Before & After – A Startling Transformation

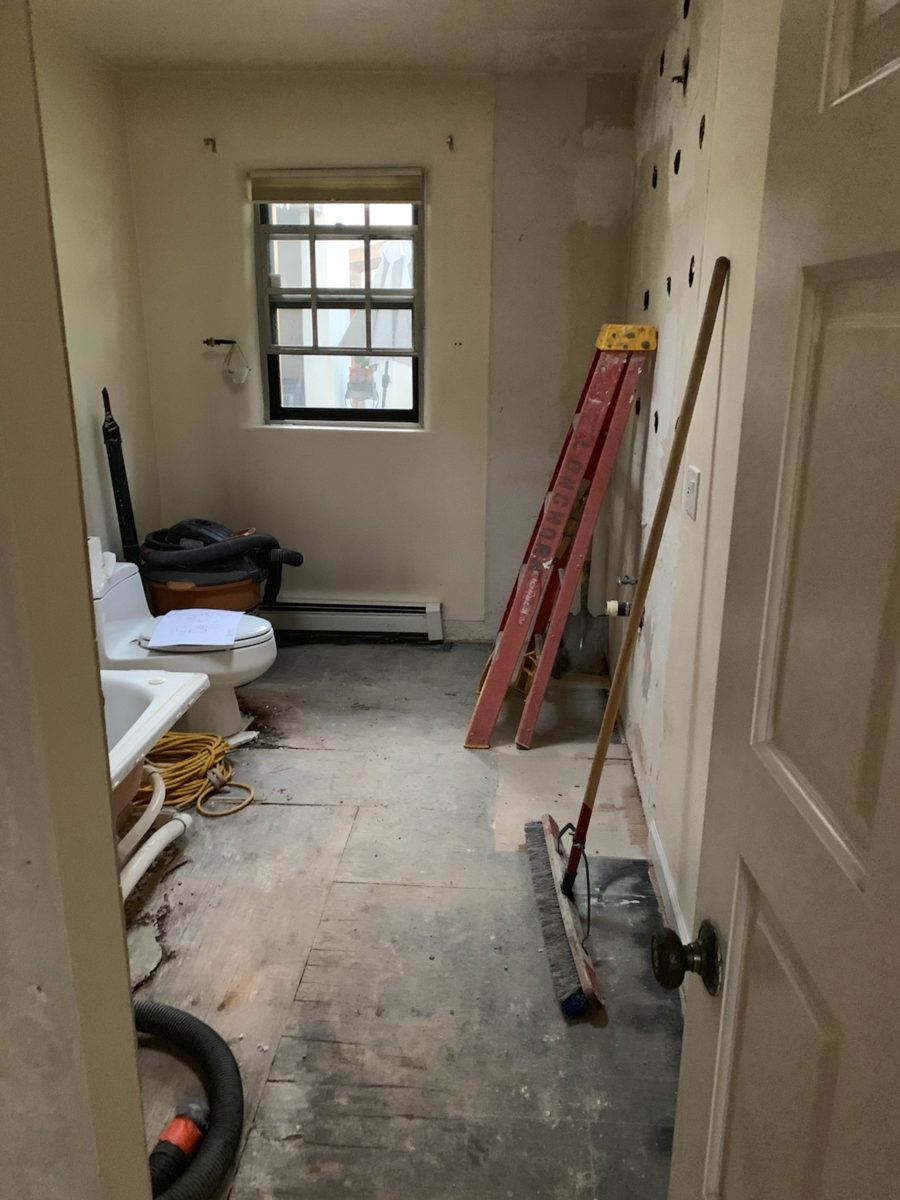
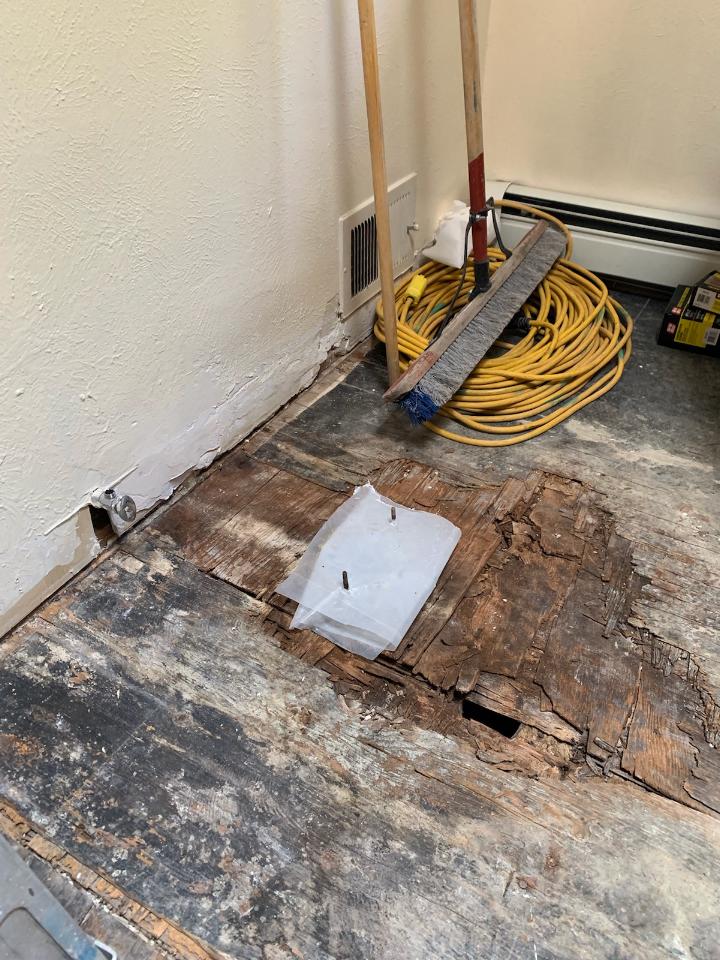
Last August 11, 2019, I left you hanging with a radical bathroom remodel that was in the throws of being transformed. The title of the blog was Everyone Loves Before and Afters. https://patriciandesign.com/everyone-loves-before-and-afters/  Here today, I am excited to present the finished product and a little more to the story…

Everyone DOES Love “before and afters.”  The original blog identifies the material process of the project, but as important as the material applications are the emotional aspects of design and precede the material selections.

The home is a bungalow style home from the 1950s. Charming architectural elements and traditional details set the stage, sensitivity, and the emotions behind any design decisions we were to consider. See the first phase of this home’s updating design in the primary living space at this link:  https://patriciandesign.com/project/classic-blue-white/   The kitchen was also re-finished. Maintaining the same design layout and appliances, the new finishes resulted in a startling transformation. https://patriciandesign.com/project/kitchen-transformation/

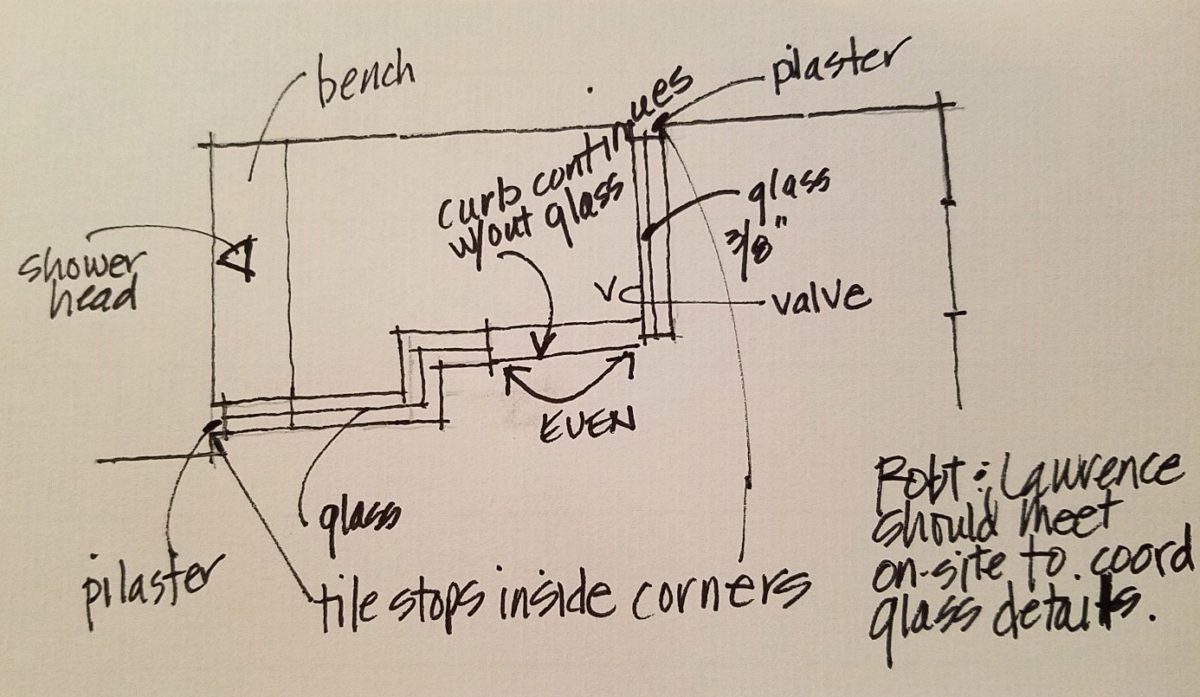
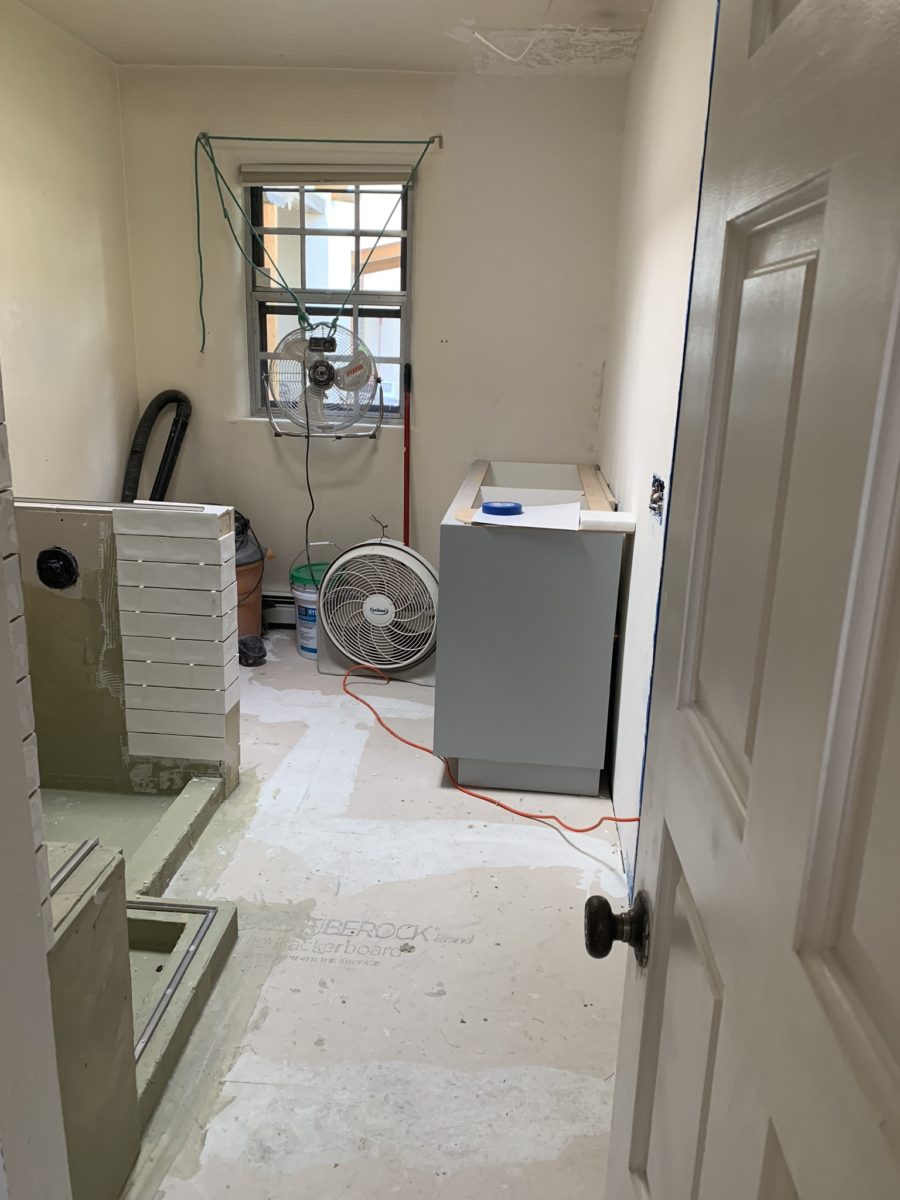
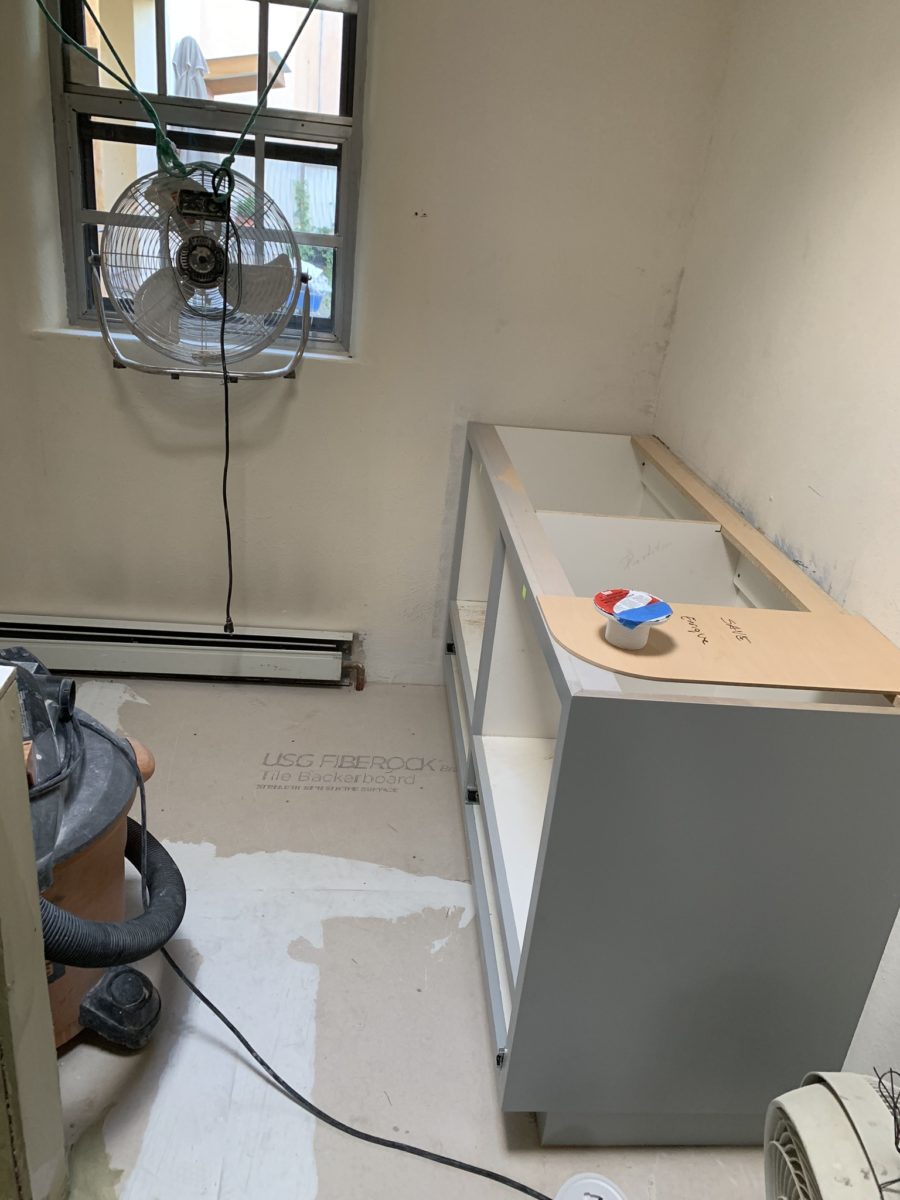
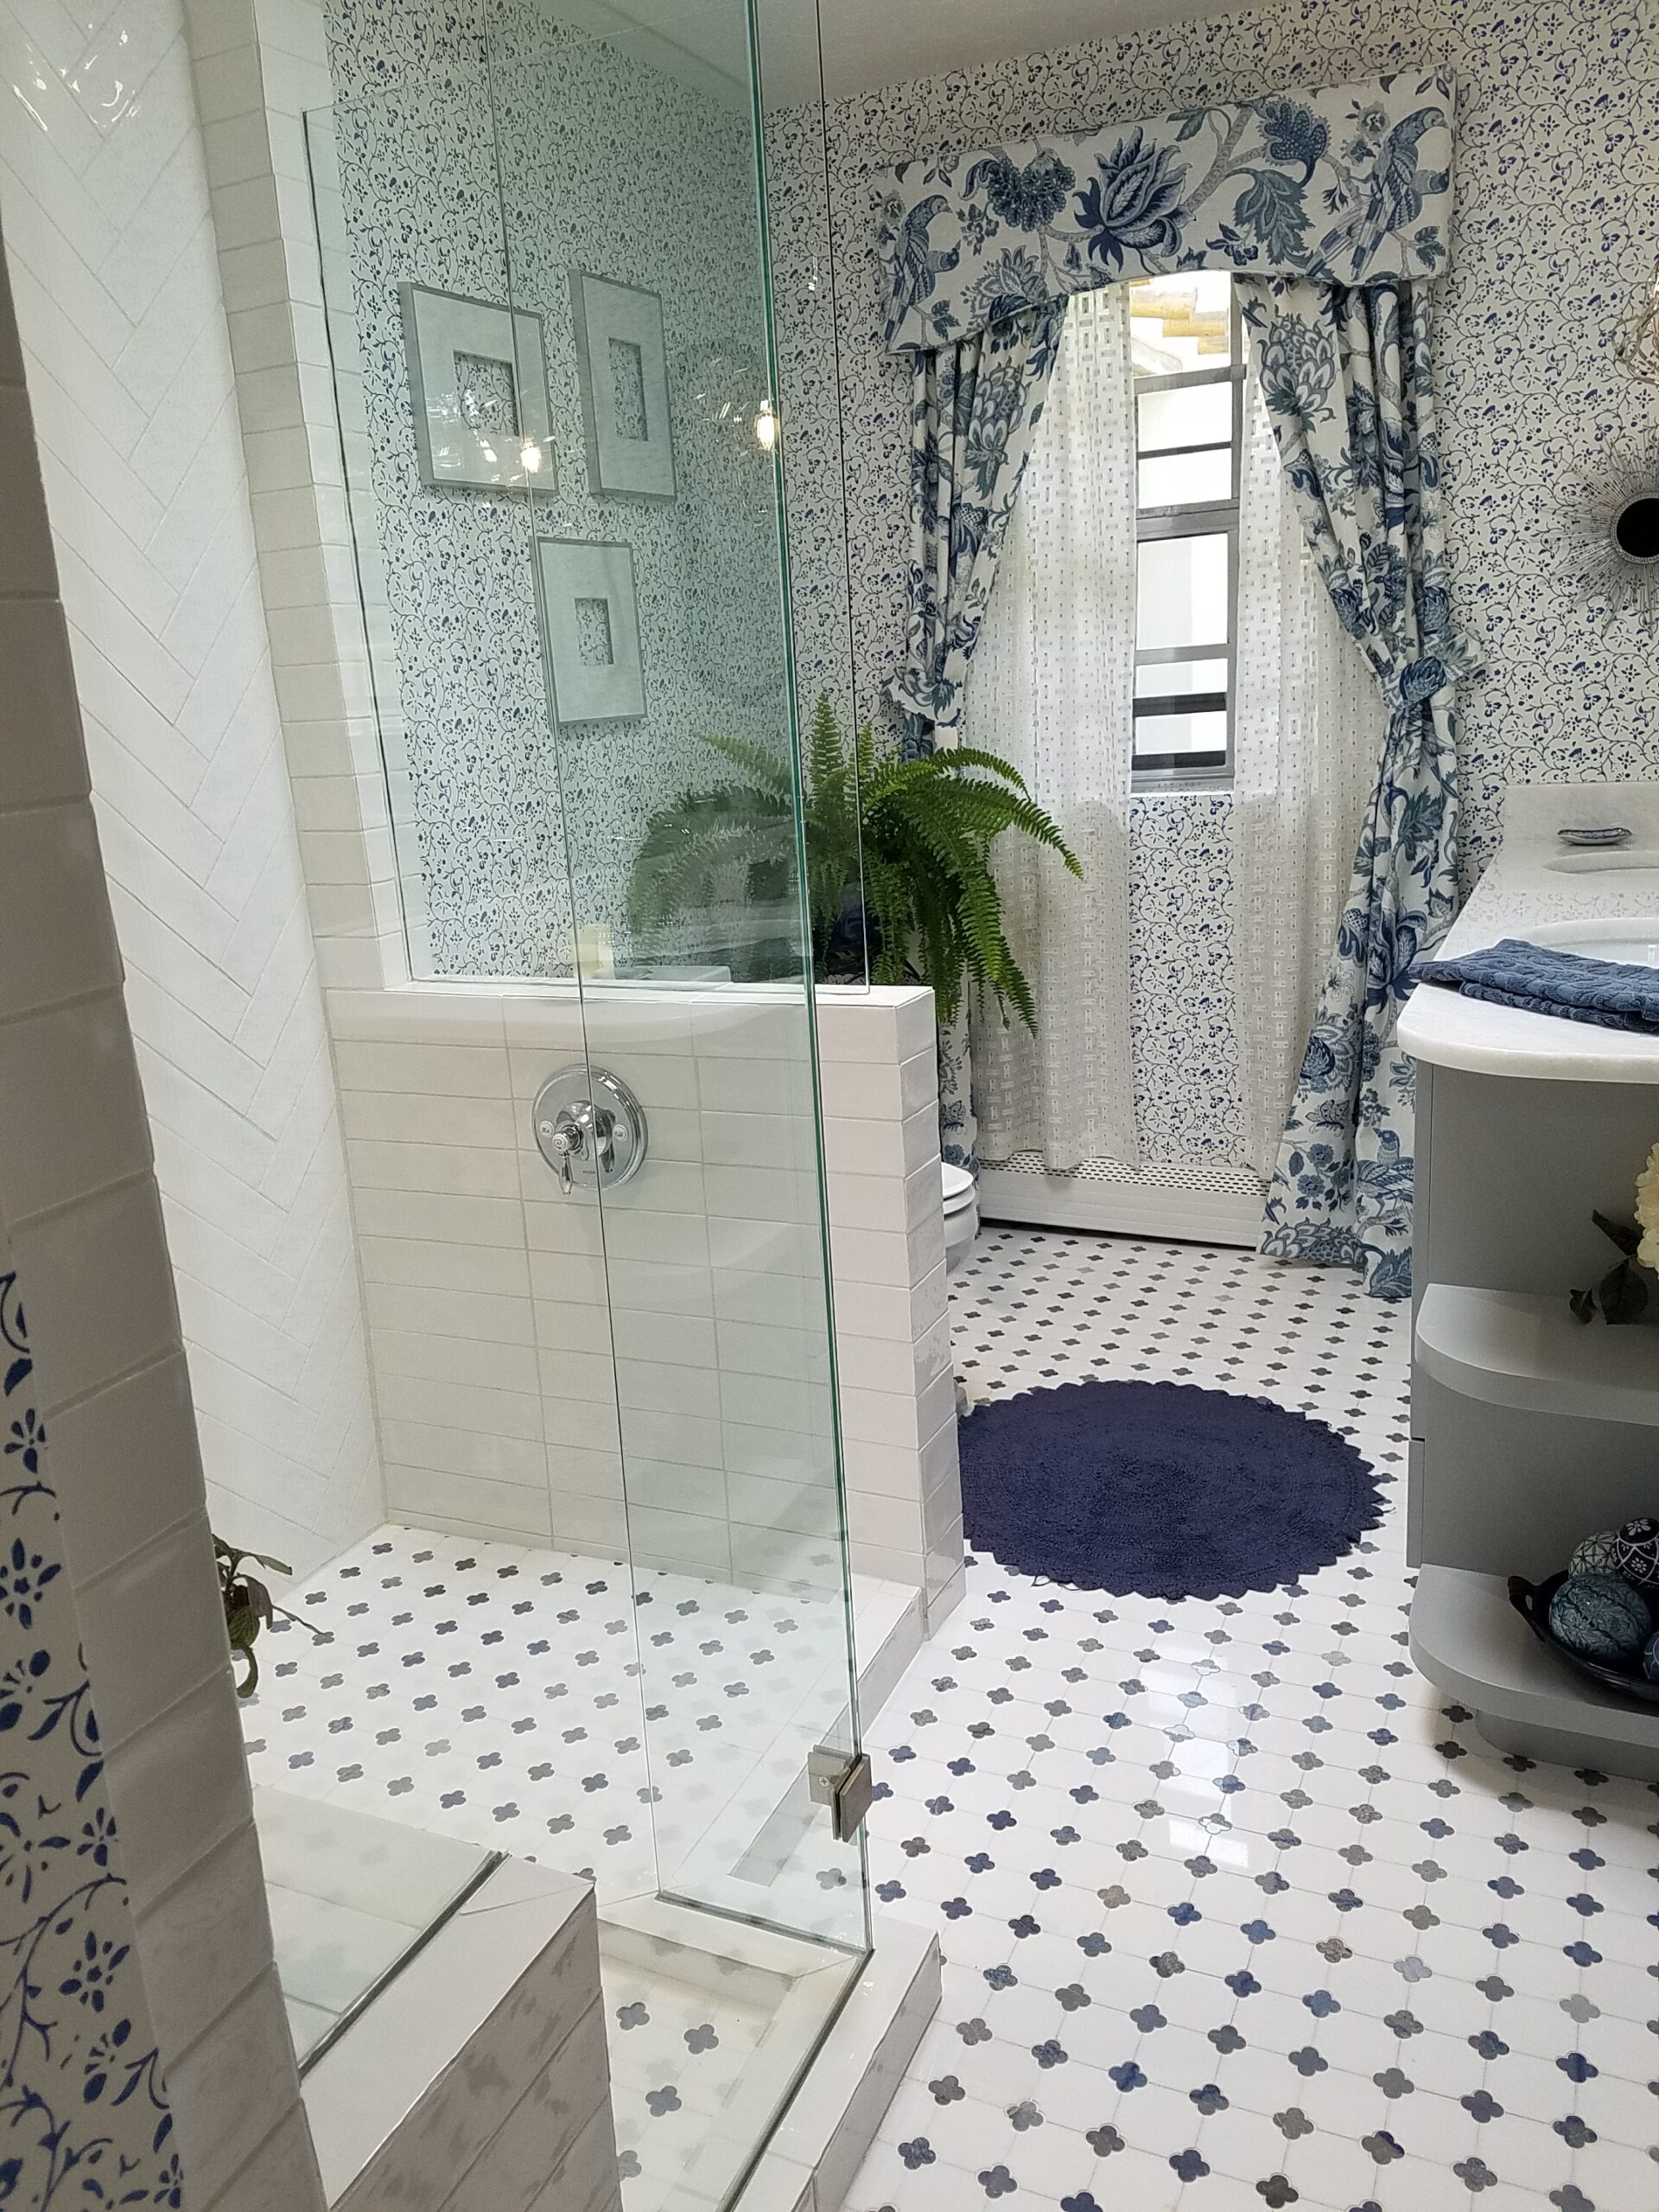
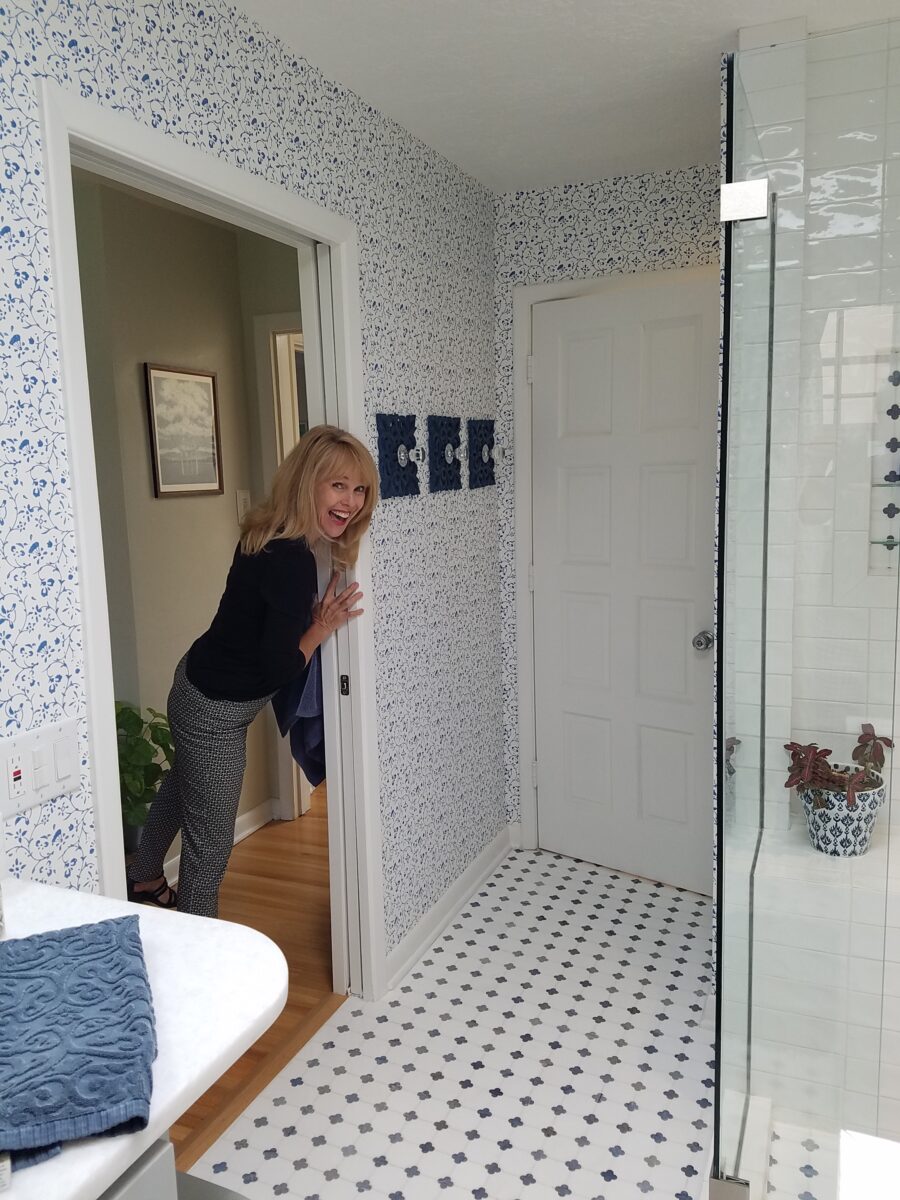
The challenge in this project was to retain the character and traditional charm that the couple so enjoyed about their home, while introducing new, modern design features and trends melding with traditional design elements. New custom cabinets for the vanity and linen storage/display unit along with the re-design of the shower – eliminating the tub and making a “doorless” access and a pocket door connecting to the adjacent guest room were the three key construction components.

Dated finishes done in the 80s, by previous owners, were common and bland. The tub and shower were enclosed with by-passing glass doors in aluminum tracks and frames.
This bathroom was the dated and fussy room that we presented last August. The tired and dull finishes needed replacing and refreshing.  It was to be a complete make-over to compliment other recent improvements in the home.

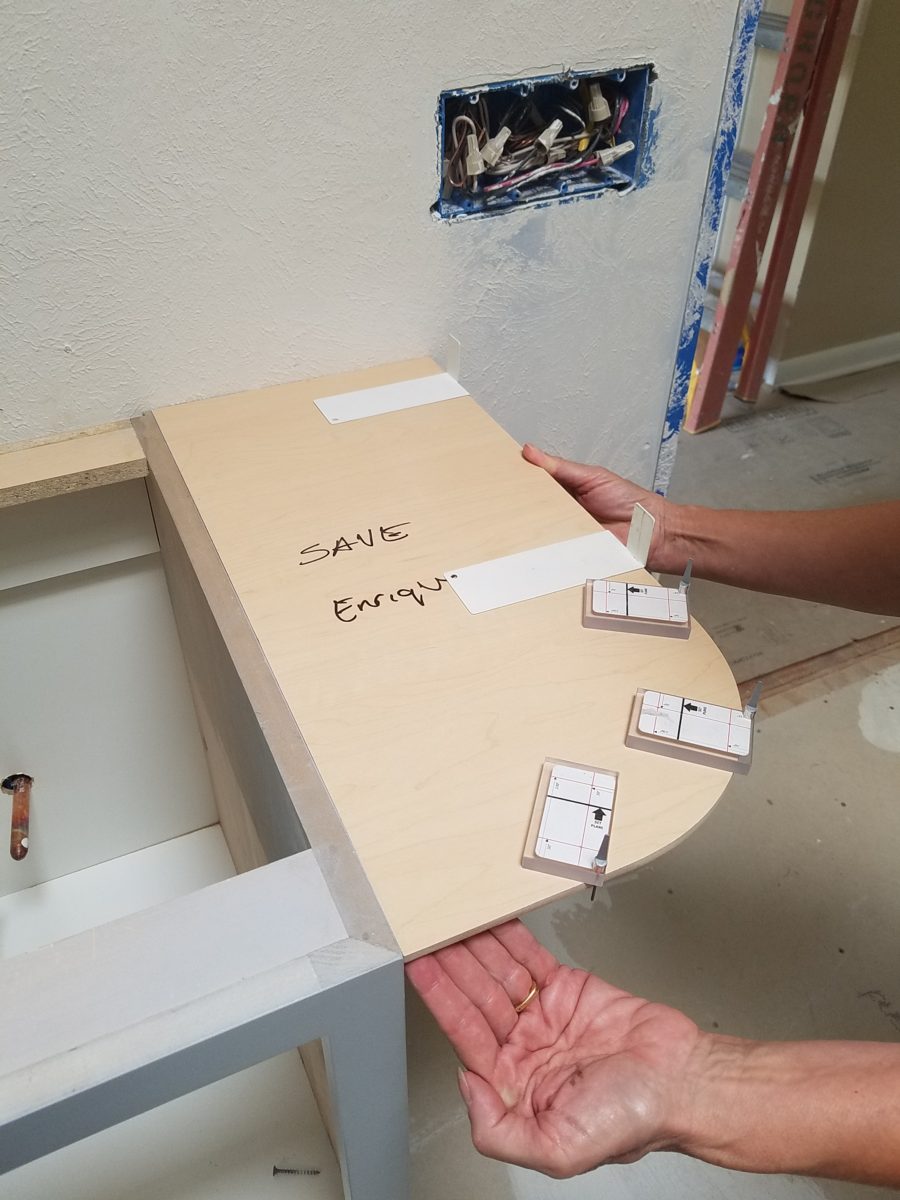
Once the general concept for the remodel is determined, the “what if” stage begins. The stage where ideas are tossed about and decisions lead to other decisions. The options are massaged giving way to different combinations and considerations.

After all the options are discussed the plan is adopted – a combination of everyone’s input. Hopefully not design by committee, but in this case the couple, in whose house we were working, and the me, the designer. After the design is determined, the input of the general contractor and/or the sub-contractors can come into play. They are generally given the opportunity to evaluate existing conditions and voice opinions and procedures or details that their expertise can bring to the project. Everything is considered until a cohesive plan is developed.

New cabinets were locally fabricated to not only insure excellent craftsmanship, but to customize the fit (left to right) and provide specific drawer configurations for the desired new height of the cabinets with an additional sink.
The tub was removed, and the new shower enclosure was clear glass and given a wider footprint to allow for a jog which eliminated the need for a door. The shower valve was relocated from beneath the shower head to the opposite “pony” wall, making it easier to operate the temperature and flow without getting wet first!

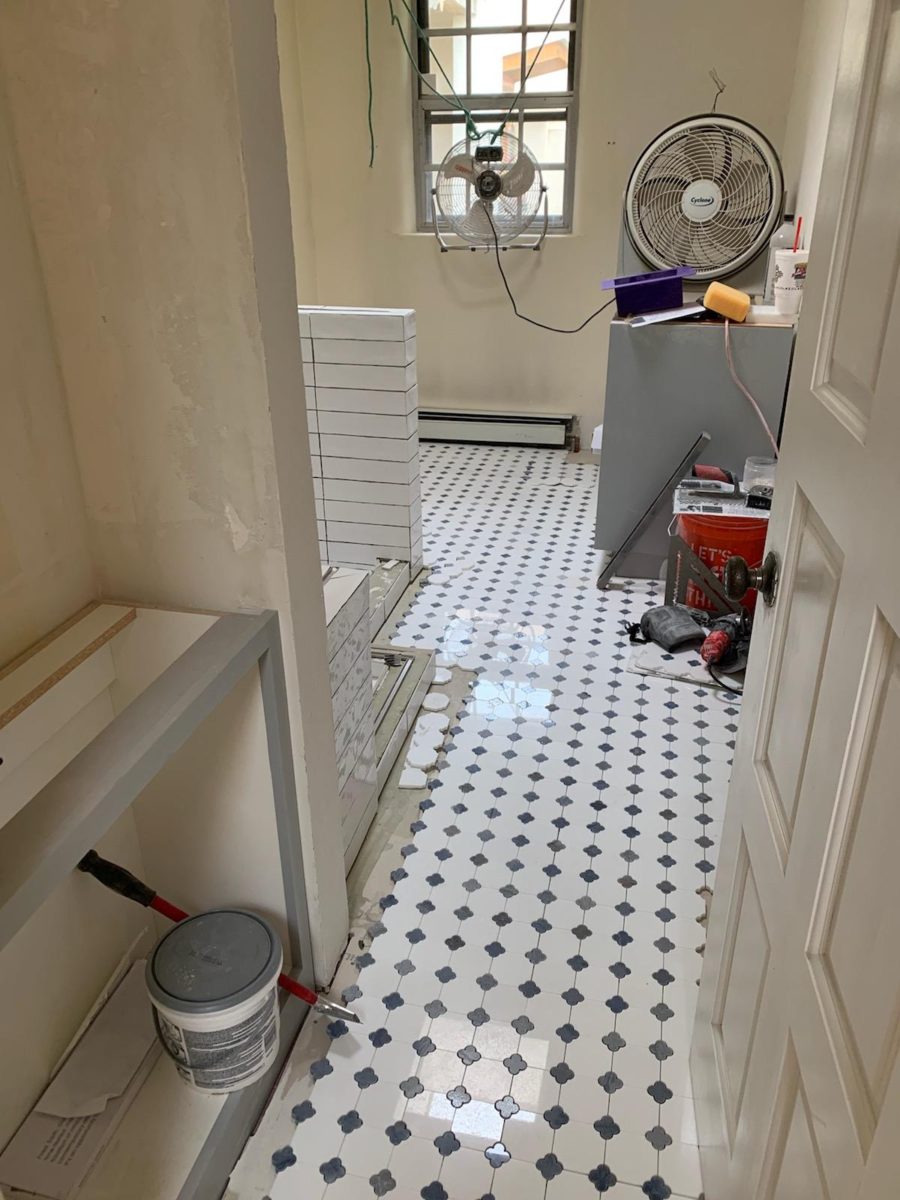
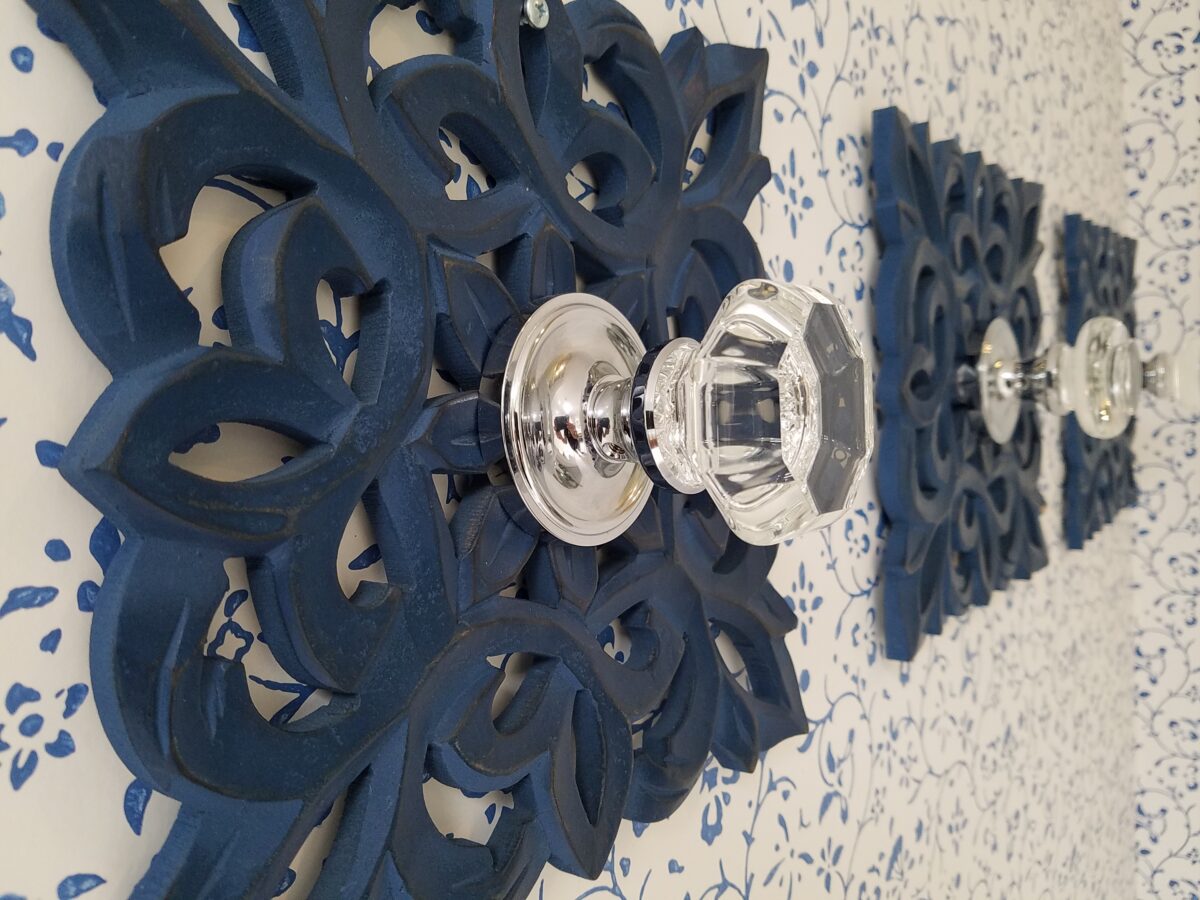
Other than the shower reconfiguration, new cabinets, and pocket doorway into the guest room all else was superficial cosmetic design features. This is where the layers of embellishment come into play.

During the process, there were certainly hesitations about the combination of patterns and finishes being proposed…however, you know you’re on the right track when the happy homeowner has fun accessorizing and creates the perfect towel/robe hooks!
DIY – finding these blue, wooden, open-work plaques, our creative homeowner bought polished chrome and glass doorknobs and attached them securely to the plaques – Voila!

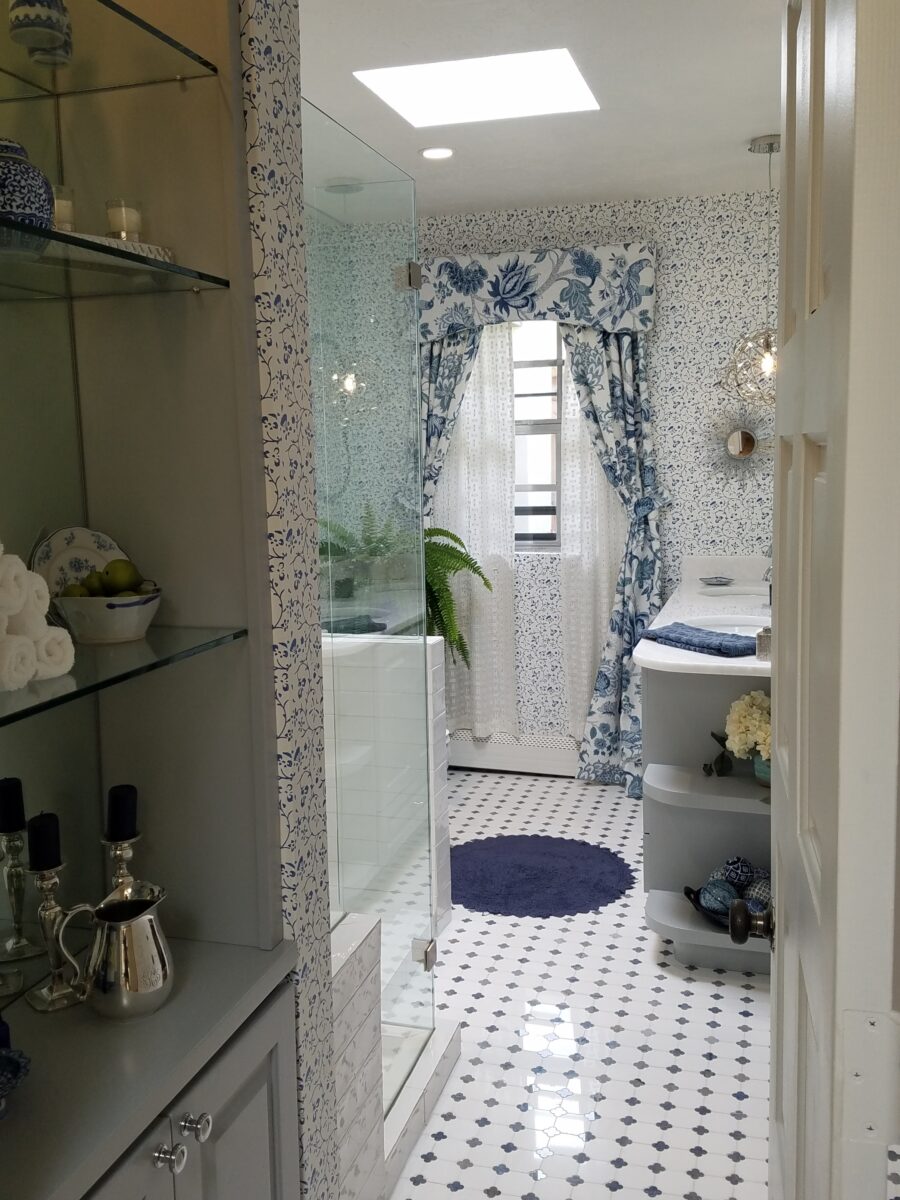
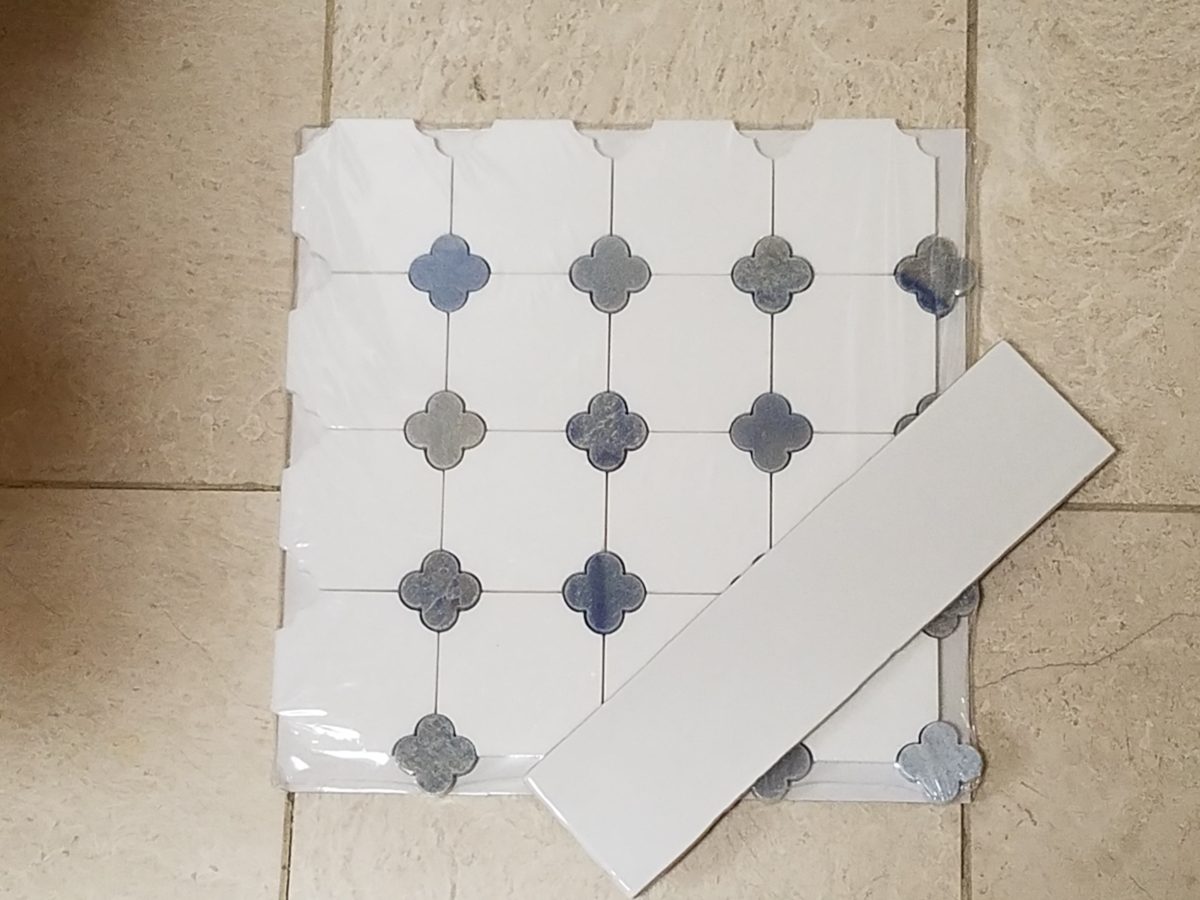
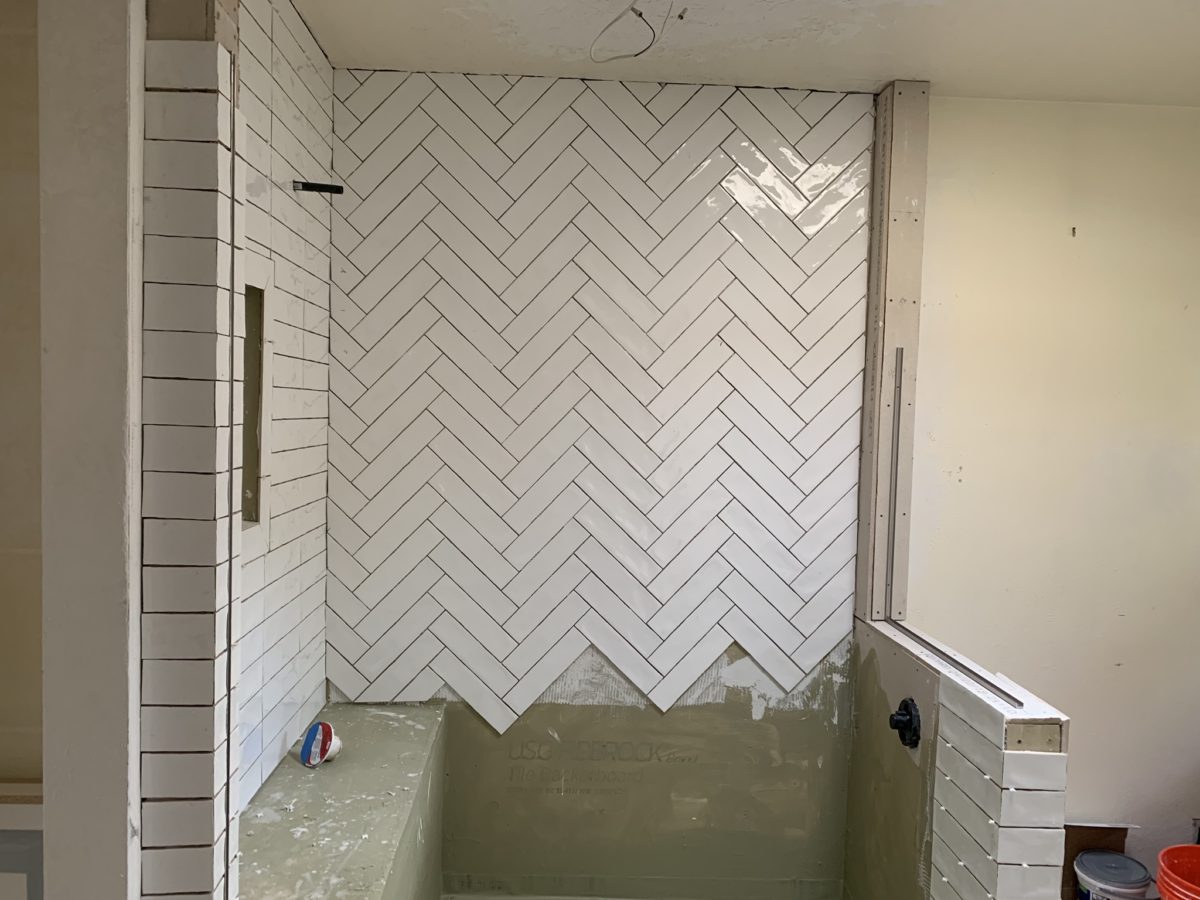
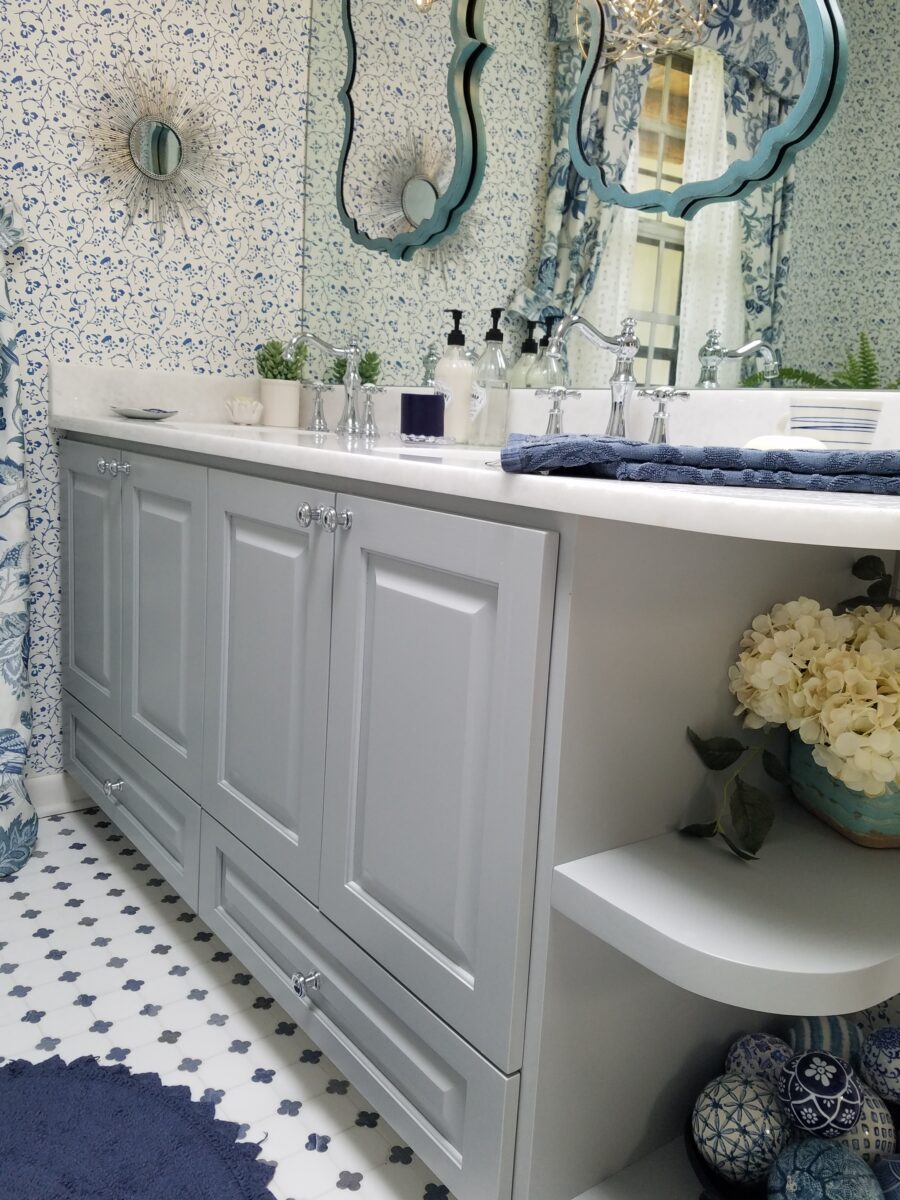
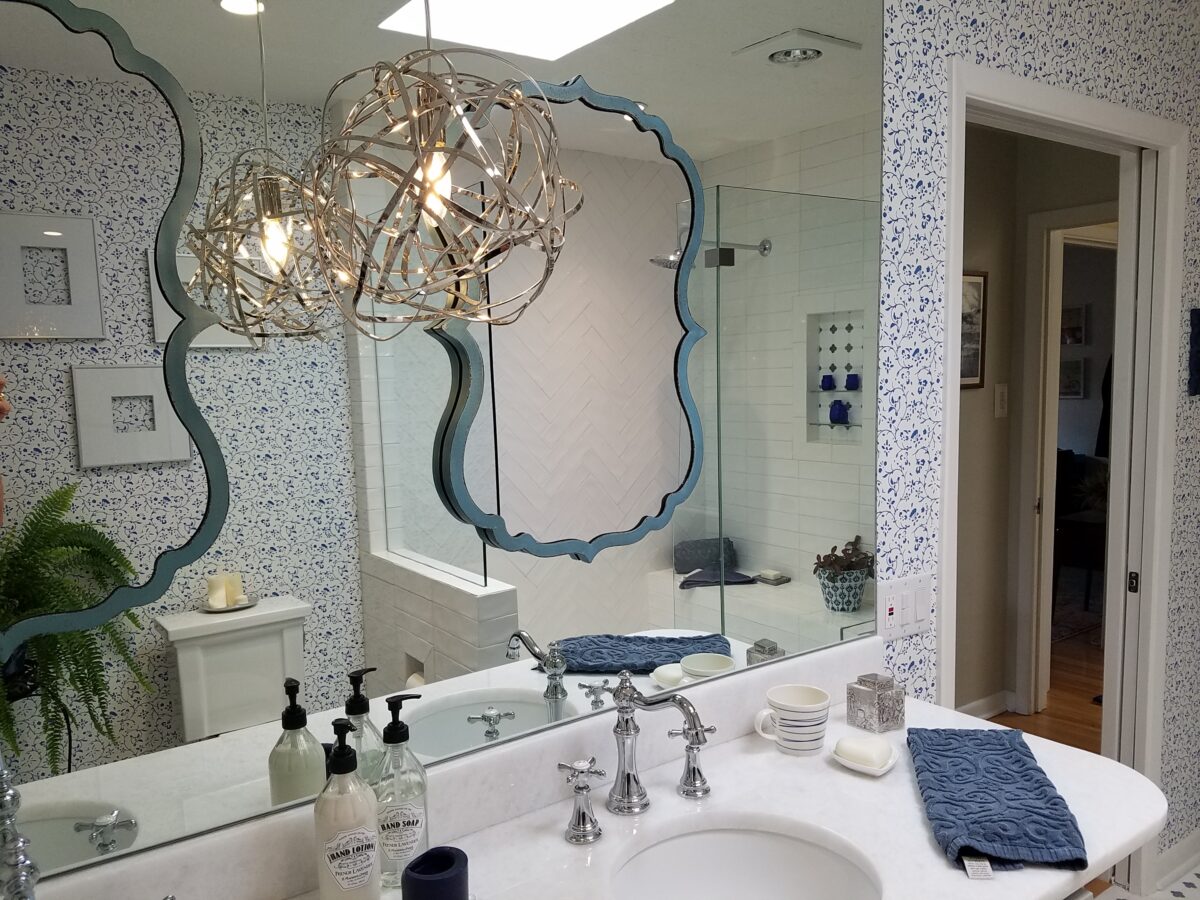
In keeping with the traditional design direction previously adopted in updating the interior, the flooring was selected for its natural stone mosaic authenticity. With a warm grey selected for the custom cabinets and white herringbone patterned subway tile on the rear wall of the shower enclosure made for a fresh modern look.

A mix of patterns – a balancing act – the art of design. Do not be afraid.

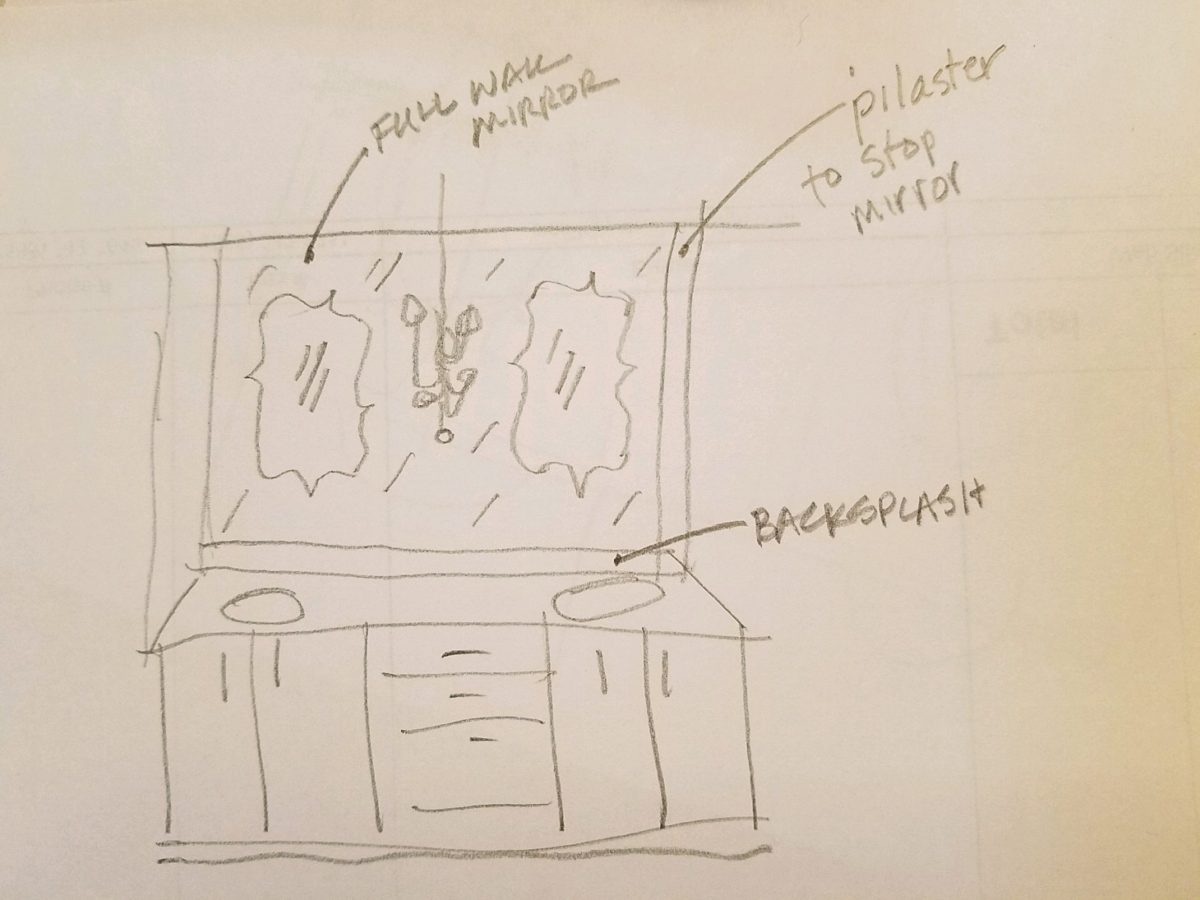
But wait! These traditional elements and modern trends were further embellished with a second layer of curvy turquoise mirrors installed over the full-wall mirror – suspended between is a polished chrome sphere of open bands providing ambient light and additional task light for the vanity area.

Layer upon layer until the composition is complete!

Classic blue and white screen-print on paper with an overall pattern of vines and leaves fills in the voids creating a not-too-busy backdrop – adding further dimensions to the design.

Natural stone slab of a white crystal-like granite – looks like a stone quartz crystal.

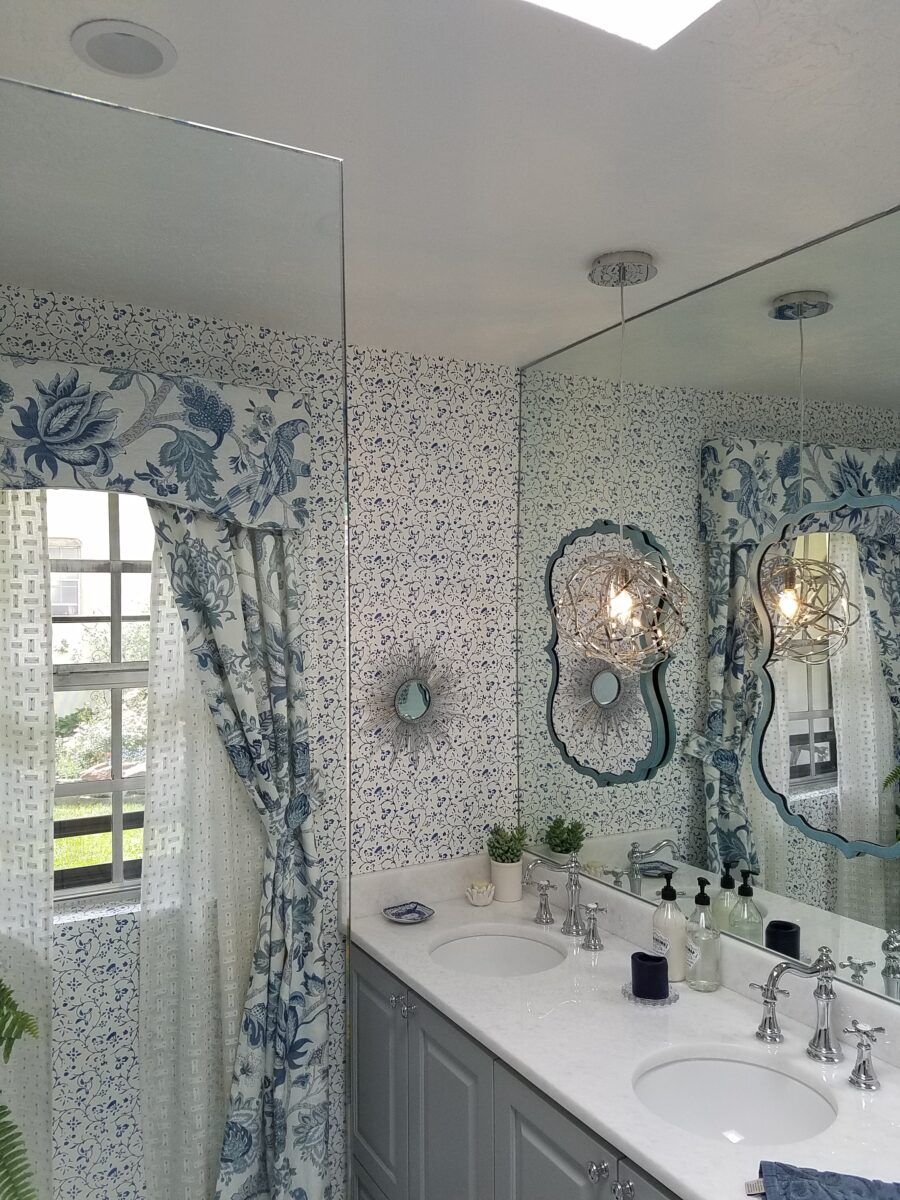
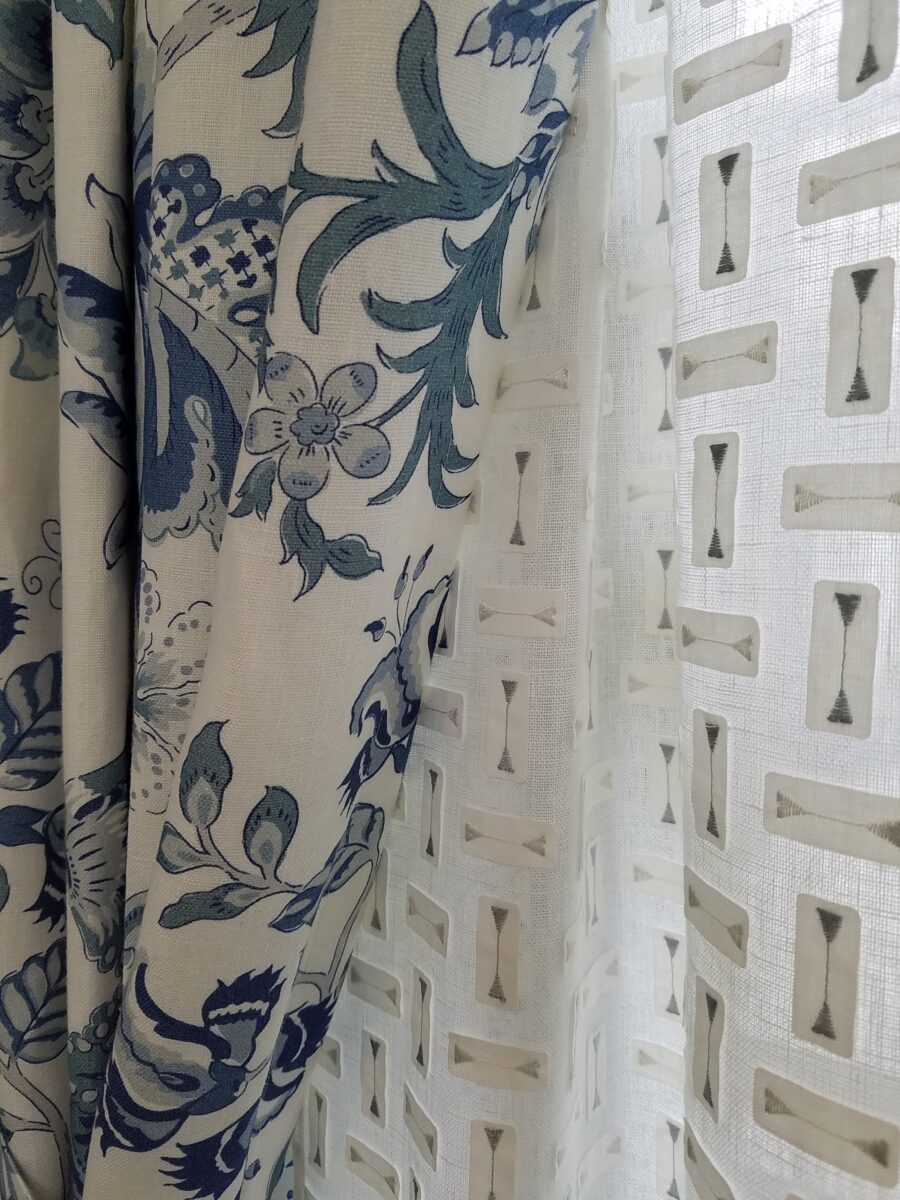
Drapery fabric in a traditional floral on linen with whimsical, modern “martini glass” sheers soften the window and diffuse the incoming light.

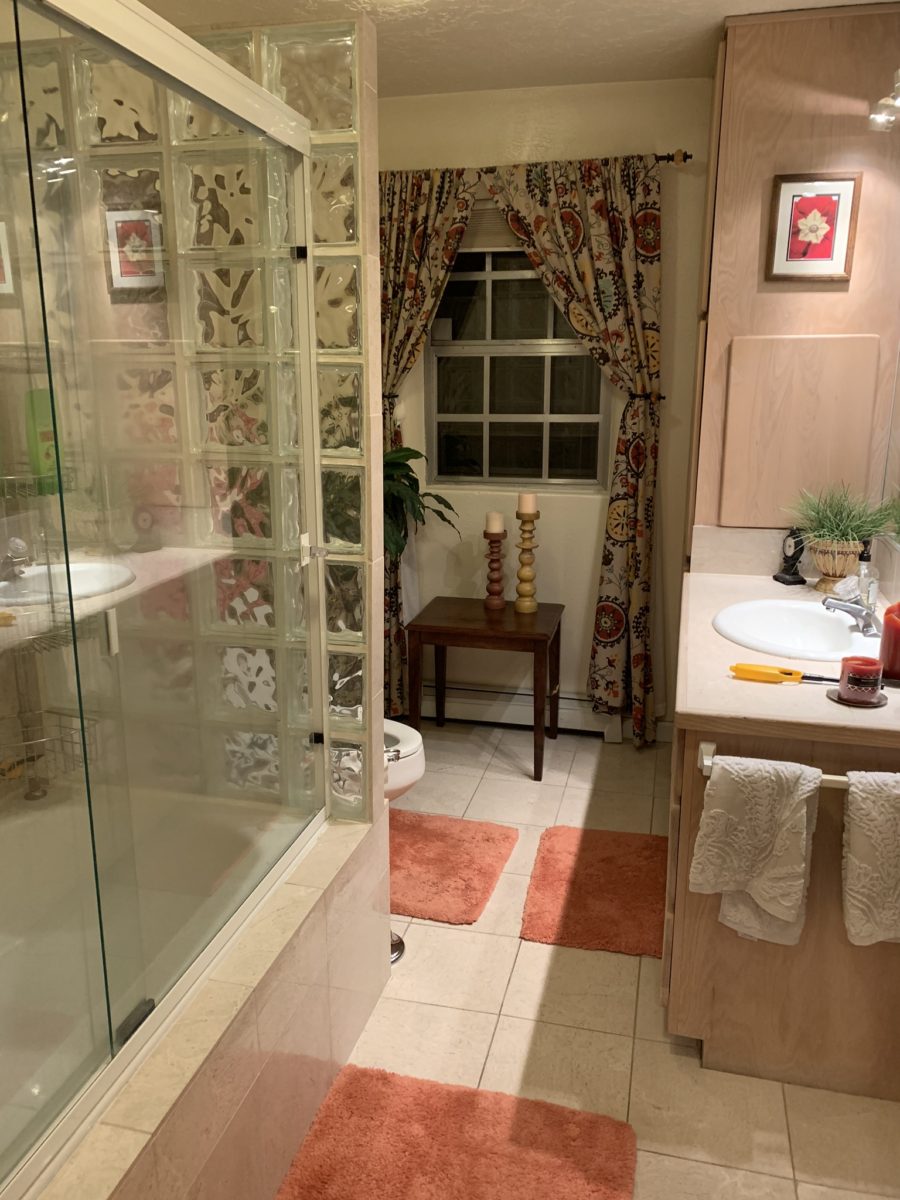
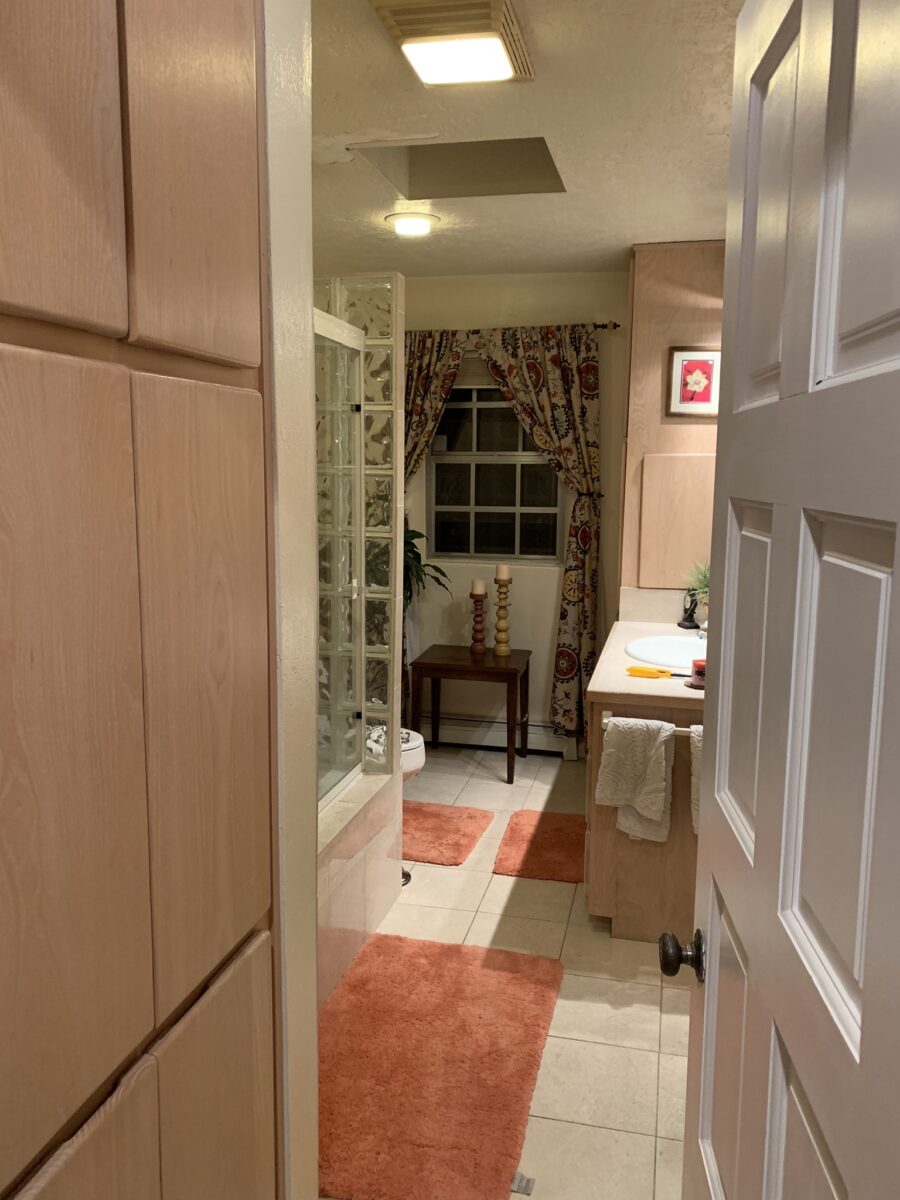
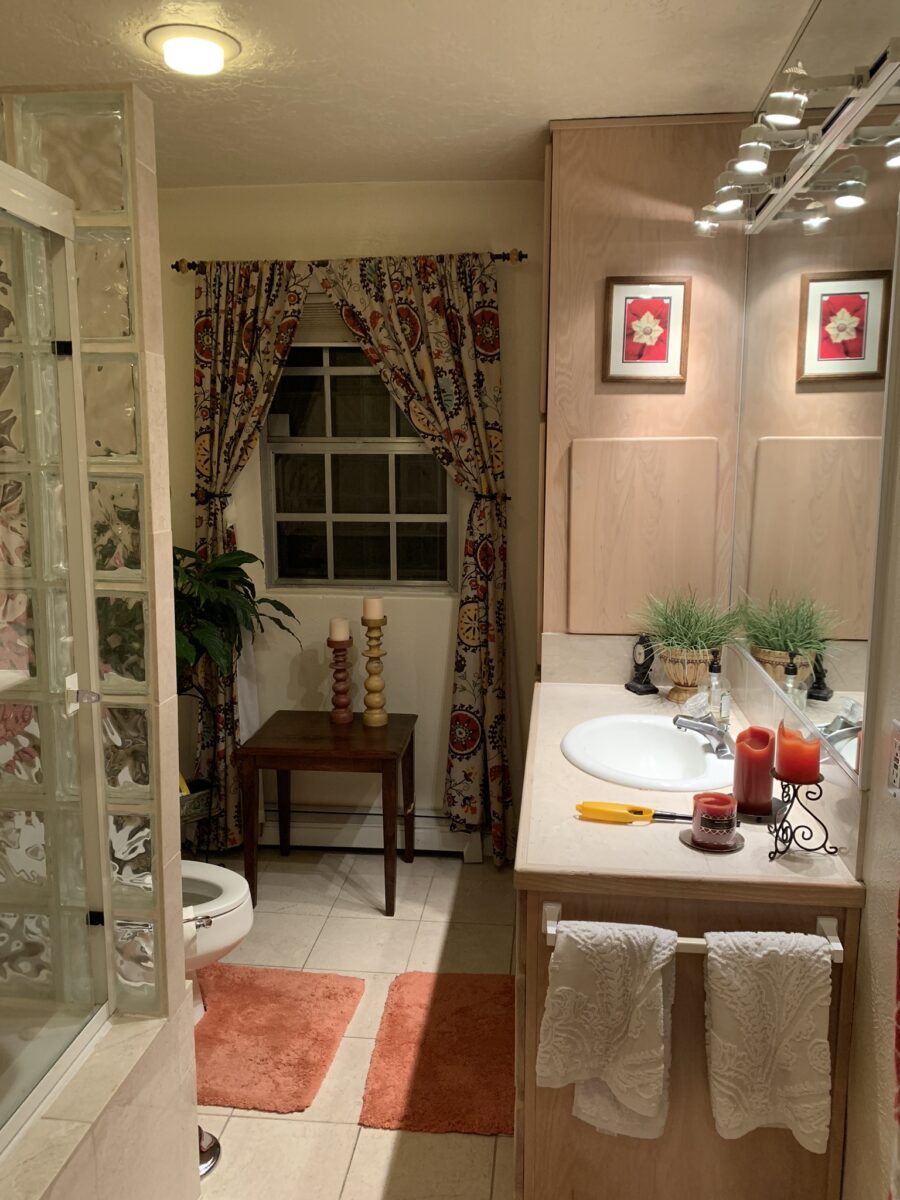
The resulting completed interior is a radical transformation from the dull beige and peach of the previous scheme. Fresh and crisp – with just enough busy to be playful – the new owners claim that they smile every time they enter or even walk by.

Remember the first photo? The BEFORE & AFTER transformation is extraordinary.

Everyone Loves Before and Afters

Everyone loves before and after shots – they are so telling, dramatic and fun to compare. How about during? This week, we are nearing completion of a project that has been in the works for the past few months. Not quite finished, here is a little story about the stages of the design process…

Are YOU planning a remodel…a room an entire house?

Once a project is identified, the options are studied. Usually each party involve has their preconceived notions…images and ideas come to mind. The mind is that arena from which it is tough to articulate images and especially between people. The design process requires that ideas need to be expressed, defined and argued – pros and cons.

This room was dated and fussy. The finishes were tired and needed refreshing. The project was described as a complete makeover to compliment other recent updates in the home.

The scope of work was to remove the tub, replace the cabinets, add a second sink and create an opening into the guest room. At that point, the “what ifs” began.

Healthy arguing ensues – meaning sharing ideas back and forth, explaining the approach and concepts. More like presenting than arguing. It’s actually a fun, creative process – full of choices, ideas and seemingly limitless opportunities. It’s the “What if…” stage. Sketches are used, arm-waving and samples, photos and words all contribute to the compilation of the ultimate design.  Each person contributes to the process until a common plan is adopted.

Whether formal plans are needed depends upon the code requirements, if applicable (“cosmetic only” changes requiring no modifications to structure, electrical or HVAC – for example – might not need formal drawings). Therefore, the development of documents is dependent upon the requirements of the municipality and/or methods of the contractors. Regardless, sketches begin the process.

If code requirements necessitate permitting, the process must proceed through that stage prior to commencing the work. So after weeks of ideas being tossed about, a plan was conceived, client approved drawings were made and the process moved forward.

The scheme was set with the first materials selected – glossy glazed imperfect wall tiles for an interesting and textural herringbone pattern with a stone mosaic for the floor.

The demolition – always a shock – but “you have to break and egg to make an omelet!”  Unbeknownst to anyone, the floor was rotted beneath the toilet and required repair. Mirror, glass block, tile and much sheet-rock was removed.

Old cabinets were removed and after all the dust had settled, the bare bones exposed and a clean slate presented, the new work began.

The new cabinets were to accommodate a second sink and slightly longer counter-top. To make sure access between the shower and counter-top was not too restricted, I designed a radius to ease the squeeze. Enrique made a template of the radius that would be represent his end shelving and counter-top. When Rocky Mountain Stone arrived to shoot their lasers to measure for their templates, the radius template Enrique had made was very helpful.

The end of this cabinet will have radius shelves with counter-top following the radius. Until then, Enrique made a template of the shape so that the counter-top could be measured in advance of end piece being completed and installed.
The laser process to template the counter-top begins…with the help of the mock-up of the radius!

Decisions regarding lighting had not been finalized, with the completion of the plans. Having eliminated the desire to have recessed fixtures, whether to use a center sconce, two flanking sconces or a single pendant in the center between the sinks was still up in the air. Love the pun! Debating a full height panel of mirror versus two wall hung framed pieces, was also undecided.

But here’s an “oops” when we discovered the power for the light fixture off-center for a center-hung pendant.

Taking the risk to be disappointed, but with little investment to do so,  our client elected to buy the two curvy framed mirrors that almost promised to be too small. Upon arrival one of the two mirrors were broken. Bummer.

The inevitable, unexpected happens on every project…we had decided not too use these so rather than have the one of the pair replaced, we requested a refund. However, upon further study, we modified the design to accommodate both mirrors – we are re-ordering the second mirror.

But in an effort to determine if we wanted to have the broken mirror replaced or refunded. We held it up on the wall, as we feared, it was confirmed that they could not carry the space. We asked that the company not replace the broken mirror, but refund the cost.

 We really loved the whimsical quality of the curvy framed mirrors and their distressed turquoise finish was a great addition to the otherwise blue and white scheme. So, a week later, after pondering the dilemma of the mirrors…I offered what seemed to be a radical suggestion (but not really), and that was to install a full-panel wall mirror – backsplash to ceiling – and then mount (over it) the two mirrors. To do so, our very able and talented glass master, Robert,  would have to cut (prior to installing) holes in the mirror panel located behind where the framed mirrors were  prepared for hanging. The result would be the pair of mirrors hanging on top of the full panel creating a floating, multi dimensional effect. Watch for “afters” in a couple weeks, of this completed installation.

As the project  proceeds, the flooring is nearly completed and all but the finishing touches remain.

Pilasters were added at each end to stop the tile on an inside corner, rather than having it quit flush on the wall. The shower will not have a door, but nearly encapsulated with frame-less clear glass to give an illusion of a more spacious room.

Best to stop here and reserve the finale for the finished “after” shots as promised.