Lift Up Those Skirts and Check Out Those Fabulous Legs!

Woo Hoo – sound a tad risqué? Well, to get your attention, the title seemed apt. We continue to find hidden treasures and here are a couple examples that we have discovered and unveiled during this time of limited mobility. And a special feature piece that we had previously presented a while back – but warranted re-visiting for this blog.

Many sole-proprietor upholsterers and seamstresses work  alone – all the time. So limiting their activities now is unfortunate for everyone. YOU might want to utilize this time to spruce up around the house since you have had this extraordinary time to observe and critique the function and flavor of your interior (and exterior) spaces.

Walking through the spaces of your immediate world, in and out of sunshine penetrating the shadows of stationary units of furniture placed with purpose and function, if not a design aesthetic – pondering the possibility of why not both?  Can’t we have function and a great look? Does anything you see look as though it might need a re-make? Why not enhance the function of  your interior space by re-thinking how it works or at least enhance the flavor of your interior with texture, color and various values of those harmonious hues or even discordant contrasts of the same?  

Re-upholstery is a fabulous tool to salvage good frames and have a near instant-gratification for the results of changing the entire look of a favorite piece of furniture. Often the focal point of a room arrangement,  re-covering the piece can exponentially change the entire look – feel – flavor of the room.

Re-upholstery can change the personality of a piece. It can transform the attitude and express an entirely different mood. With feet already exposed and no discovery required,  some pieces benefit from minor modifications as well as new fabric.
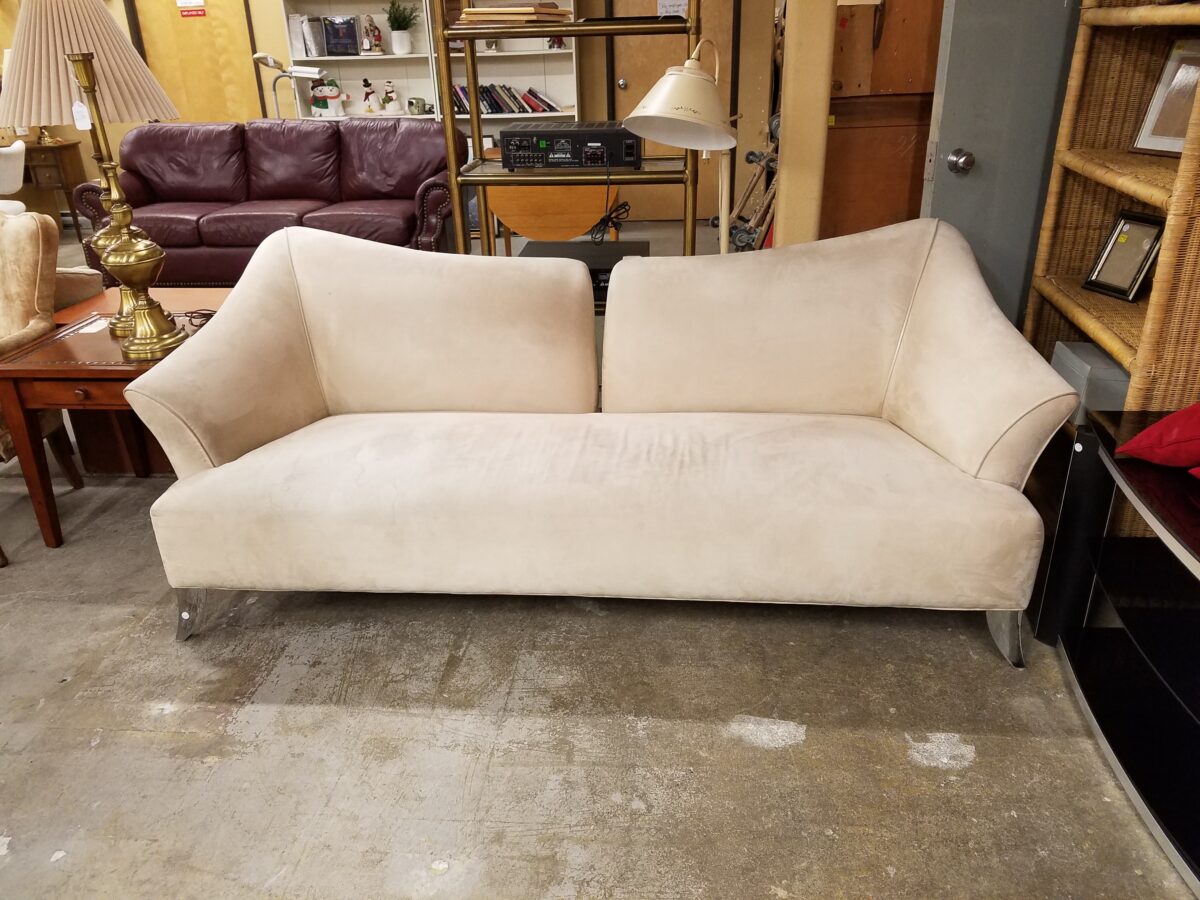
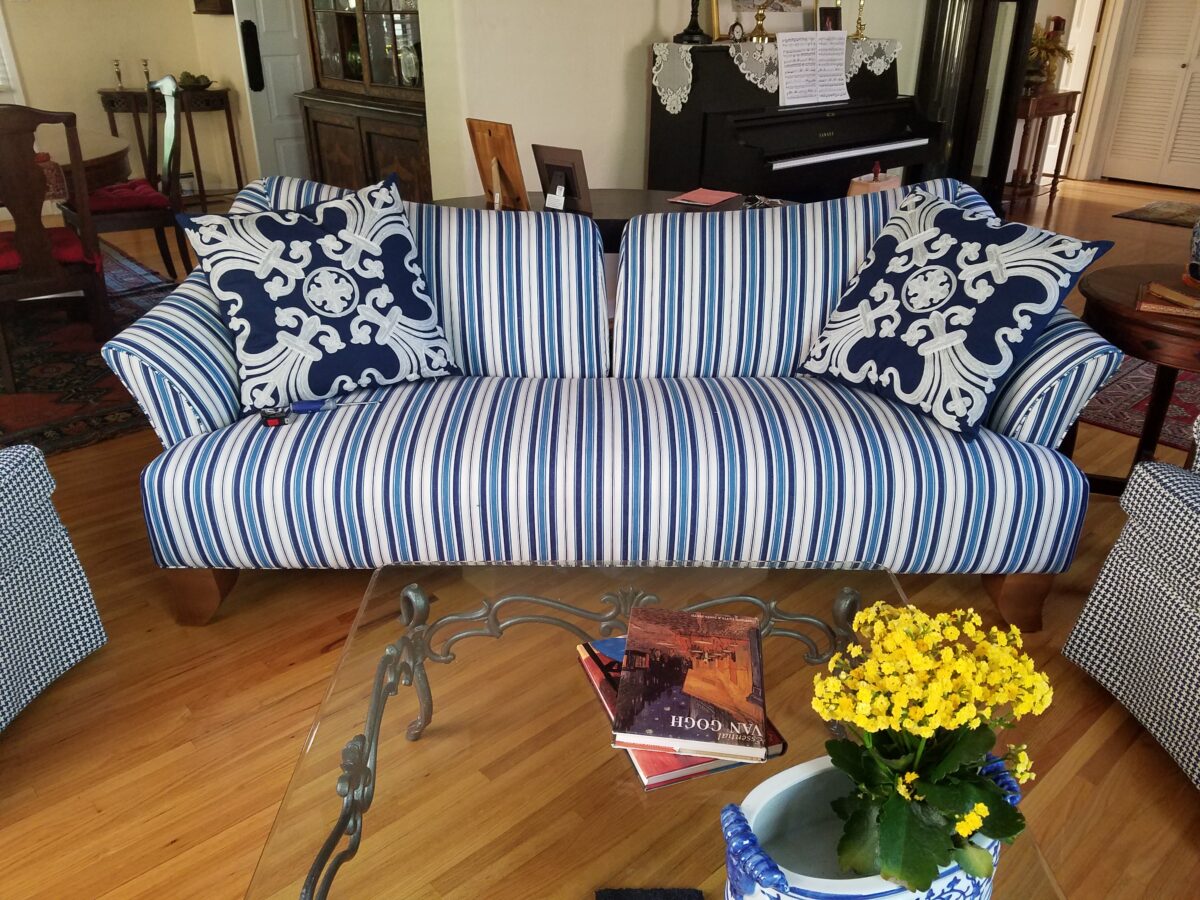
This “find” in a consignment shop a couple of years ago sported loud chrome feet  that seemed to scream they wanted to  take flight – yet decked in a rather dull, dirty neutral velvet. Hmmm…
 The transformation with a classic blue and white cotton stripe from Scalamandre  made this piece stand up and be counted! New feet, in warm cinnamon-colored wood, maintained its original design with an entirely new, grounded style.

However, on the subject of great legs…it’s the discovery that there is something quite fine beneath the modesty panel that was intended originally to limit dust accumulation…the modesty of concealing that which should be celebrated, complimented and enjoyed – great legs!!!!!!
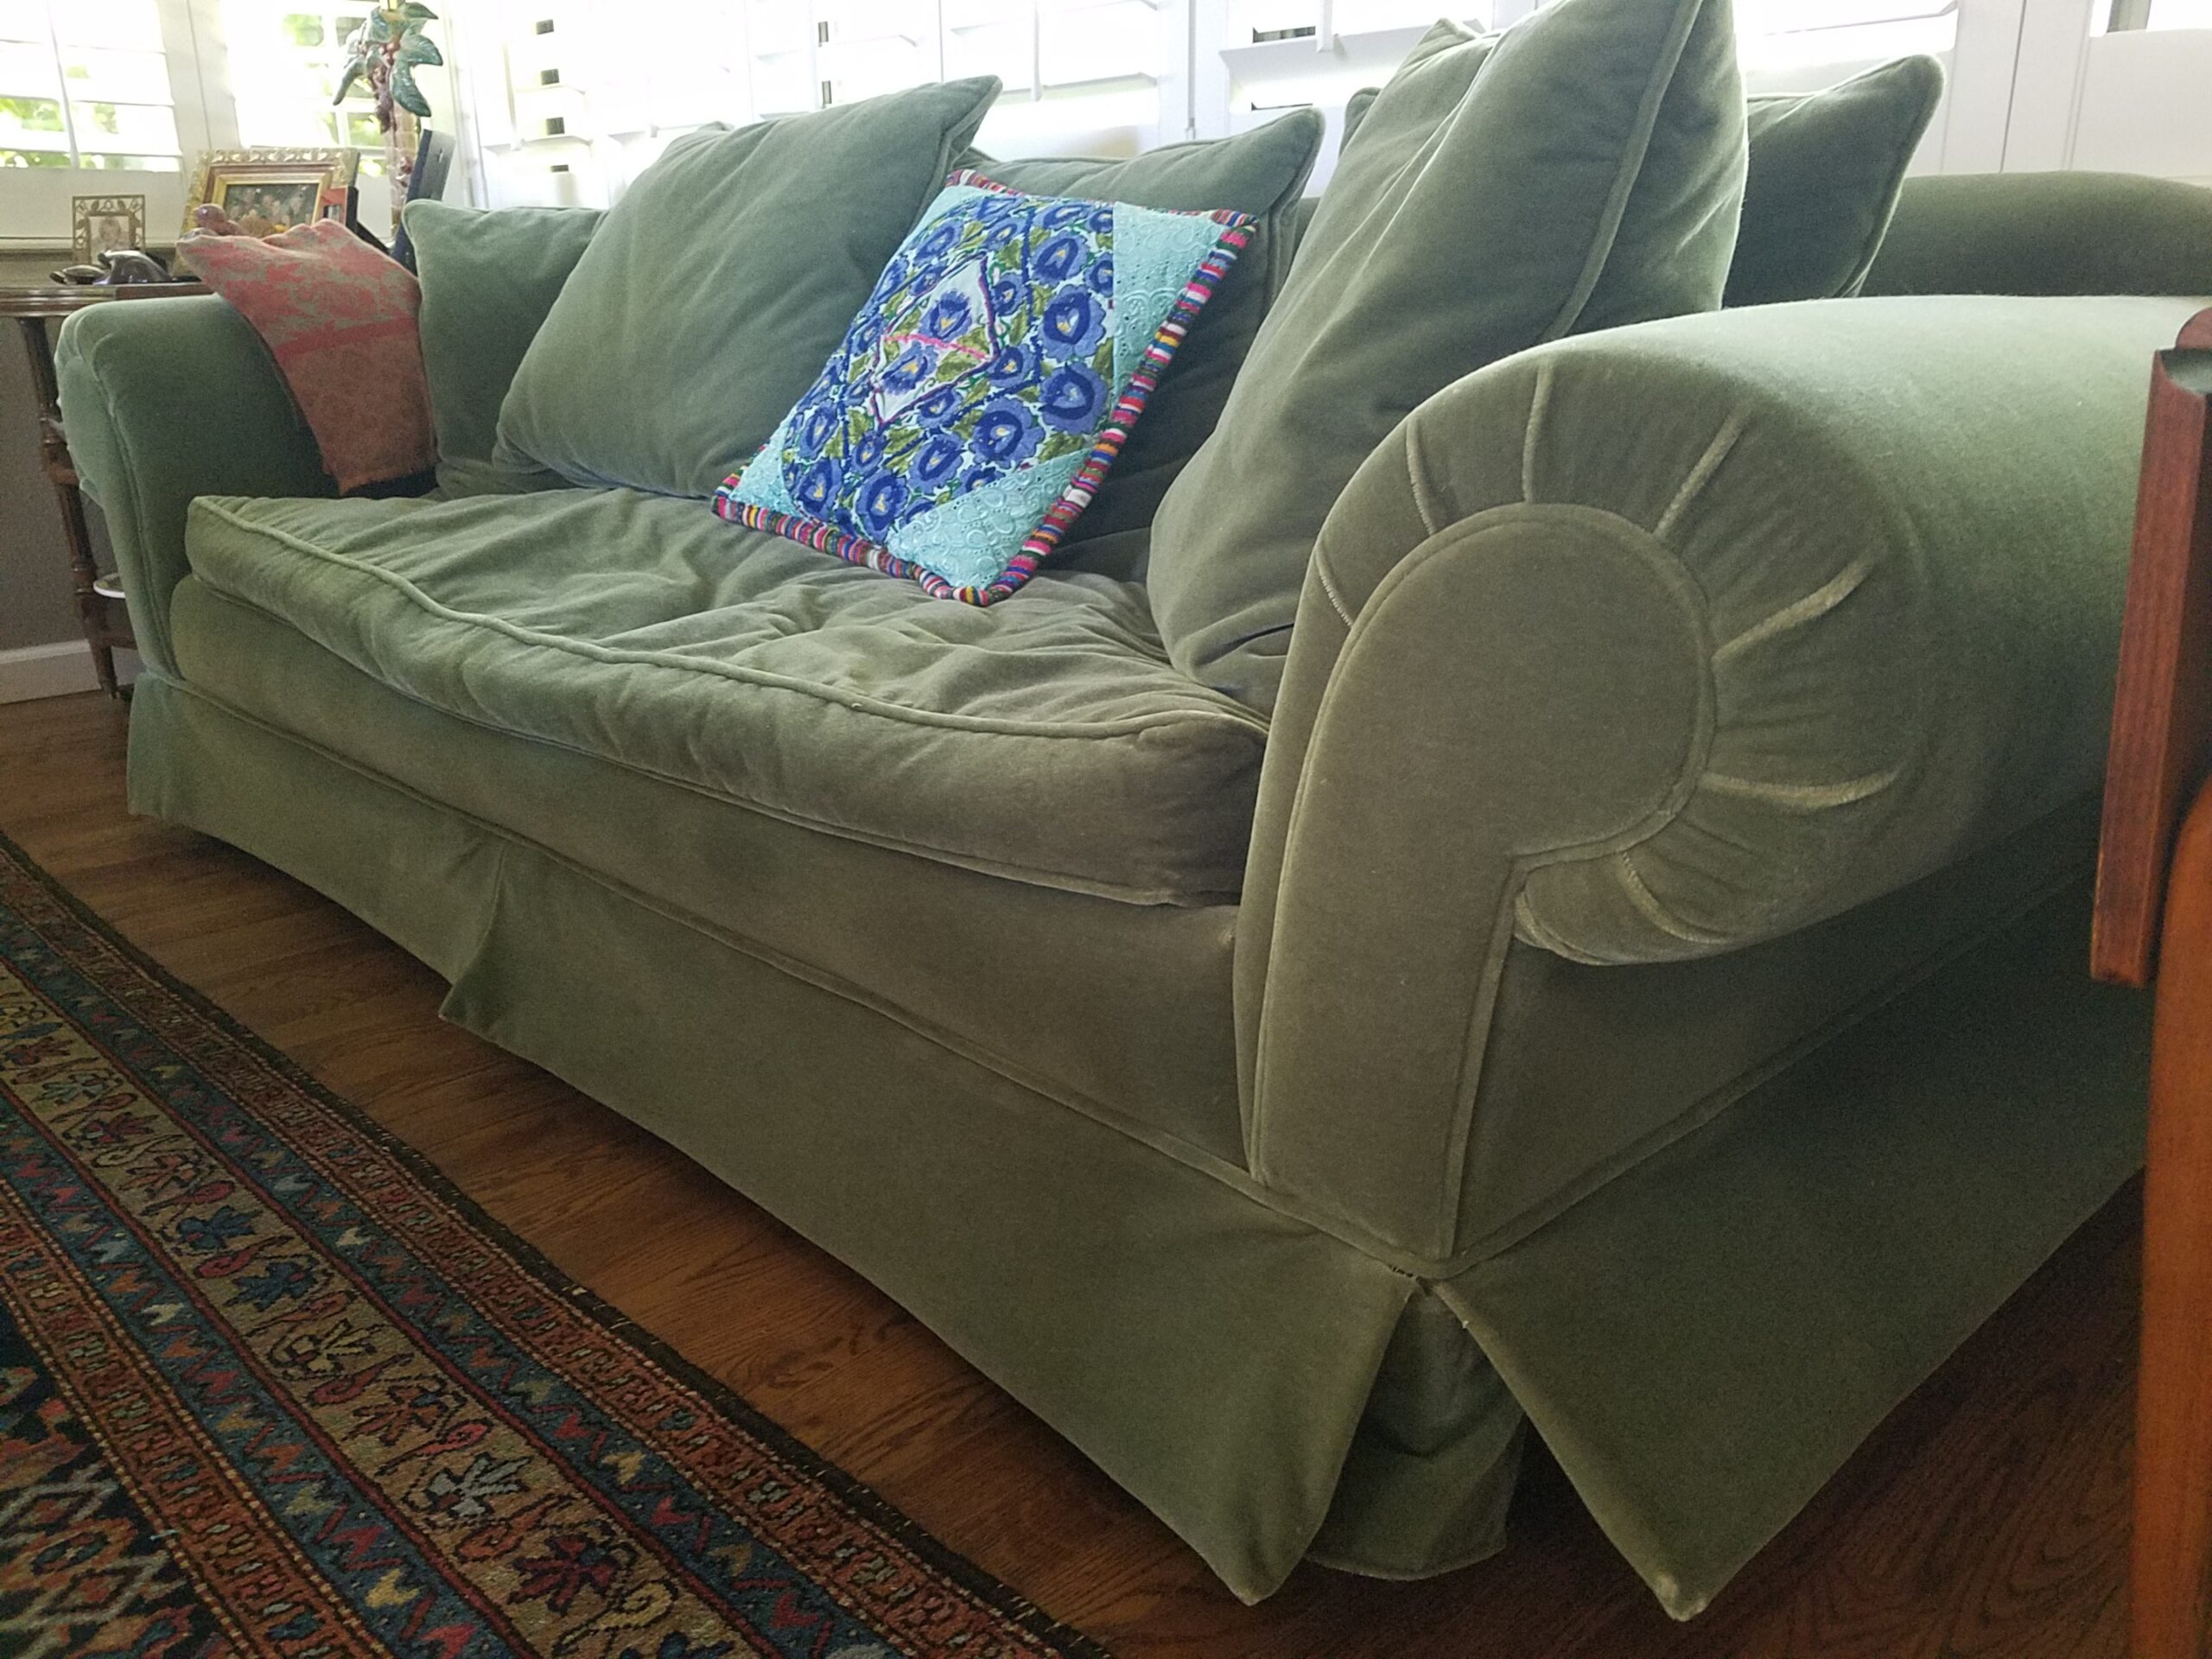
 Sometimes it is just a modification and not necessarily complete re-upholstery . Here is a perfect illustration of a classic design elevated with the removal of this traditional skirt.

The treat here is lifting the skirt on a sofa or chair and revealing fabulous feet – legs to showcase! Yes, featuring these great legs can give a lighter look to a tired piece, elevate a bit for a clearance off the floor or rug. And the bonus is great features worth exposing!!!
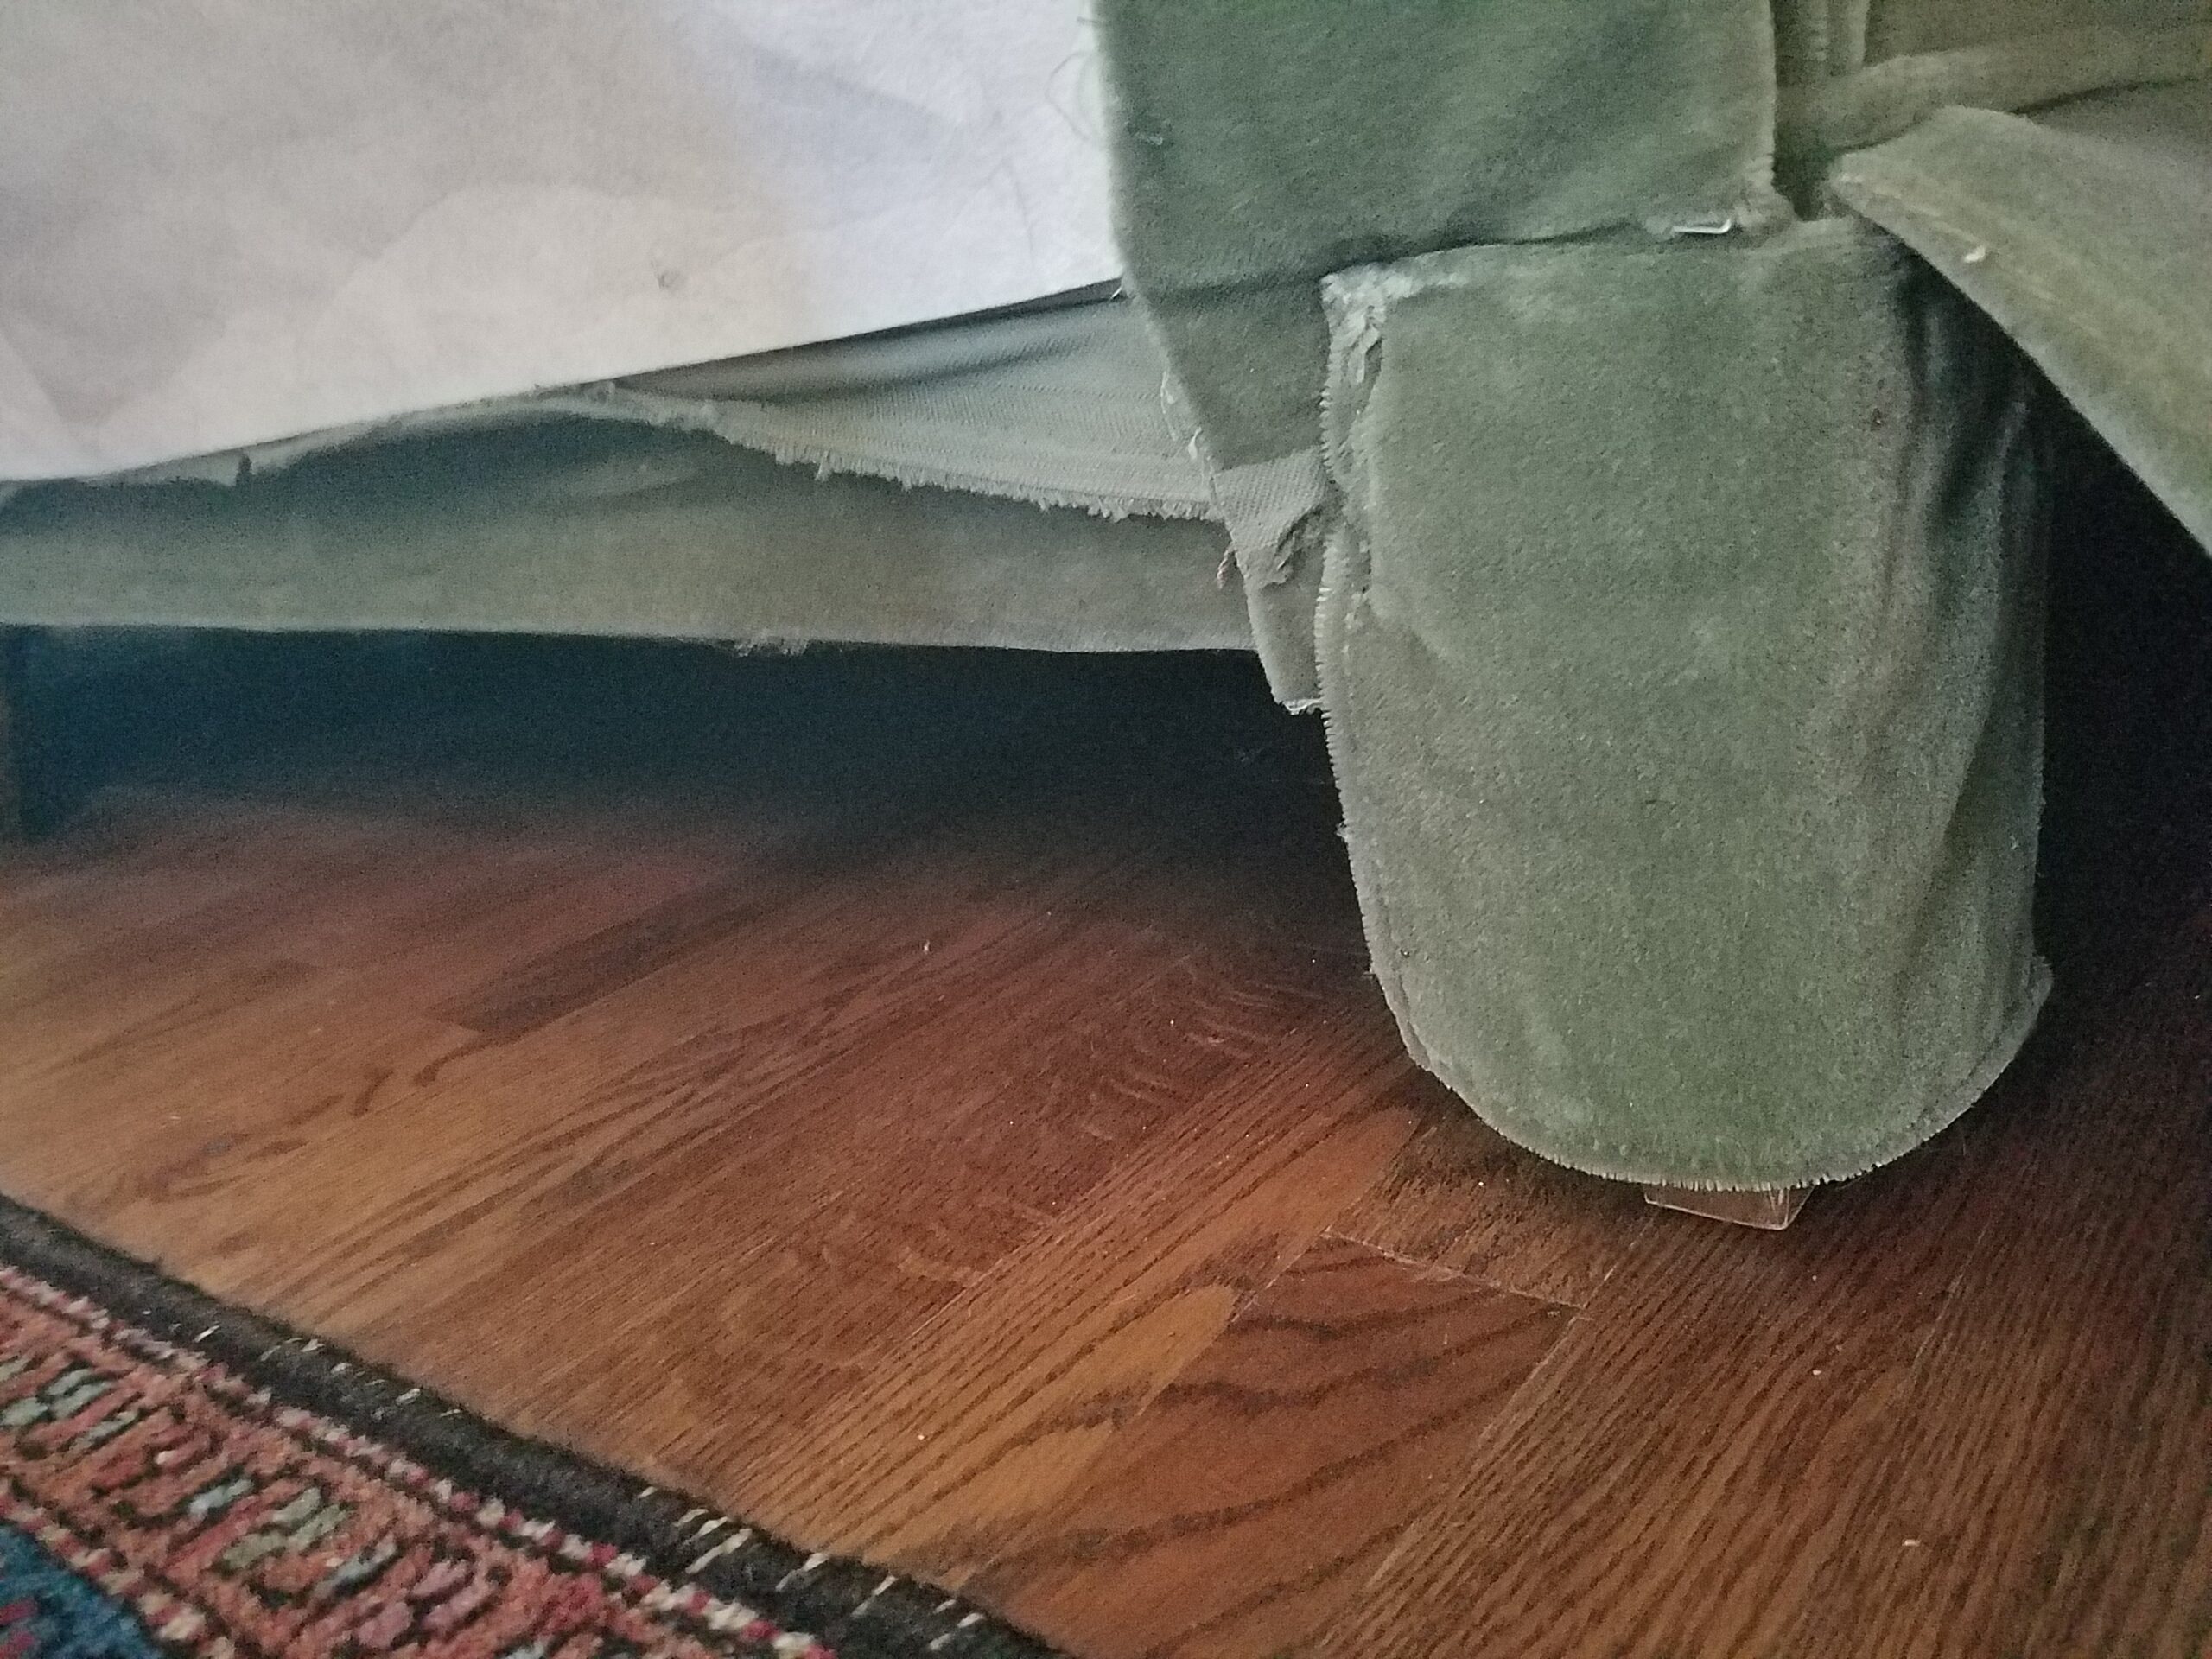
Still concealed behind the gusset of the skirt’s corner, the leg has yet to be revealed.
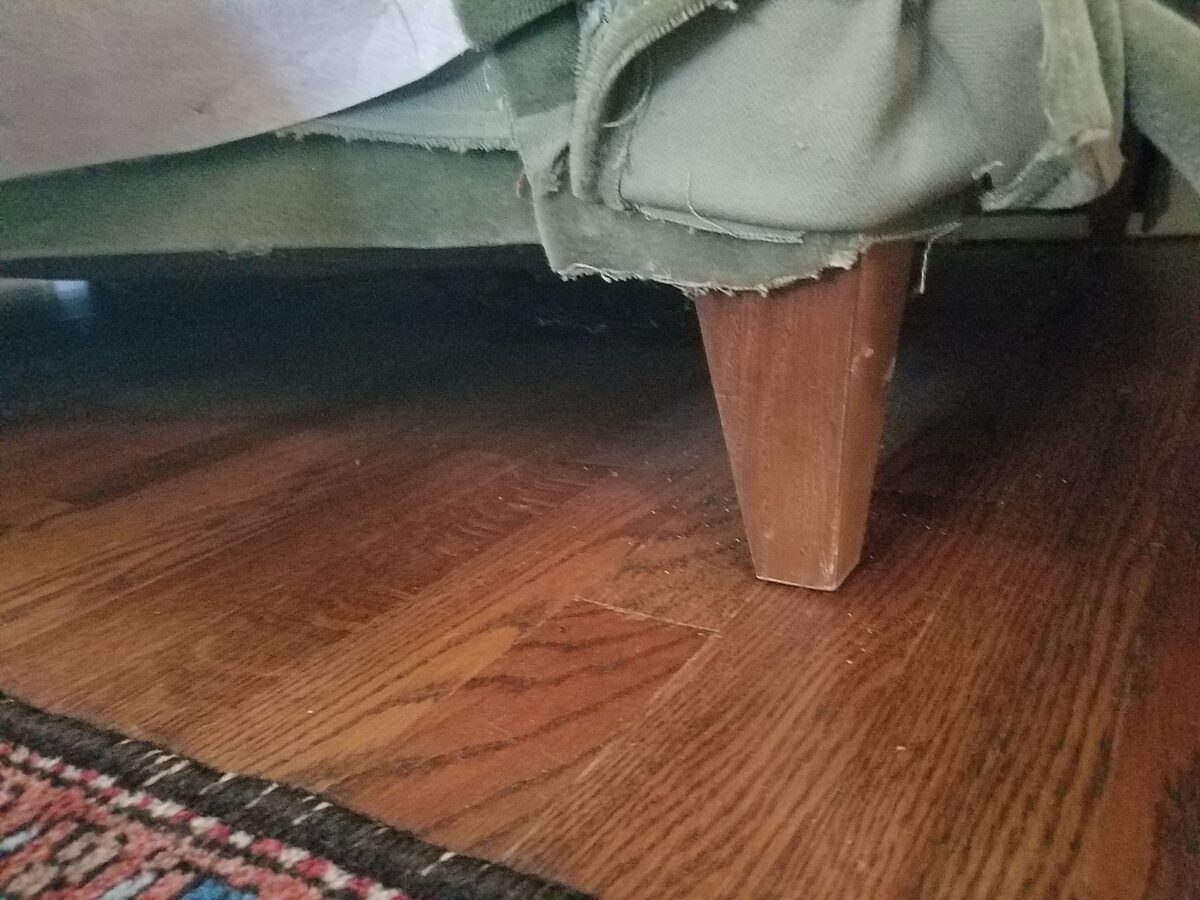
Perfectly lovely legs in need of a little “lotion” touch-up – to the finish is all.

Tired upholstery can so easily be replaced. The idea is to know that you have “good bones” with which to work. But even if the bones are less than stellar hardwood, lesser frames can be reinforced to create a good piece for years to come.

New foam,  Dacron, down and other fill and wrap all are fluff upon the frame to give the desired loft, density, give, luxury, stability, comfort and over-all look. Collapsed cushions, and worn fabric come to life with new fill and fabric.

This piece was new in 1978 covered in a neutral flaxen damask.  In 1997, an intentionally selected down-filled seat cushion, once a desired relaxed, shabby chic look, in a second covering of this classic piece in a luxurious mohair, now looks deflated and tired.

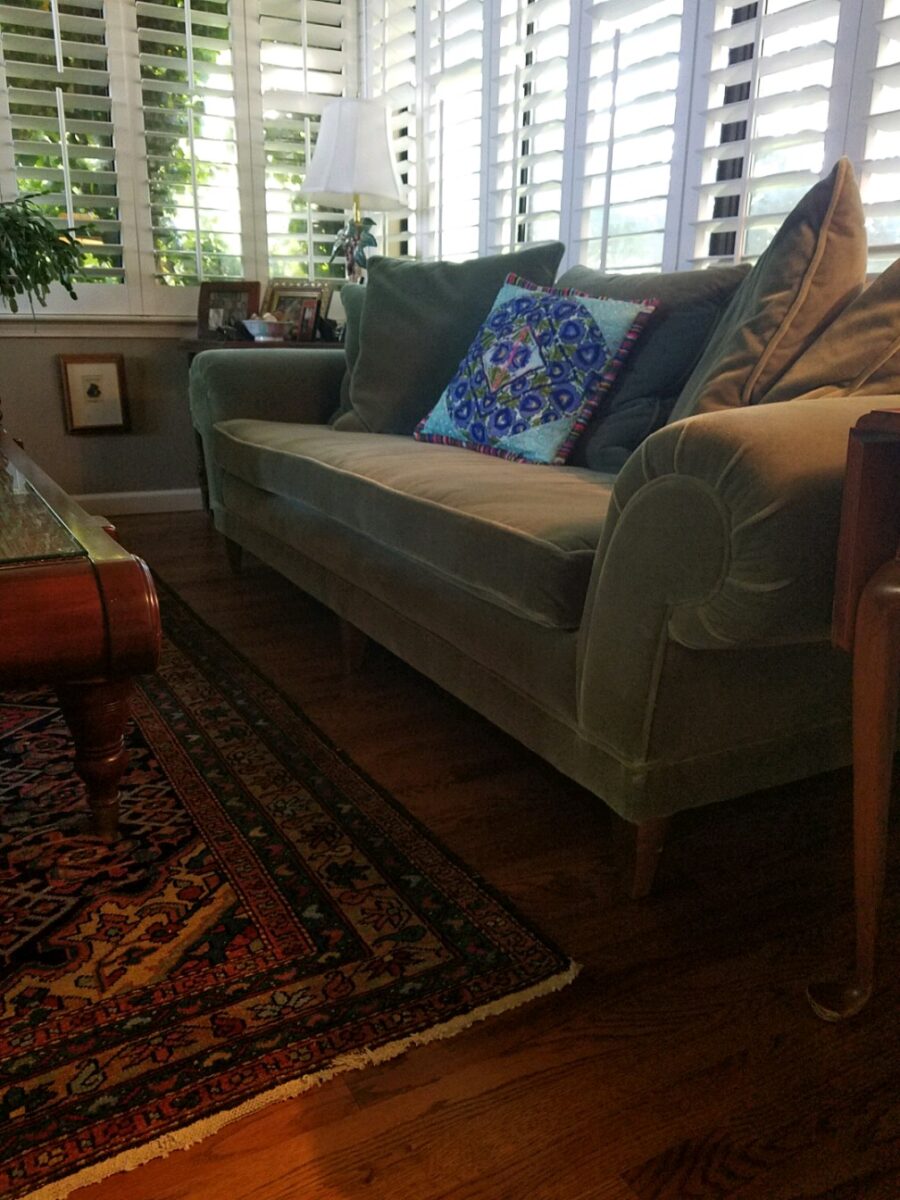
Deflated and tired…this piece covered in a fine, timeless mohair needed help…
The new look elevates the sofa, creates a cleaner style and refines the lines from the collapsed, relaxed look of the shabby chic!!!

The new seat cushion fill and removal of the skirt exposing the legs is a radical transformation without completely re-covering the sofa. The classic mohair fabric is timeless.

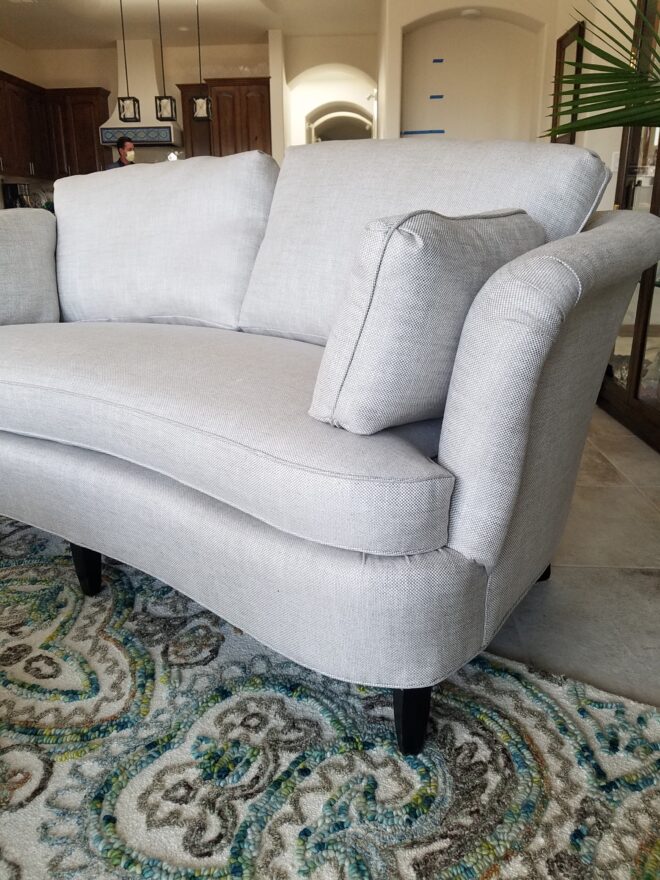
Here, another pair of loveseats had skirts that when raised revealed fabulous legs ready to show! The project is not yet finished – move-in, unpacking and re-upholstery on-going…while new furniture pieces and rugs continue to arrive.
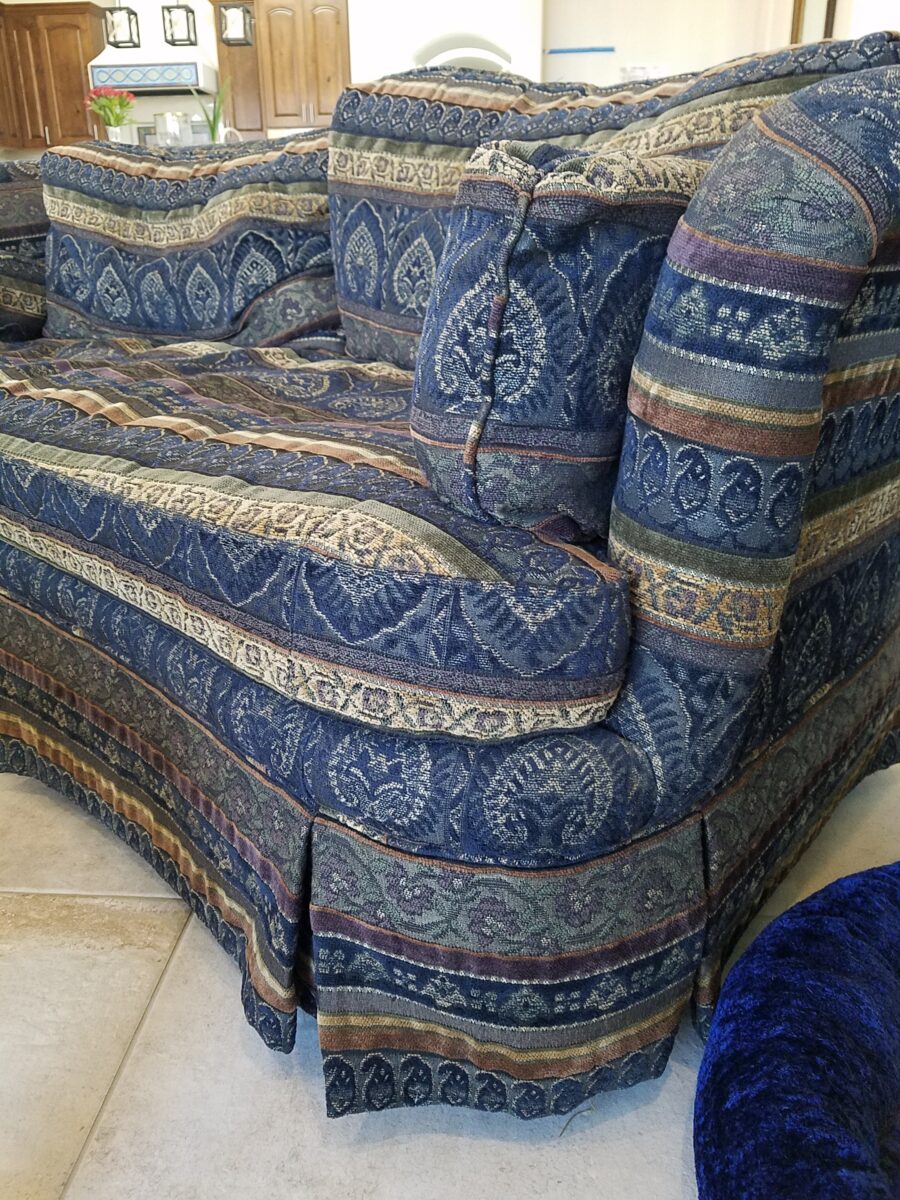
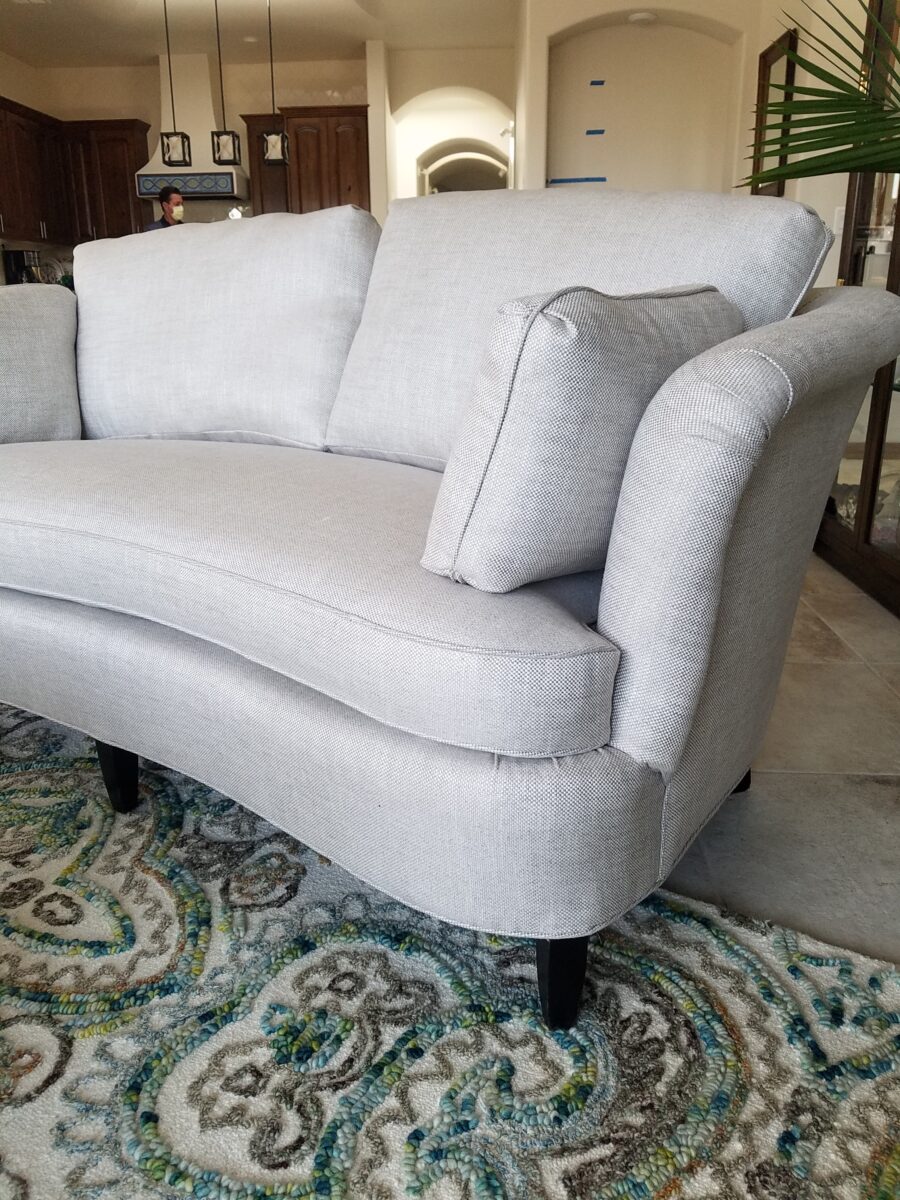
A dramatic transformation of a tired piece into a lovely statement piece.

Another detail worth noting is that contours and lines read differently with different fabrics that will conceal or highlight the lines.
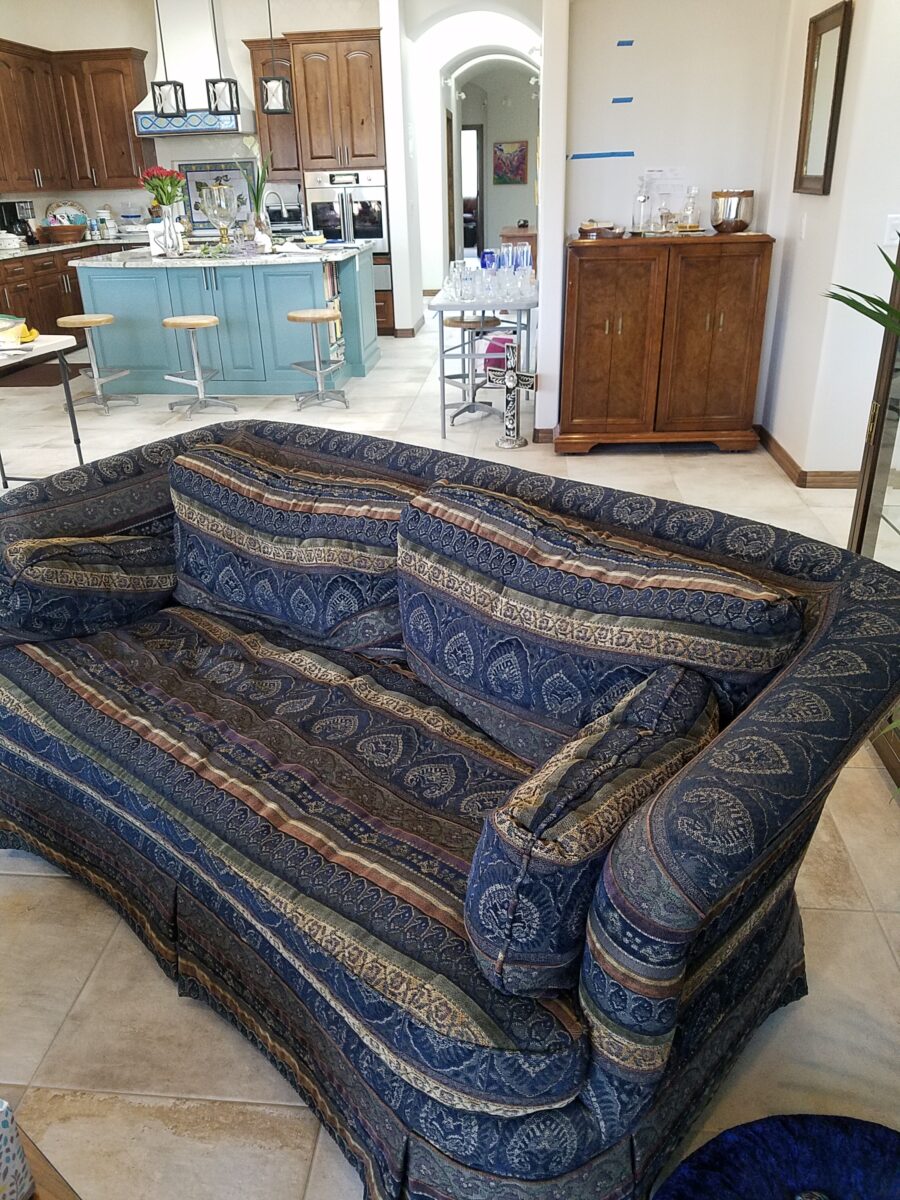
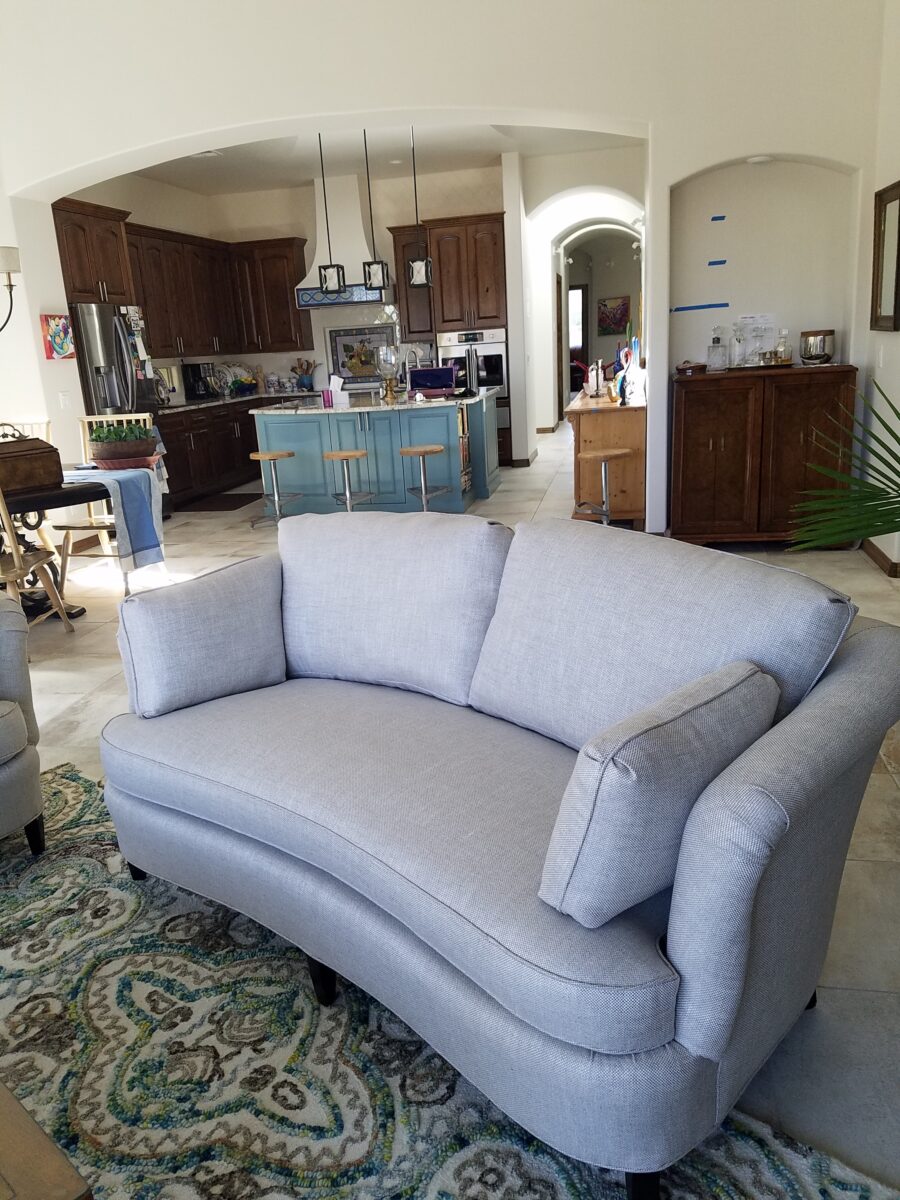
This once jewel-toned tapestry fabric (25+ years ago) was a popular chenille for both design and durability. But over the years it has broken down and faded – yet this pair of loveseats remained favorite pieces very worth salvage.
The graceful lines of these pieces were not nearly as evident with the heavy tapestry as they now are with the clean woven linen neutral.

By changing the fabric and exposing the legs, these two pieces are exquisite and remarkable in their amazing transformation.

Consider re-upholstery. It provides the opportunity to select any fabric on the planet that is suitable for the purpose – resulting in an exclusively custom piece. The cost to do so is off-set due to you owning the frame. You don’t have to buy a frame and can therefore put more into the selection of the fabric. The labor and fabric are often less than purchasing a new piece. However, the custom satisfaction is personal and priceless!

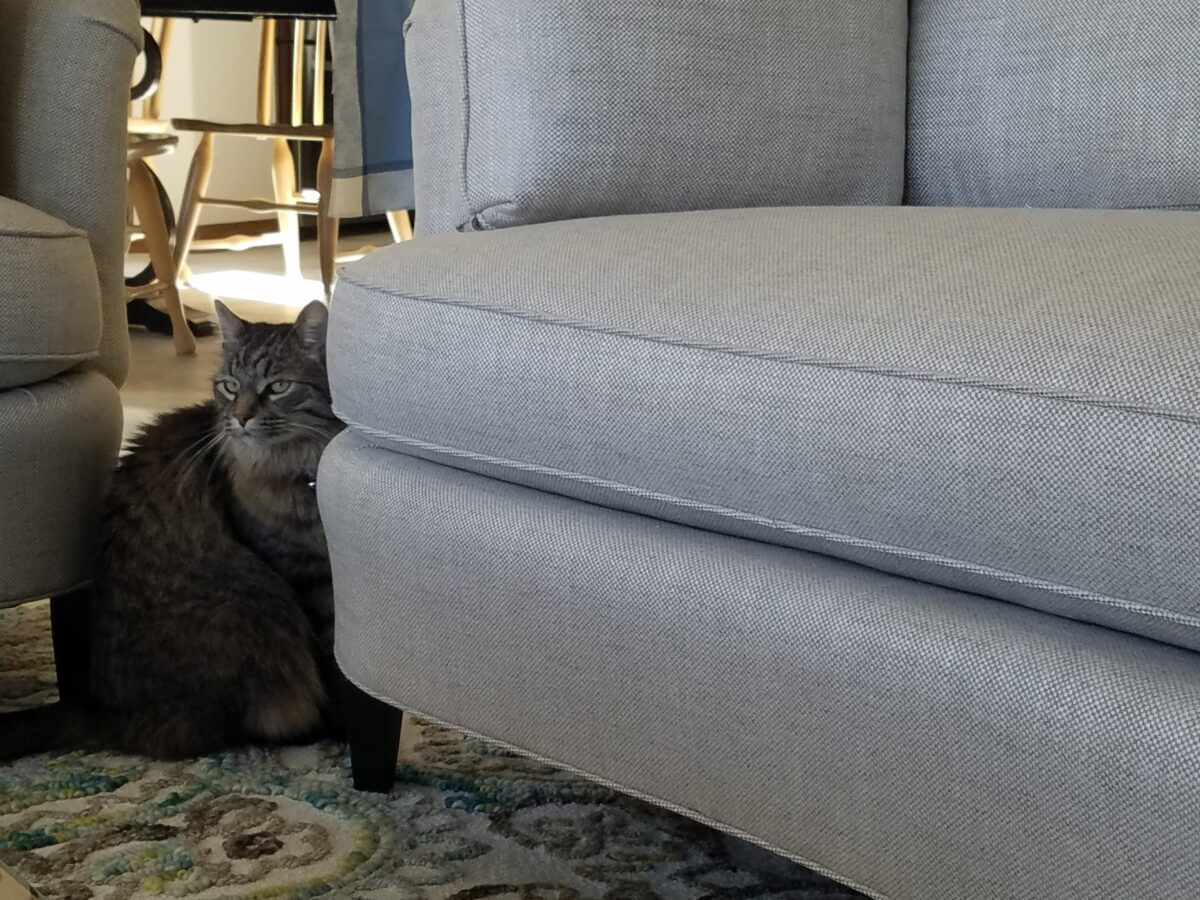
The expected wear on the piece and daily use will direct the selection process for wear-ability.  Color and abrasion tolerance will be key to selecting the right fabric for the piece.  Don’t pick white if you tend to enjoy red wine on a regular basis. But even that is not insurmountable. An extra piece of fabric used as a daily cover will protect the primary piece of upholstery and maintain the desired appearance. Remove for special occasions and Voila! This works too to protect from that prima donna cat who has free run of the house and finds the new upholstery to be the best place for a feline to recline. YOU know who I mean you hairy beast!
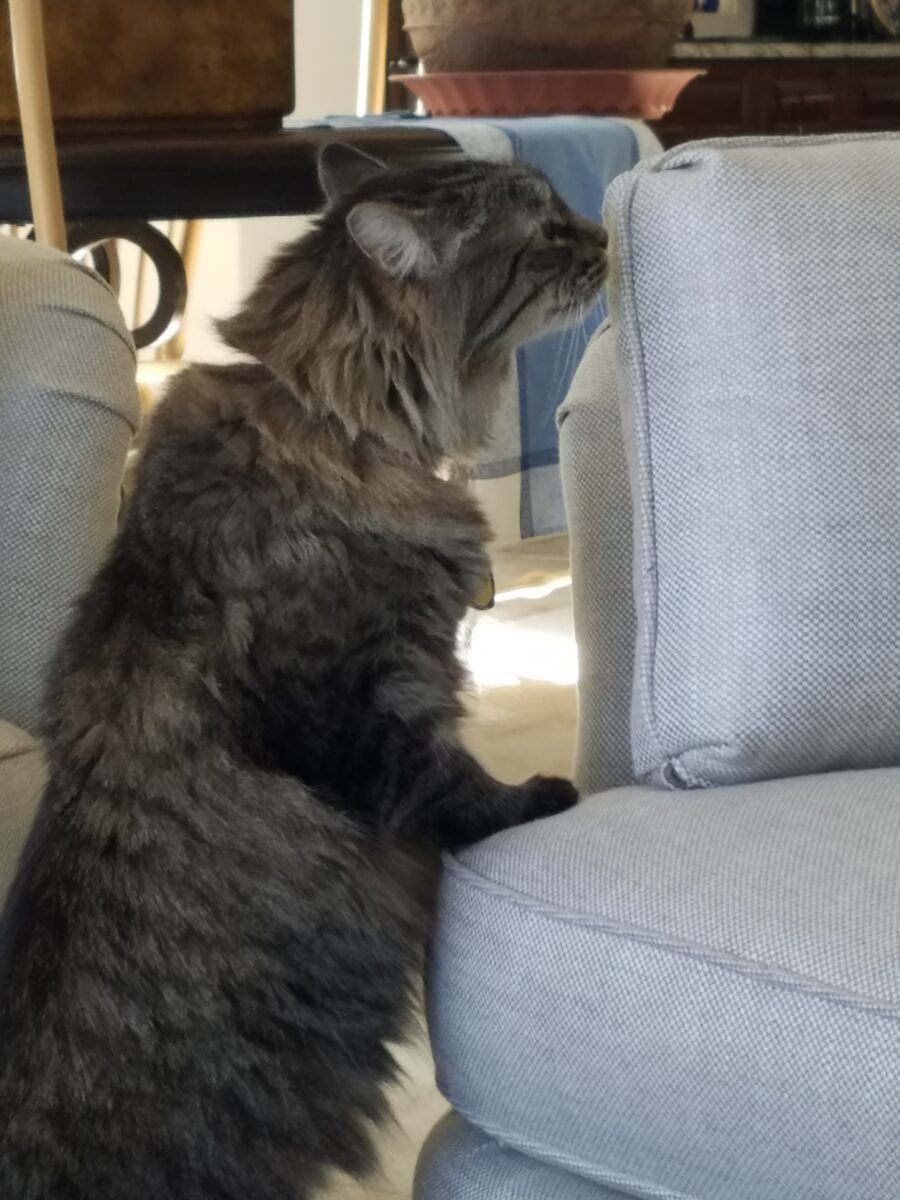
Gotta love this magnificent feline! Shown here, Disco  inspects the newly upholstered loveseats…wondering “what’s happened here?”
BEFORE AND AFTER for Busy Young Couple Making First House a HOME

Busy lives in a new town, he in his residency and she working in a busy OR, they bought a house – their first house – and asked for help making it theirs.

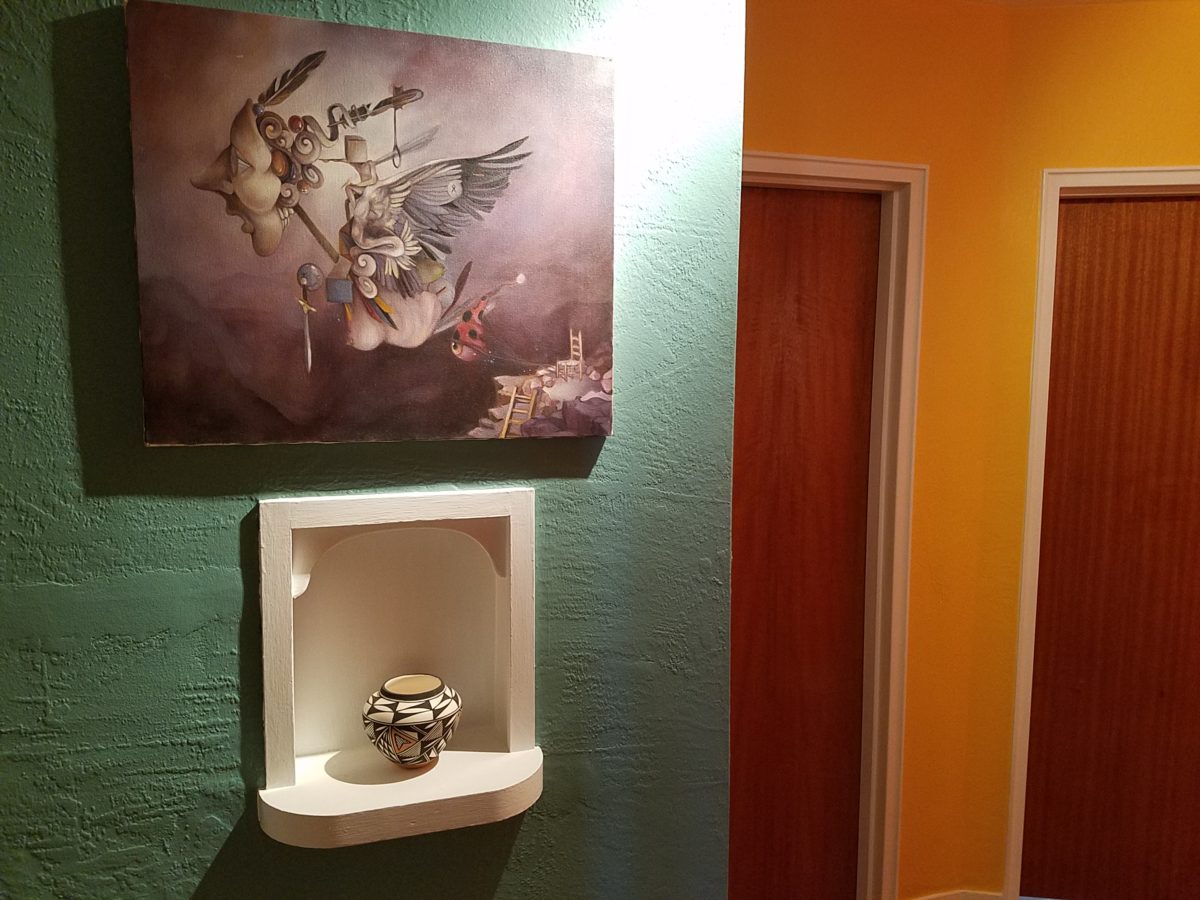
They have traveled the world and collected art along the way, a disparate inventory of things that caught their eye, spoke of their experiences and reminded them of people, places and things to savor once home.

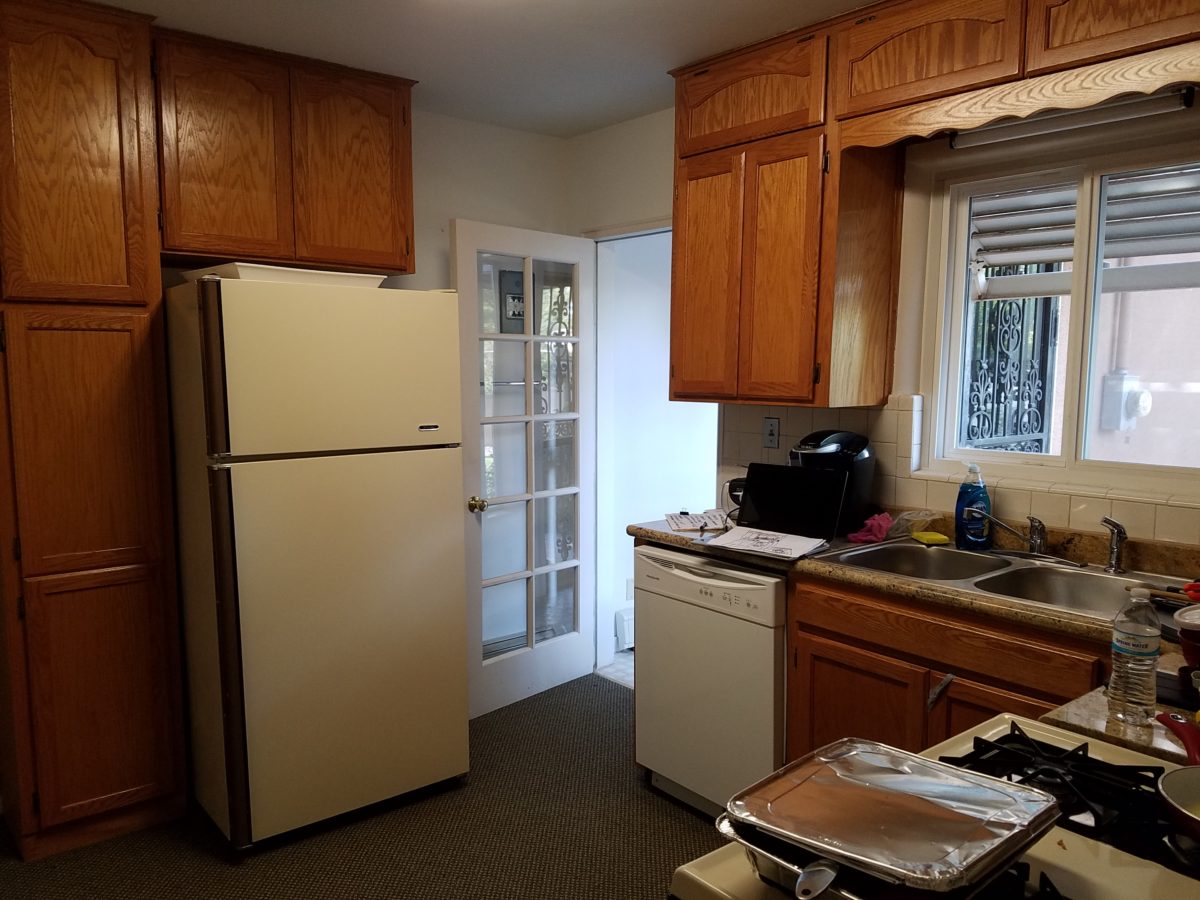
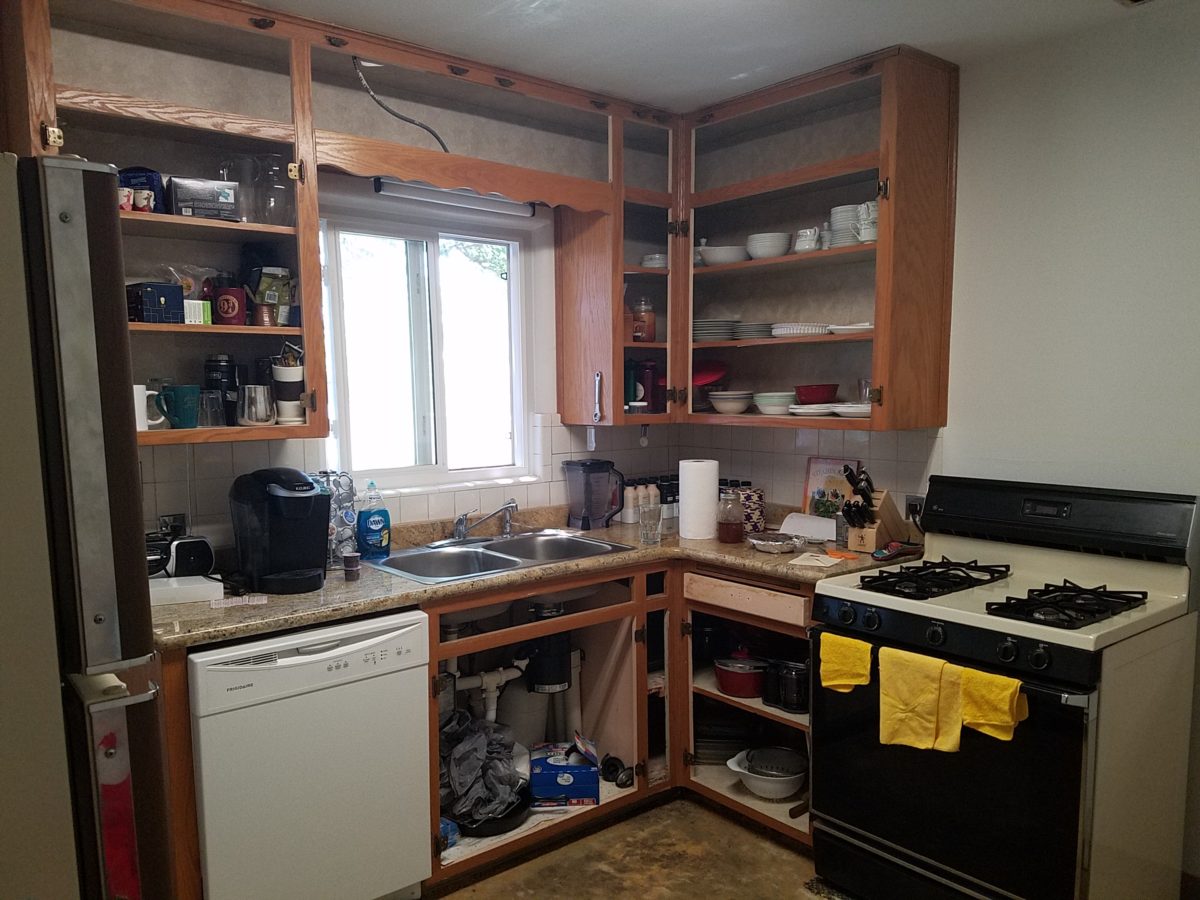
Home, that was the task. Create HOME in this new, old house. Built mid-century, it was simple, clean with some patchy remodeling from previous owners reflecting rather common decisions, with limited funds. We needed to discuss priorities and budget, evaluate what should stay and what needed to be changed.

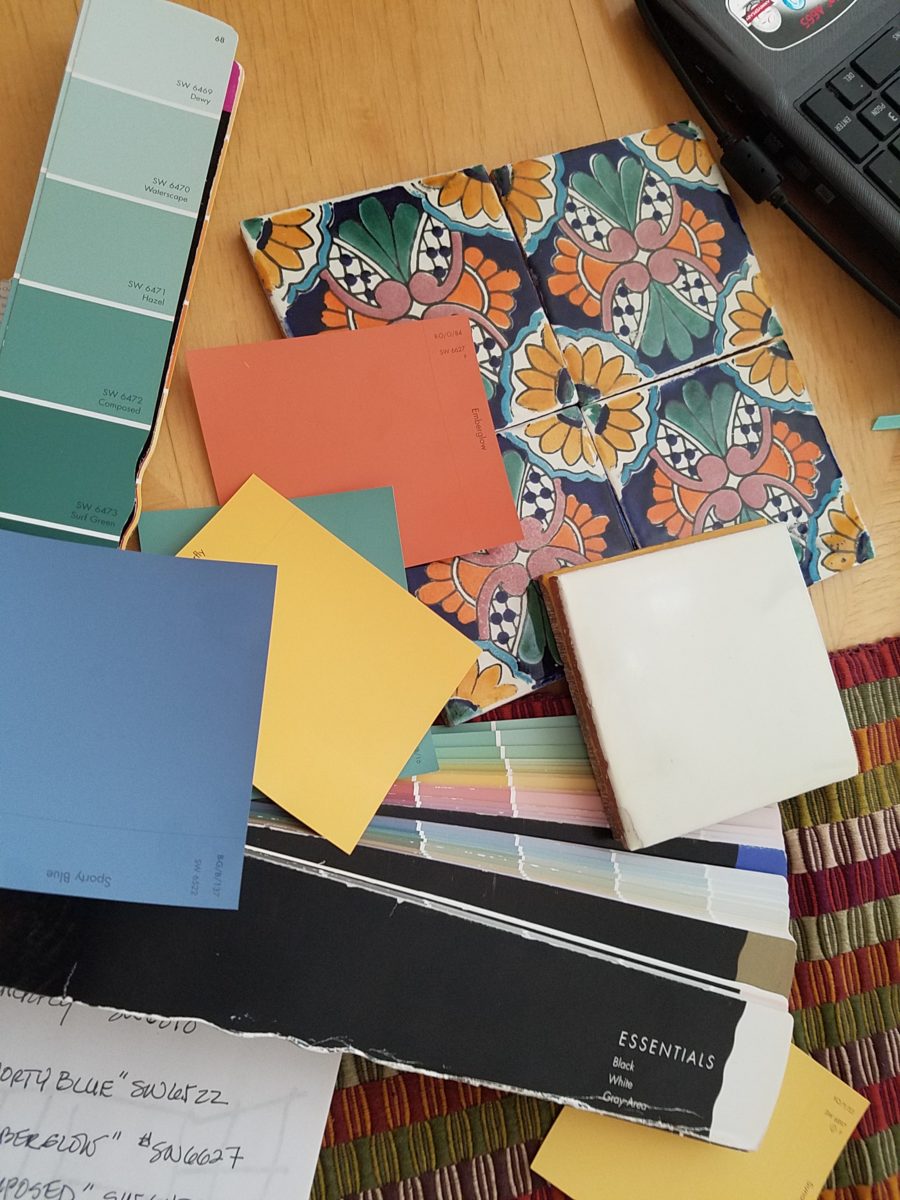
They both had a love of Guatemala. Their travels there left them with dreams of color and pattern, handmade functional art and an exotic sense of place. Having these elements ingrained in their longing, they expressed a desire to have that sense, but with a bit of a modern twist.

Assembling the colors and materials…

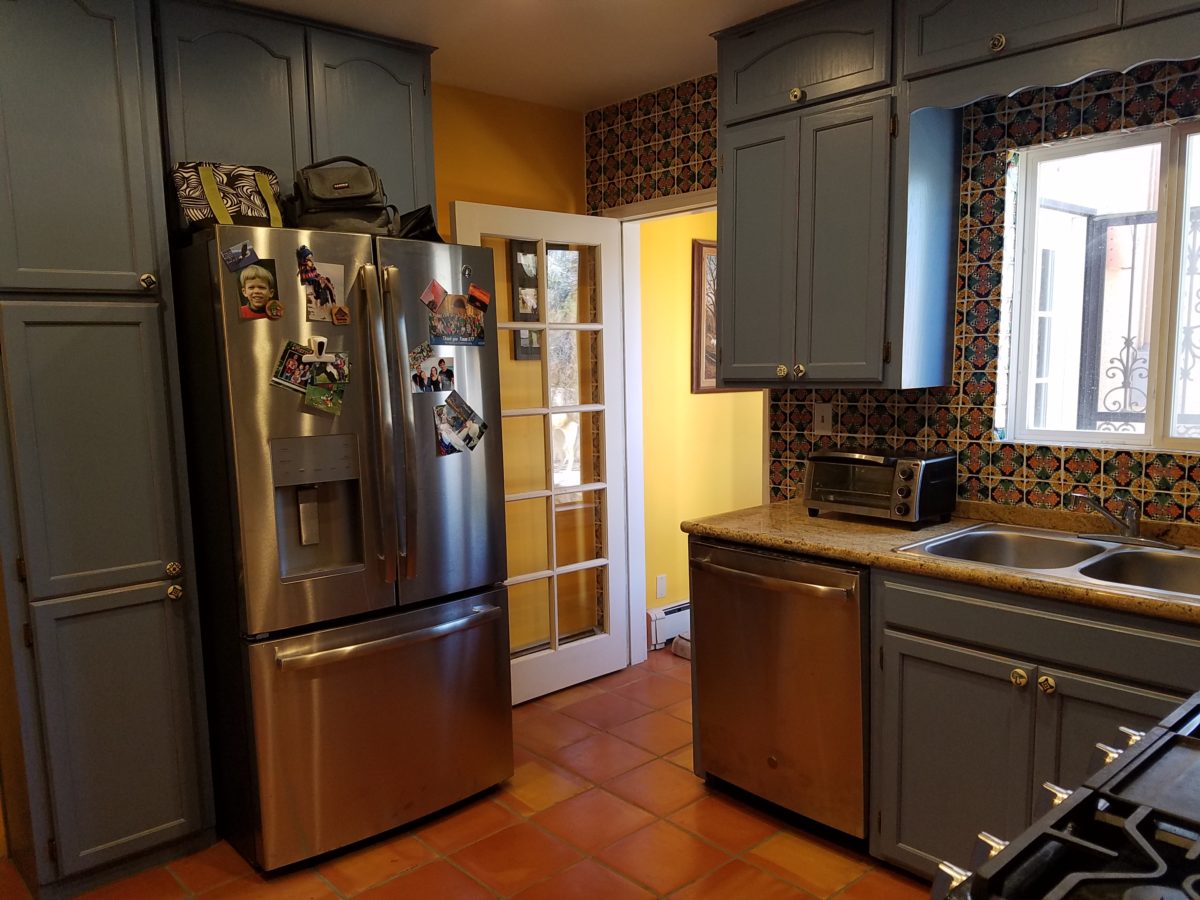
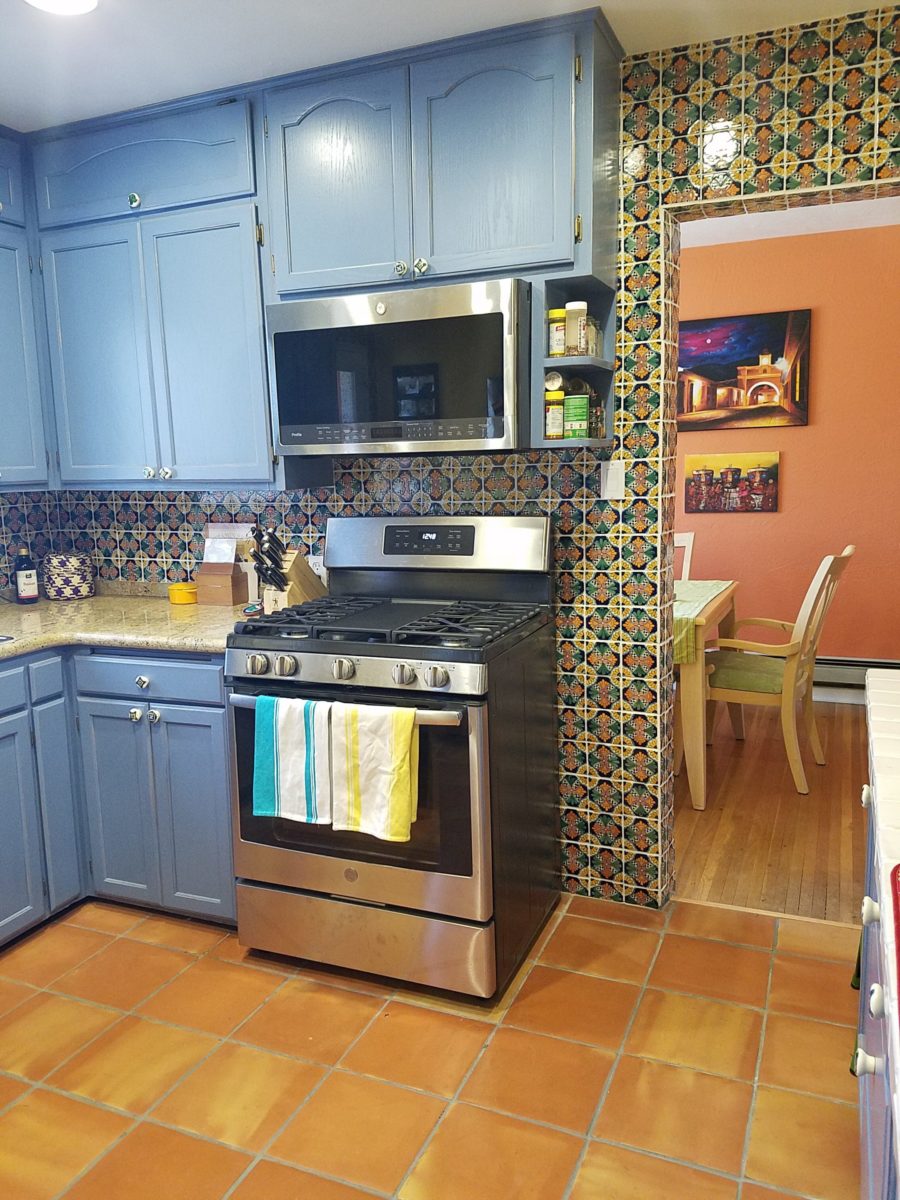
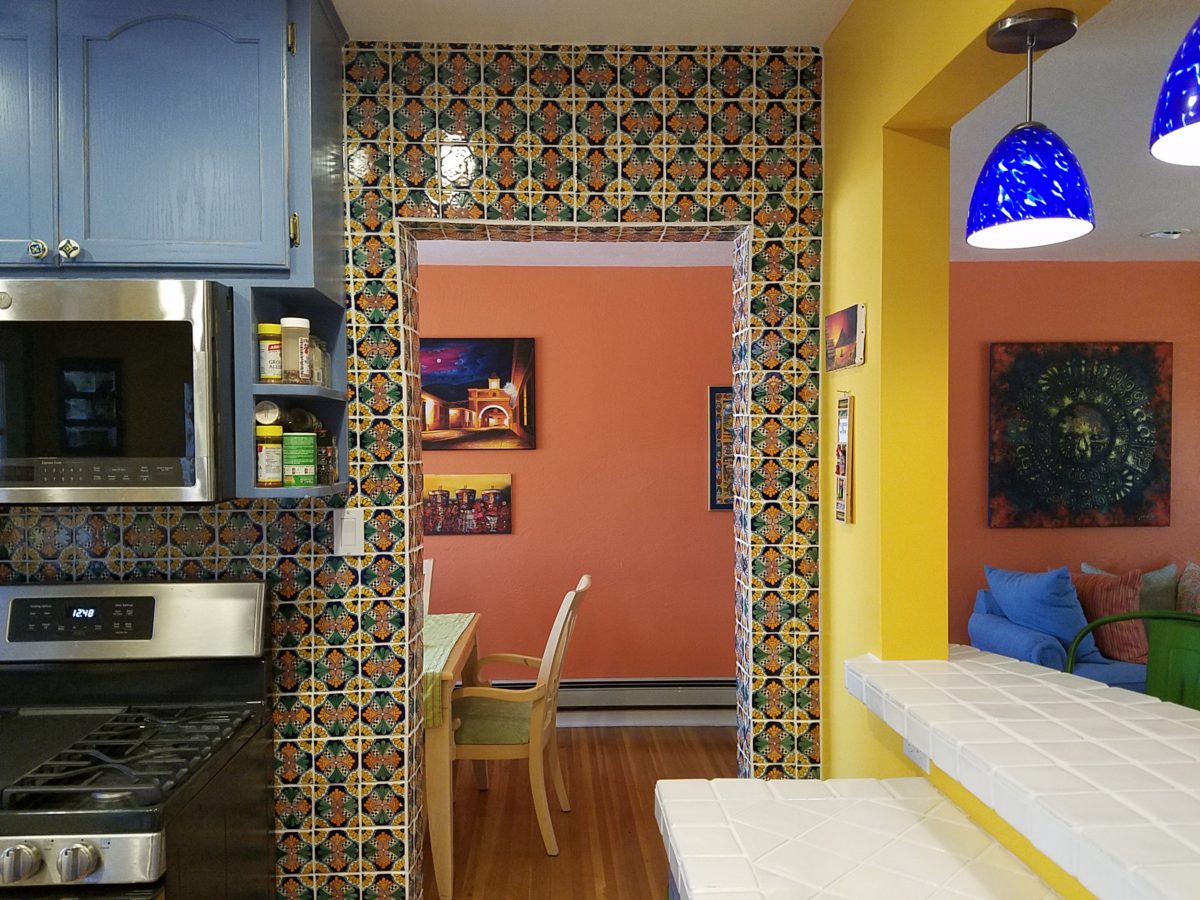
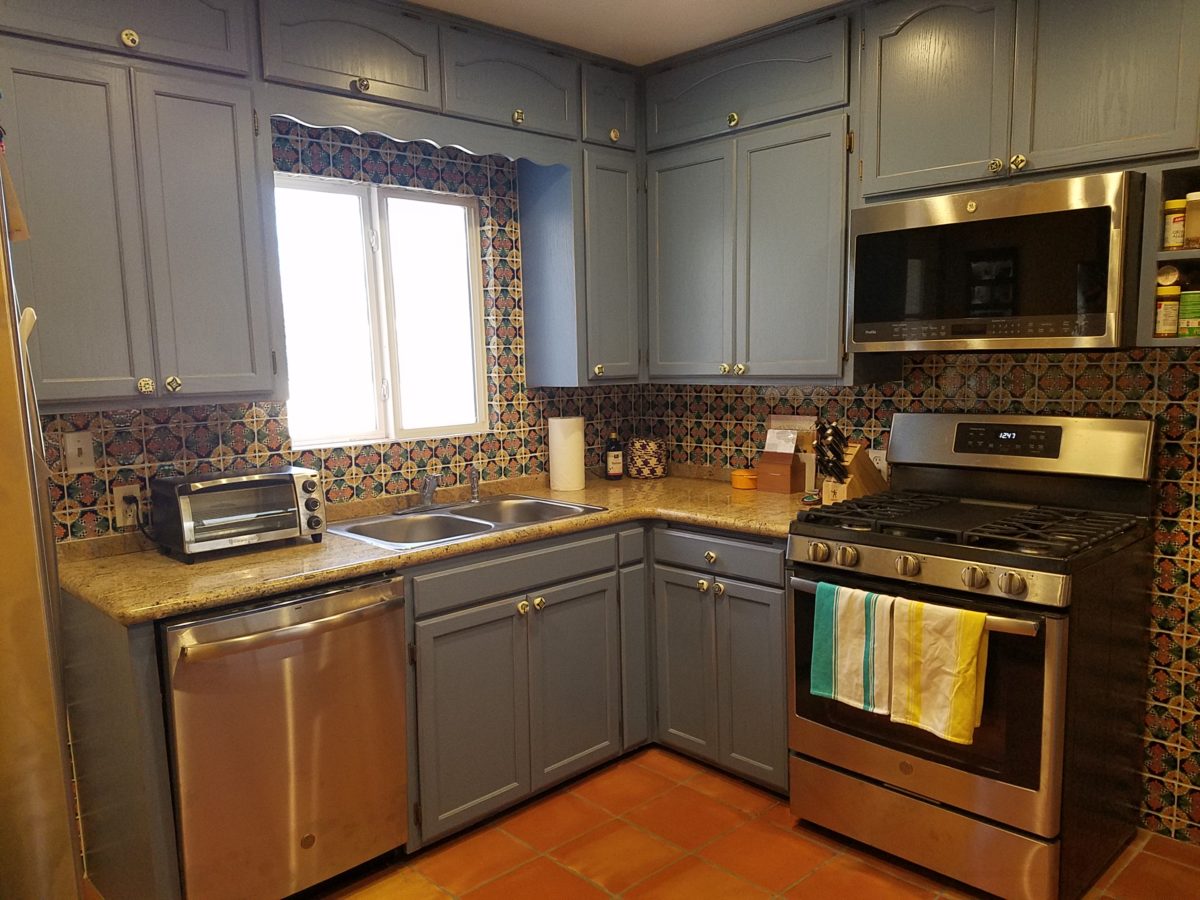
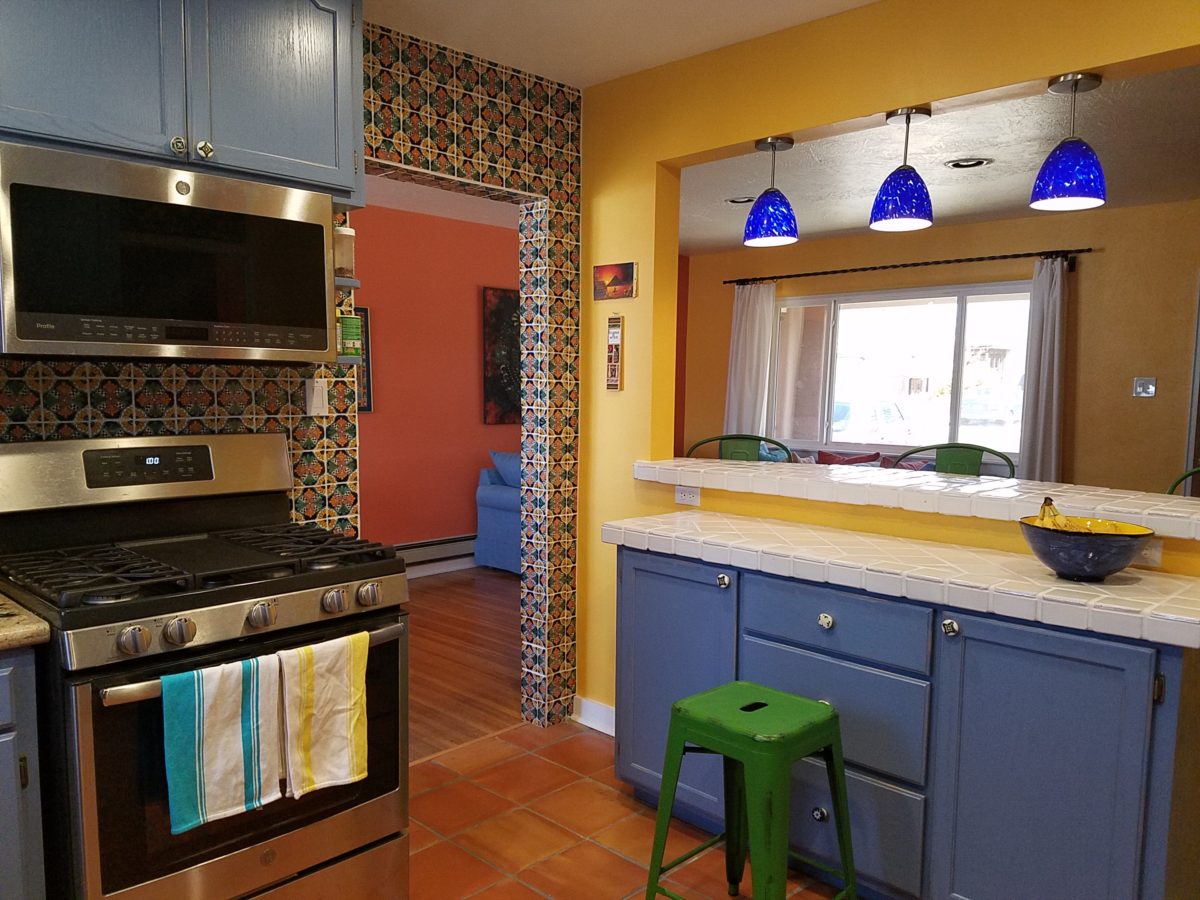
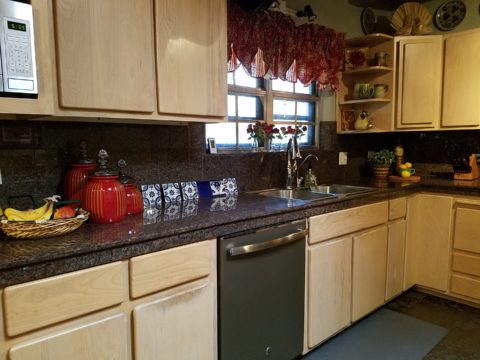
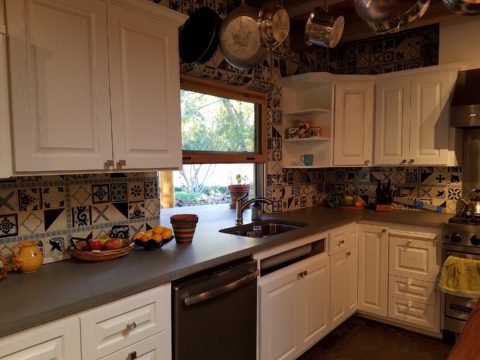
We salvaged the existing natural granite slab countertop and unfortunate surface-mounted sink. The granite was a practical save and the sink came along for the ride. In order to integrate the granite as though intentional,  I selected a multi-colored Talavera tile that specifically had a dollop of mustard glaze in the design picking up that Dijon field color in the speckled granite. As is my usual preferred mode of installation, we took it wall-to-wall as a complete wall-covering.

We also saved the cabinet boxes and doors, but needed to give them a lift from their median caramel stain on oak. Deconstructing the colors in the design of the Talavera,  we knew we wanted blue cabinets – so the paint shades were fanned and the color pinned-down. To give the cabinets that wabi-sabi look of loving wear, we sanded the edges after the painting was finished. We also added cabinets over the stove for additional storage space and utilization of that blank wall.

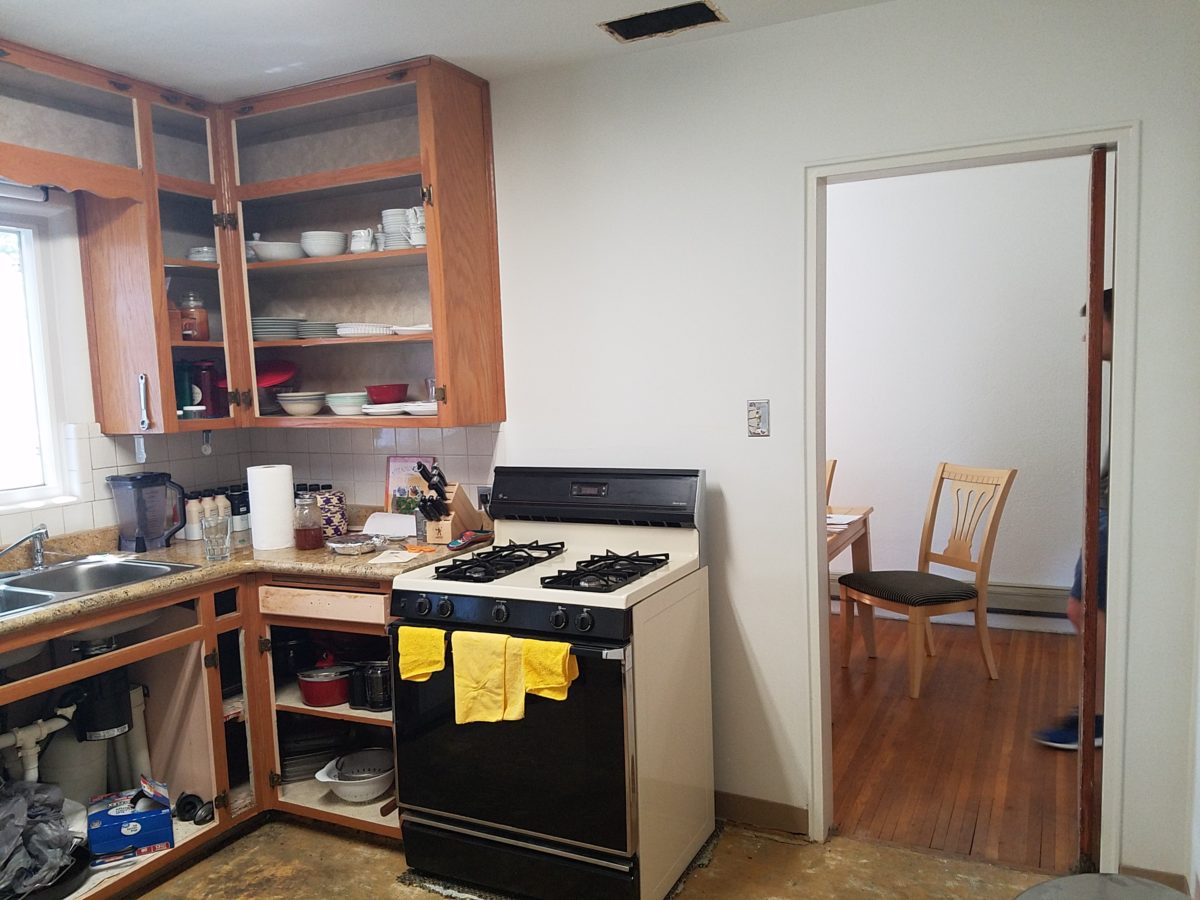
We removed all the doors and drawer fronts, filled the holes from the old pulls/knobs and painted them off-site. We painted the boxes in the field. Granite was salvaged along with the sink.
New paint, Saltillo flooring, Talavera tile and cabinet pulls along with new appliances gave an updated look to the scene.

In real life, when  practicality rules, certain things have to give way for the good of the whole. The whole being the pocketbook and other elements that take precedence at the time. So we live with the radiant heaters, keep the chandelier for now, until they have one fabricated to their specifications, use a machined rug instead of a handcrafted piece and know that over the years they will massage this starting place and truly make it their home.

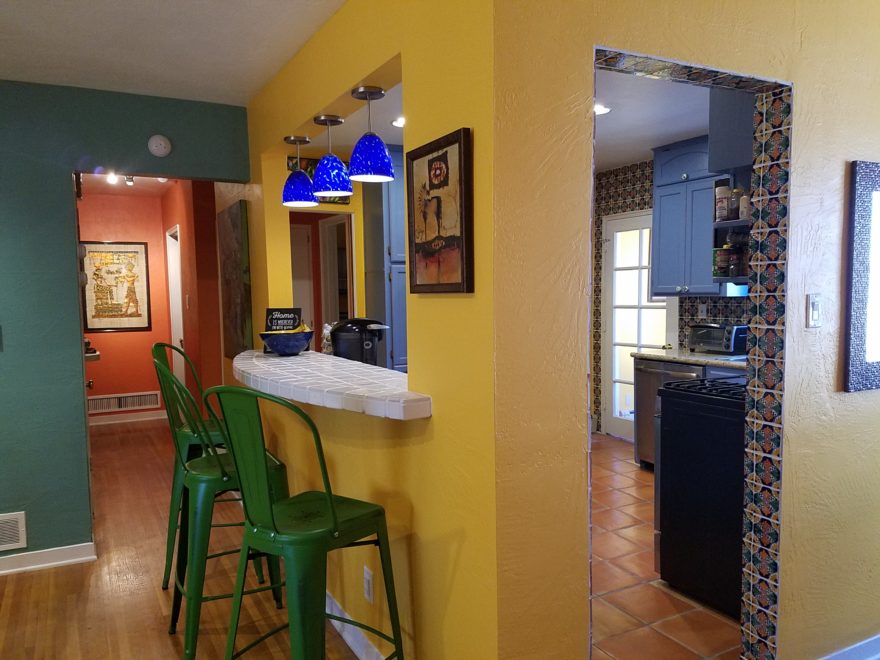
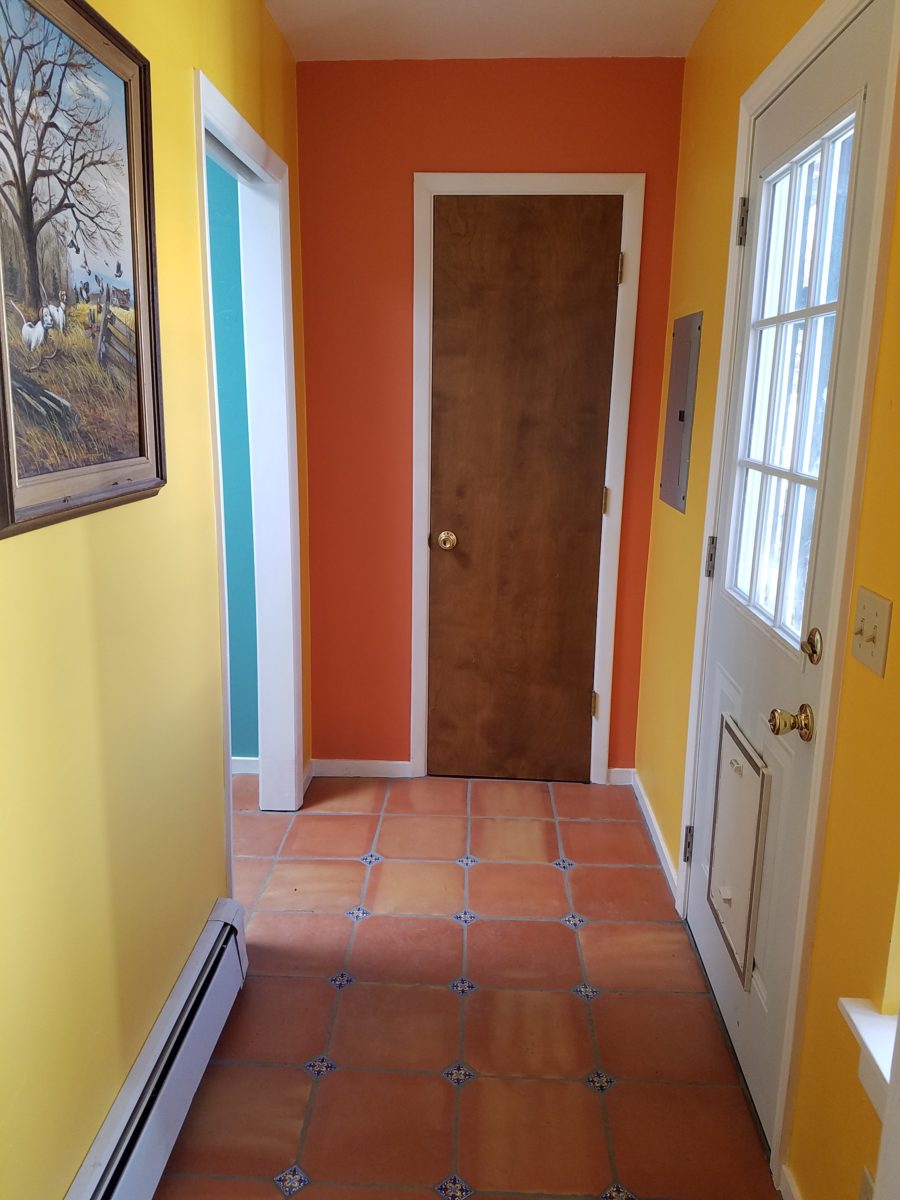
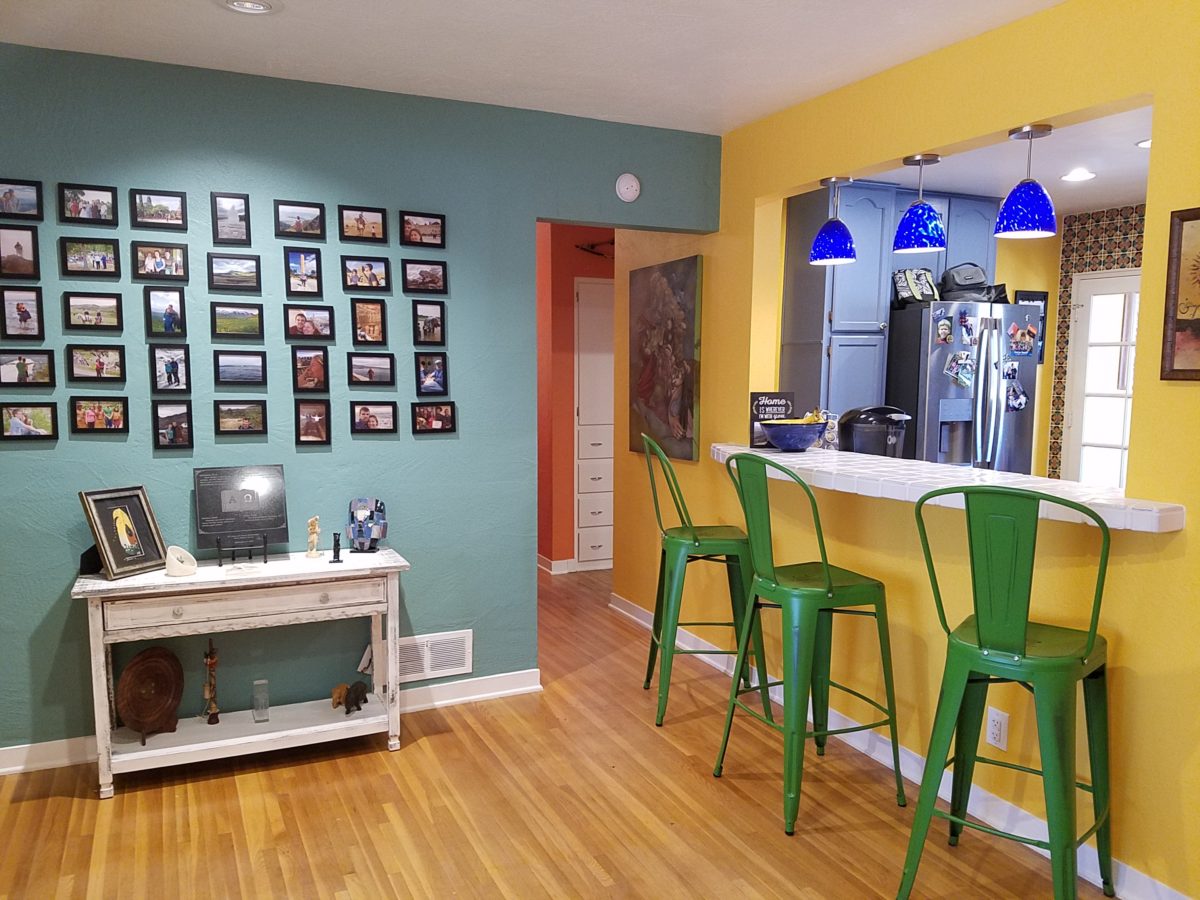
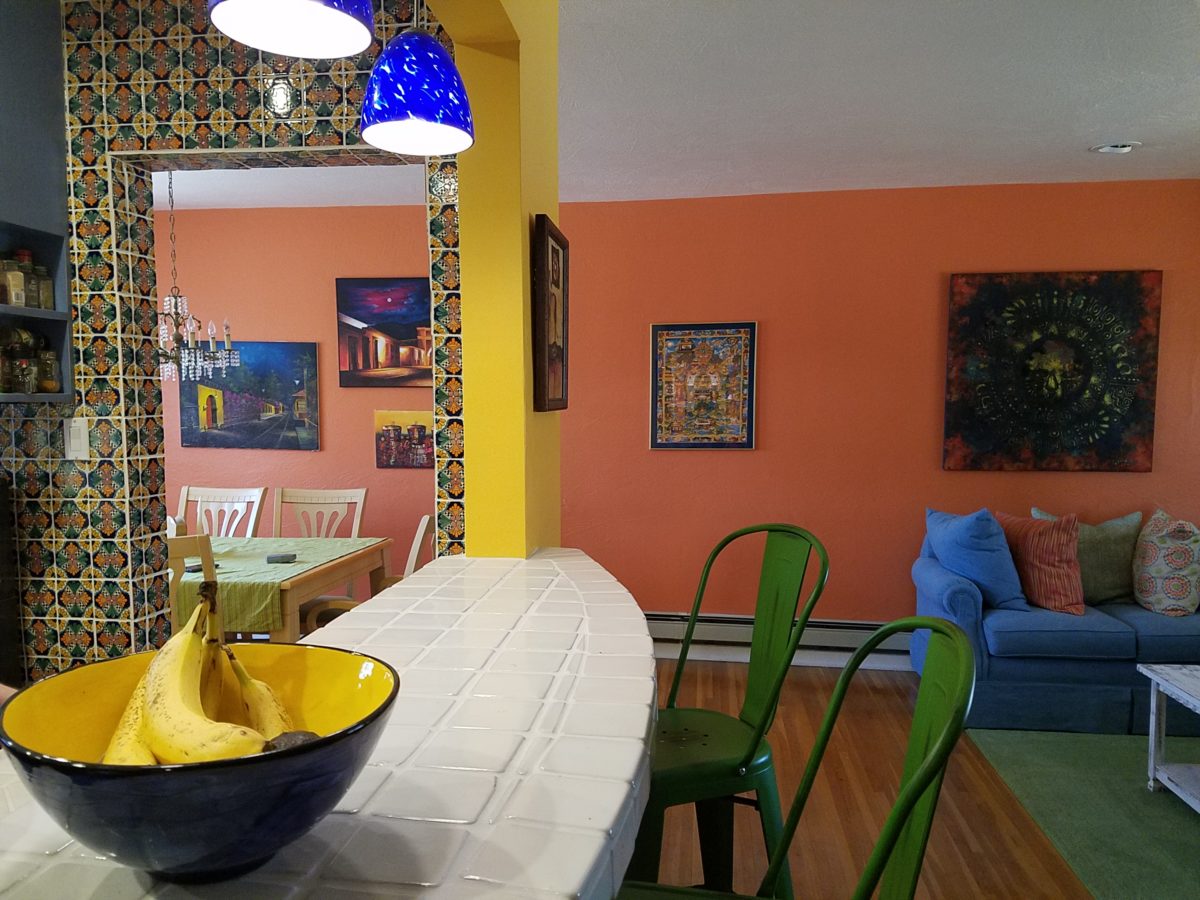
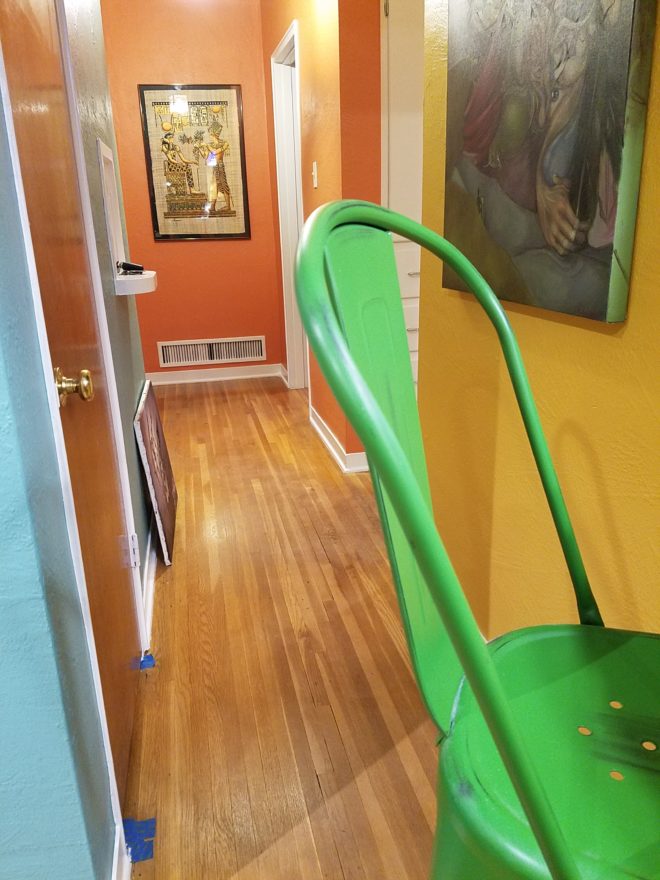
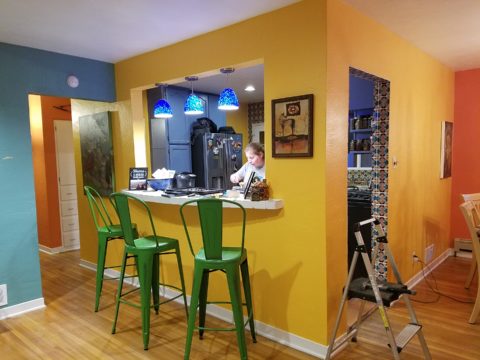
Continuing to dissect the colors from the new wall tile, our colorful young couple wanted more color…we chose individual values of bold paint colors –  smoky turquoise, slightly burnt orange and brilliant golden yellow to intersect the planes throughout the space.

Typical mahogany doors common to that era of home interiors, the decision to match the white trim would have been easy, but we labored over the existing natural, tropical wood and decided to keep it in the mix.

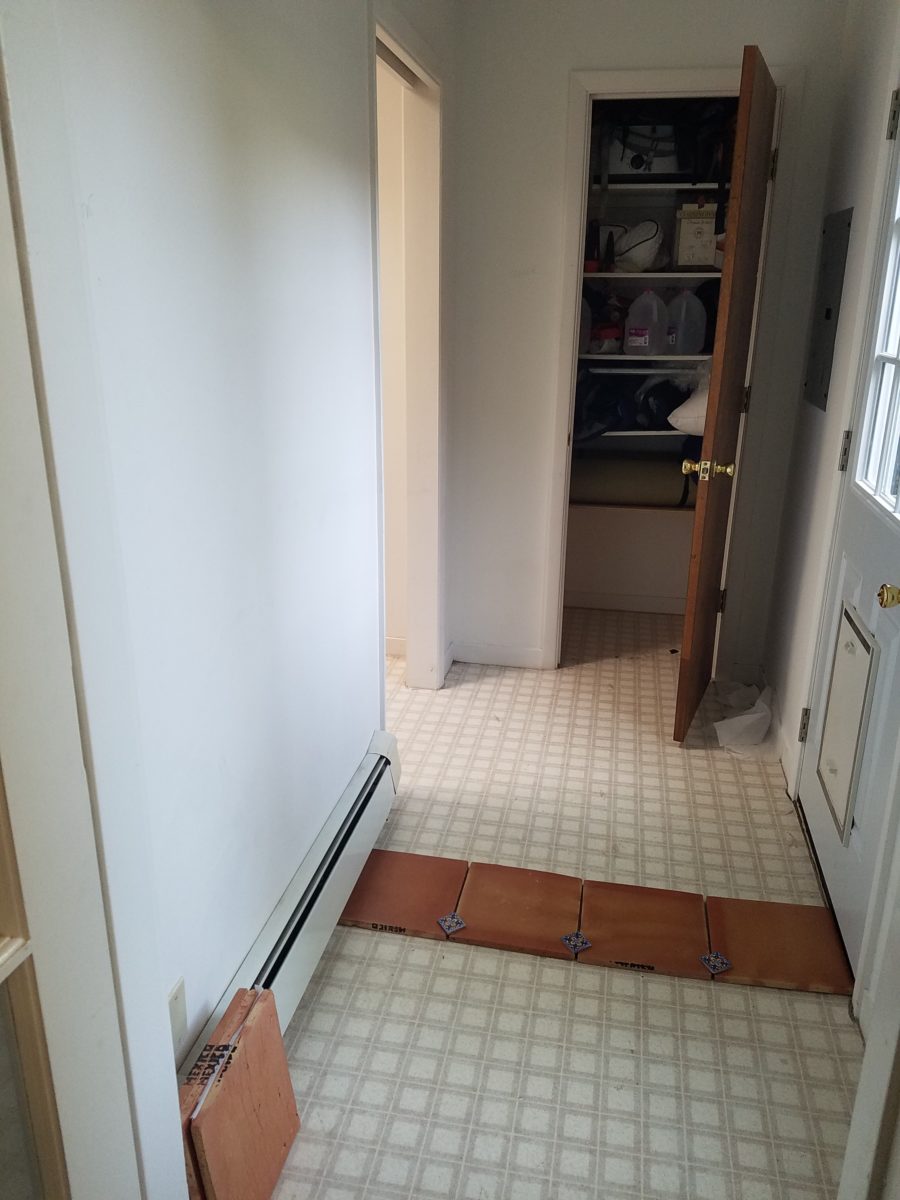
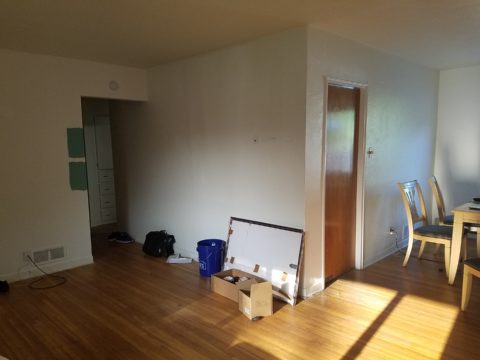
Although the nearly immaculate, original hardwood oak floors were revealed after removing the wall-to-wall carpeting, the kitchen floor throughout the rear vestibule and laundry room was an inexpensive and uninspired sheet vinyl.  Saltillo clay tiles were the answer to furthering the Guatemalan feel. More commonly associated with Mexico, these clay tiles are historically the plebian choice. Taking many forms, some artful enough to be the cornerstone of patrician interiors in fine mosaic installations and other patterns and designs, clay tiles – glazed and unglazed always add an artful, soulful human element. Speaking to that, we inserted 2″x2″ glazed Talavera accent tiles into the floor’s  new Saltillo field in the vestibule creating an almost area-rug-like definition.

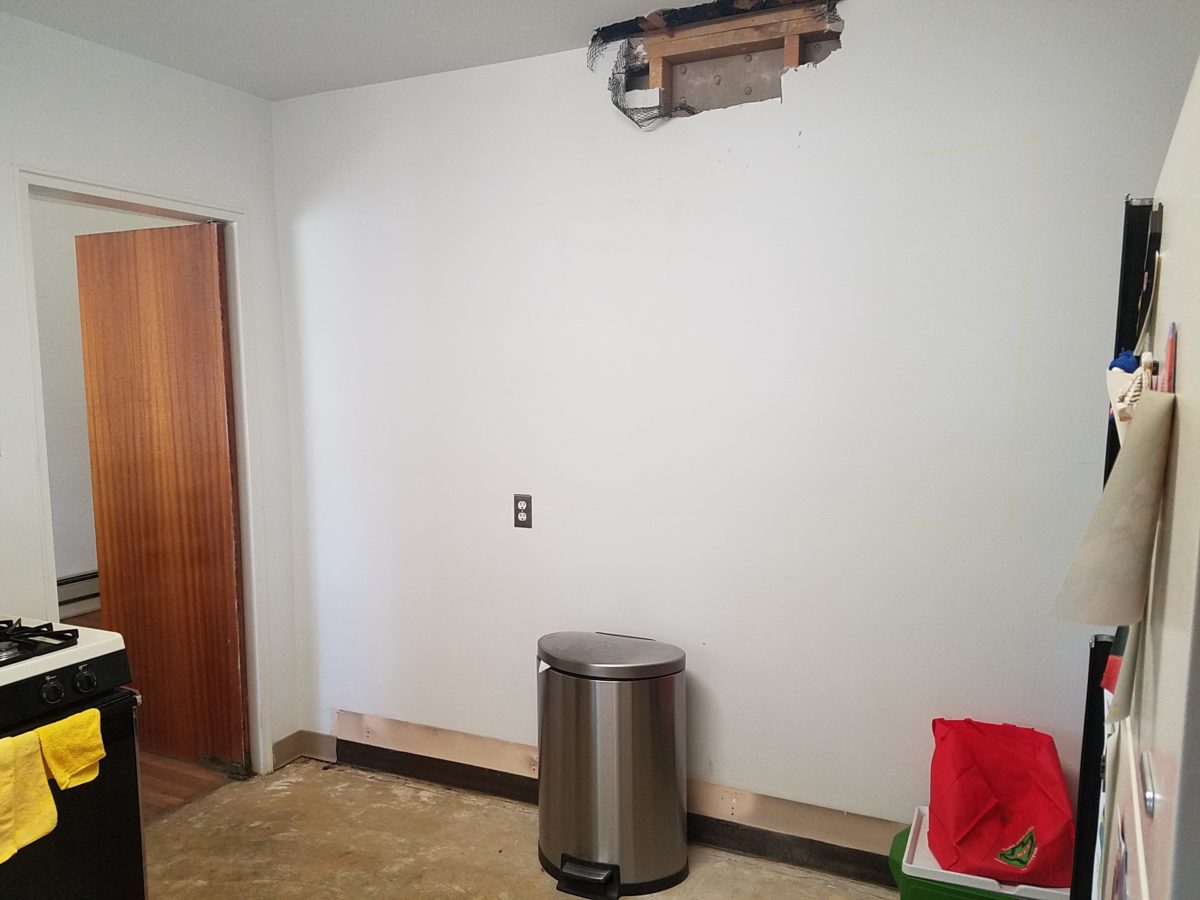
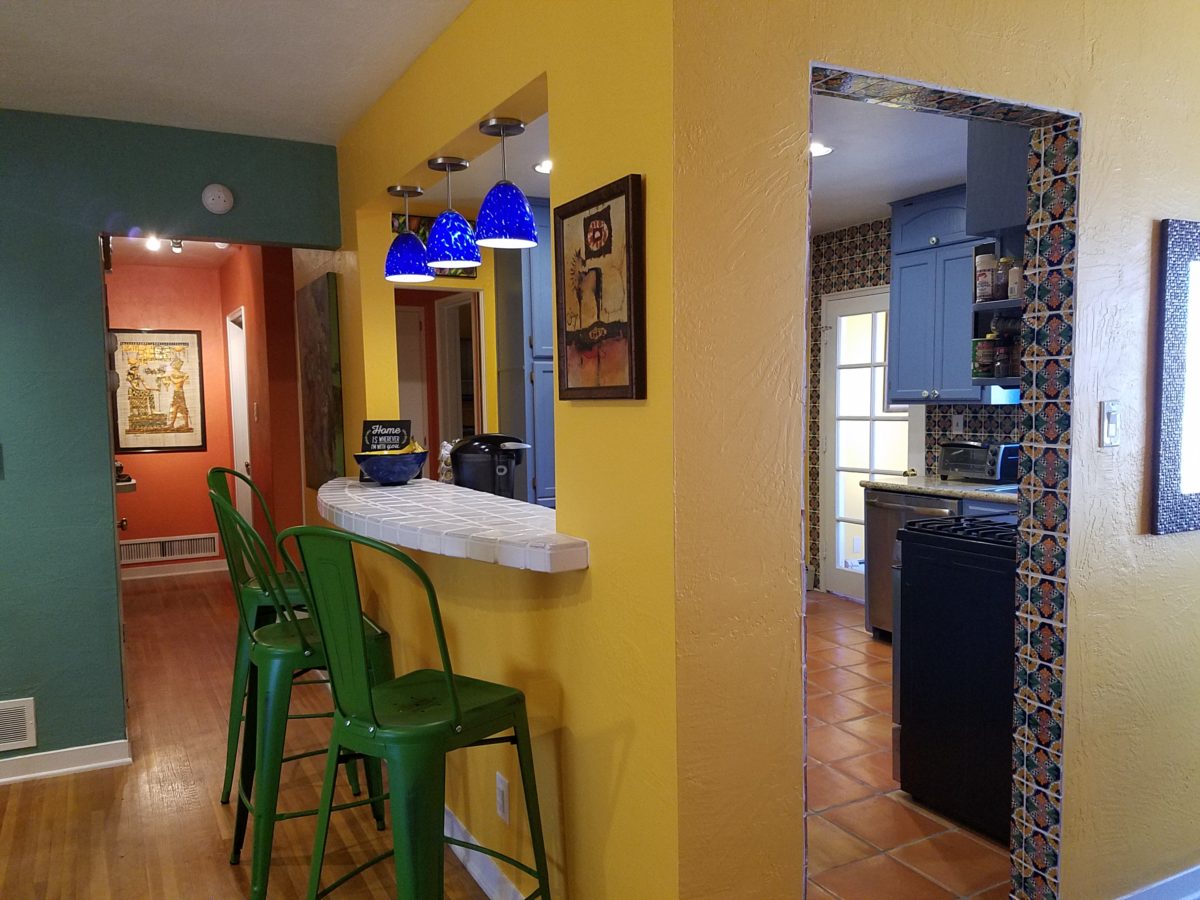
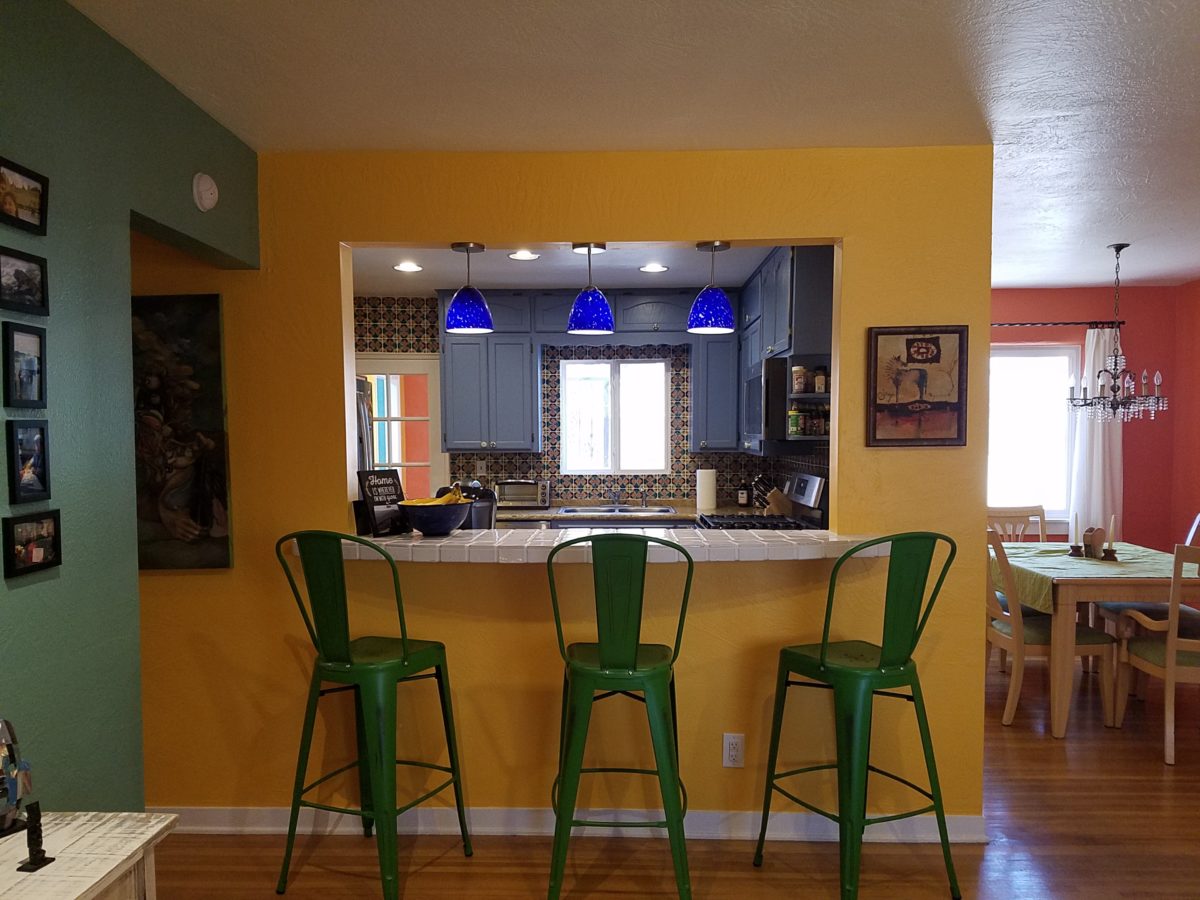
The dated floor-plan enclosed the kitchen separating it from the rest of the living area. The very first comment made by our clients was questioning if we could open that wall – connecting with the living room and large picture window beyond.

The mottled cobalt blue light fixtures add another punctuation of color over the bar along with the parrot green barstools that our home-owners spontaneously nailed in an irresistible lust for even more color!!

Rather than trying to continue the existing “Dijon” granite, white Talavera tiles were used on the new pass-through bar counters – both high and low on the new cabinets.

The first phase of this colorful project has set the stage for an enjoyable work-in-progress for years to come as they now have a basis for design, more collectibles to come, and all they enjoy from places near and far. The upcoming annual trip to Guatemala, in April, will reinforce the joy and appreciation for this special place “home base” in their lives.

The dogs look in eagerly, but are limited to their expansive backyard, their vestibule and full run of the master suite.

Although they selected a durable denim twill fabric to reupholster their sofa and loveseat that they were gifted from a friendly neighbor, the primary living area is – for the most part – “off-limits,” but that seems to work for everyone in the family!!!

Patience and Reward for Design Processes

Patience. Good design requires patience. Do you have it? The design process can either take the route of “all planned before anything starts” (everything drawn and detailed, all finishes selected, all fixtures and furnishings, fabrics and accessories decided and specified, for perfect inclusion into the design) or the process of “design-as-you-go”. The “all planned” design process allows for exact pricing and budget planning. But if the process takes too long, some of the things specified might no longer be available – that has happened more than once! The other “design-as-you-go process” is more random.  There can be and often is a combination of these two approaches, but the second requires more patience and less precisely scheduled time.

The luxury  of  time, experimentation, trial and error, wait and see, what if, all are elements of the “design-as-you-go” process. It is decidedly the more fun and more participatory process. It starts and evolves before your very eyes, with the in-the-field options, to change, modify, massage, delete, add, think and re-think, all available while the action takes place, it is like creating an art piece one stroke at a time. Artistic expression rarely progresses in a straight line.

All of the above can be said of the pre-planning process too. You can illustrate, render, draft, erase, alter and change all the while – but you are doing it prior to commitment, prior to actually  seeing the actual design unfold in real time.

Changes and additions can arrest the process – whether in pre-construction planning or live-in-the-field. However, live-in-the-field is much more int-eruptive and possibly costly. Changes and additions can cause scheduling delays which can domino throughout the otherwise planned program. This can result in not only cost considerations, but disarray and a prolonged inability to use the space.

As I visited one of two parallel kitchen remodels nearing completion  that I have previously mentioned, the owner mused “It’s a painful process.” But as we stand there enjoying the transformation he continues “It is almost hard to remember all the phases we’ve been through to get here. Kind of like childbirth.” We laughed at the fact that the world would be filled with “only children” as no mother in their right mind would go through that pain again!! He and I both never having experienced it for ourselves – yet, “they say” that it’s true. All very much worth it in the end!!!  The ultimate reward!

This BEFORE shot of this kitchen shows dated, anemic face-framed radius flat panel cabinets, granite tile counter-tops and back-splash.


Not quite finished, cabinet pulls are being installed, final painting details are underway and the transformation is being unveiled. New cabinet doors add a classic raised panel detail painted white, with new concrete-like engineered Italian counter-tops, and striking Talavera tile back-splash punctuated with mini mosaic Spanish tile accents. A new window opens to the outside patio with the counter-top passing through and the window closing directly on the top.

Residential design – those private, personal spaces always involve knitted brows, vacillation, additional worry and more indecision than commercial designs. Not to say that commercial designs don’t involve interested parties, if not actual owners, the investment in the personal pocketbook and  personal emotion is not the same. Furthermore, there are greater personal thrills and disappointments in the residential projects.

Well, back to patience. It’s a virtue and I often struggle to practice it. I tend to be overly eager for instant gratification.  But patience is very important when creating something of value and timeless appeal.

Design takes patience during the various stages of design details. We are not talking about building a rocket ship – but imagine the design and engineering required for that!. Let’s just talk about something simple, like custom drapery rods. The client thinks – fast and easy. While on vacay they experience a lovely accommodation that features hand-forged drapery  rods. “Cool” they say. Filing that away among their thoughts of interesting interior details. A couple of weeks later, they are in front of an art booth and meet an iron-worker who offers all manner of custom iron work. So they recall the cool drapery rods and inquire as to whether he would do something like they described. “Sure,” he sings and whips out his portfolio of photos among which are very cool twisted iron drapery rods with swirly finials adorning the ends. They’re sold! They invite him over to see their windows and get started. At this point, their interior designer knows nothing of this idea or the contact and engagement.

Remember, they are thinking fast and easy. So they expose their idea and plan that is already underway asking their interior designer on advice for drapery fabric.  With this opening, the designer asks about the rods. Come to find, they aren’t sure how far past the windows they have been measured to go, they haven’t considered that the 5/8″ solid stock might want to sag after a while spanning 8 feet and they have no idea how they are going to hang the draperies…”Oh” we need rings?  So it seems that the conversation with the iron-worker has been rather cursory. Questions that needed to be asked and answered at the outset had not been thoroughly considered.

Fortunately, these details will now be addressed, issues solved and finished product all as it should be with proper extension past the actual window opening, matching rings to the iron rods, and a stout enough rod so as not to require a center support – an element to be avoided if at all possible. Whew – caught that one before it was too late!! (Watch for the installation of the hand-forged rods and custom draperies in the next few weeks).

Paint colors often wait until other decisions are made. I have mentioned previously that we usually pick things that have fewer options. There are more paint colors than anything else in our design world with fewer fabrics and even fewer rugs. In that order, we might pick the rug first, fabrics to build upon it and paint colors to bring it all together. Not necessarily – but that is a pretty good example.

Starting with an existing hardwood floors well preserved by decades of wall-to-wall carpeting, we discussed the desire to create a colorfully transforming interior and opening of the space to better connect the kitchen with the living area.


As we met to hang artwork, discuss iron drapery rods, custom chandelier and finishing touches, the clients remarked that this was so exciting to be nearing the end of this dramatically colorful transformation that so nearly has transported them back to Guatemala where so many fond memories have been established over the years.

Well, back to patience. It’s a virtue and I often struggle to practice it. I tend to be overly eager for instant gratification.  But patience is very important when creating something of value and timeless appeal.  Go forth and design your dreams with all the patience to make them come true!


Living Room Transformation

As an adjunct to last week’s story about the progressive young couple and their dramatic kitchen remodel, I thought I should finish the subject and tell about the adjacent living room transformation and comfortable family room on the lower level.

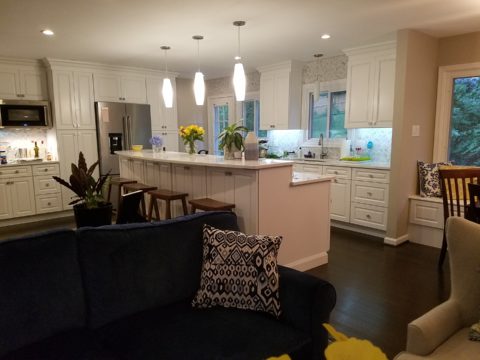
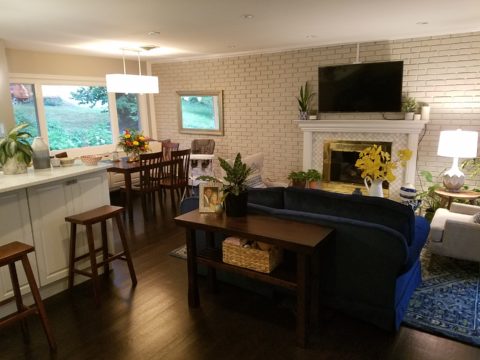
When the kitchen grew to become the focal point upon entering and the bar counter expanded into the living area, it reduced that space to now become a comfortable sitting room for guests to gather or the family to relax while activities are  brewing in the kitchen.

Looking through to the dining room where a built-in storage bench was added along the window wall, offers additional seating. A new fabric-shade chandelier softens the light levels. All lighting in this remodel are on dimmers.

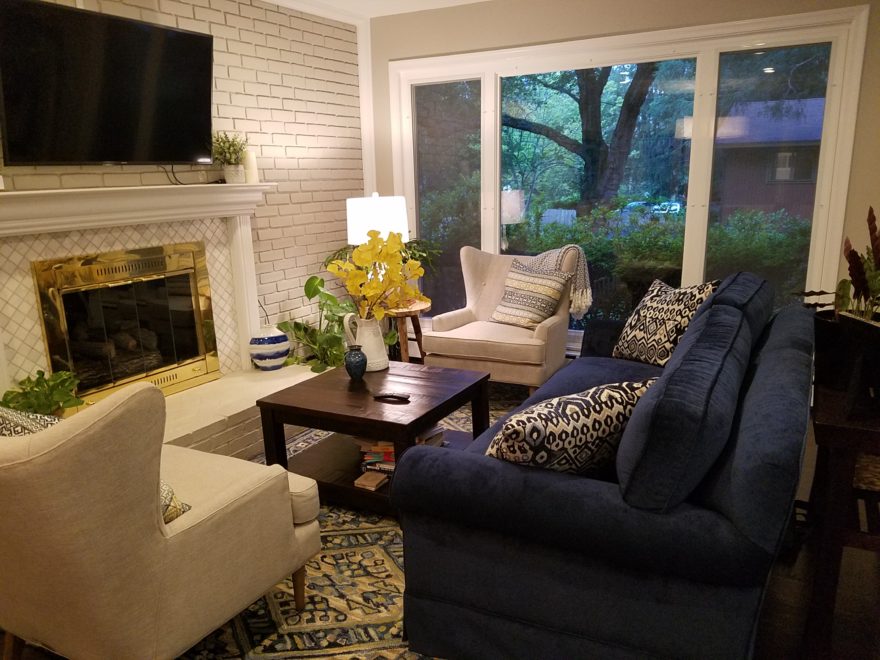
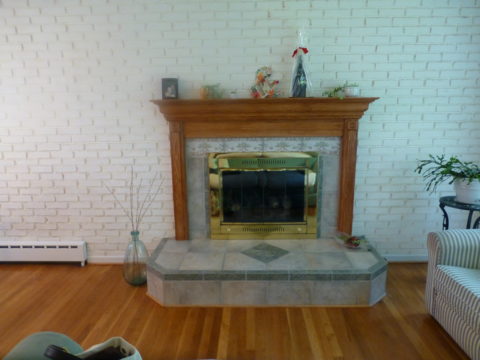
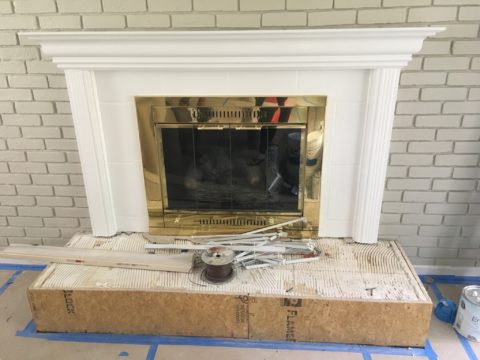
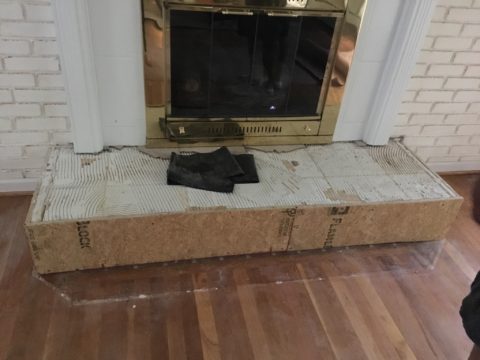
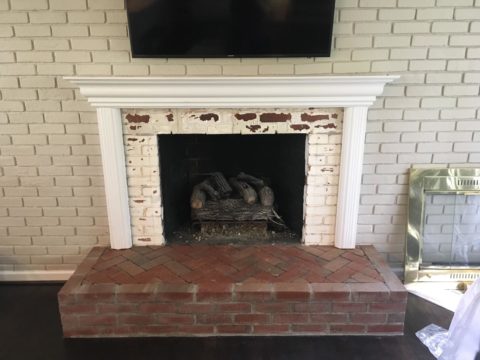
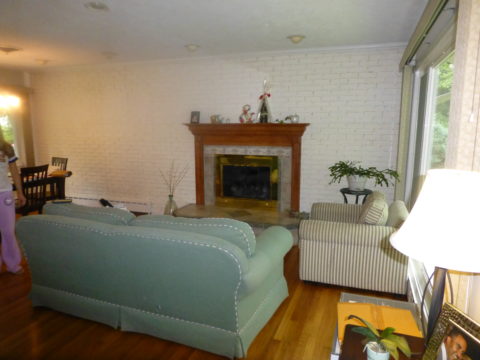
The former white brick wall had gently rubbed edges to suggest a distressed condition exposing the red brick beneath.  The fireplace had an unrelated golden oak mantle and surround with insipid tile inset also used to cover the hearth. The tile was a glazed faux marble with a Victorian design accent feature.

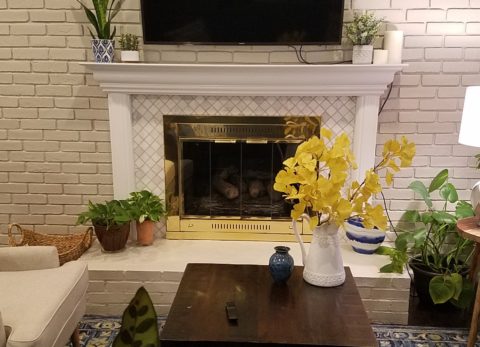
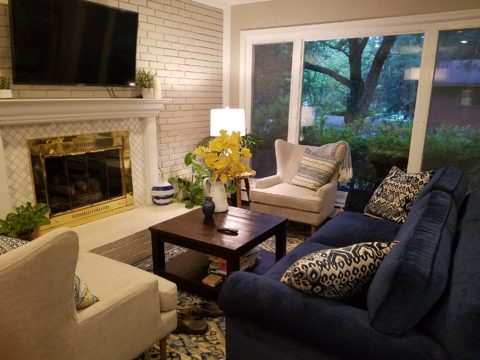
By simply painting the oak white to match the rest of the wood trim throughout the home and also painting the brick a soft taupe/grey tone, the look was instantly transformed. But they still had that awful tile…so here’s a design tip: to buy time either while you decide or until you save-up for the next phase, paint the tile away!!! To accommodate a new TV that is to go over the mantle, the wood surround was shortened. Notice the extra piece of wood trim that was removed to lower the mantle.

The hearth was removed and rebuilt (without the cut-off corners) with brick and painted to match the wall. Lucky for them the hardwood floor went beneath the hearth – so when they modified the size, they didn’t have to patch the floor! Tile was removed and replaced with 2×2 mosaic Carrara marble to coordinate with the herringbone mosaic of the same marble in the new kitchen backsplash/wall (see last week’s  blog).

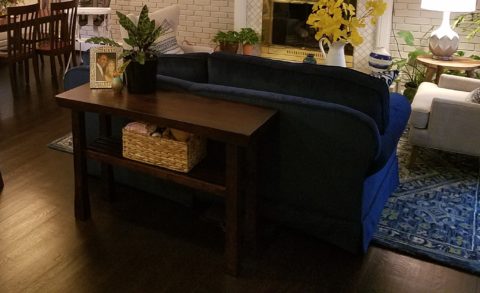
A sofa found, for nearly free, was in good shape and reupholstered beautifully in this plush, durable navy solid.

The classic blue and white motif was punctuated with organic yellow.

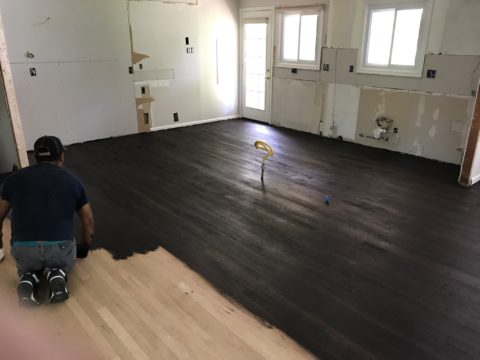
The newly refinished original hardwood floors – taken from a golden oak finish to a rich espresso/walnut stain…

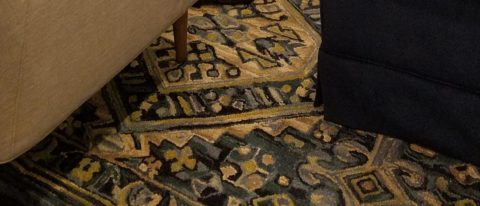
…with the blue and white wool hook rug creates a handsome contrast. The rug actually “reads” blue and white, but upon  closer inspection has warm khaki tones, soft turquoise detailing and is quite complex.

This revitalized cozy ambiance of this new sitting area/living room is perfect for this growing young family!

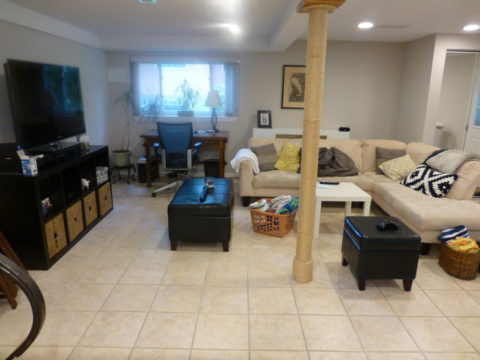
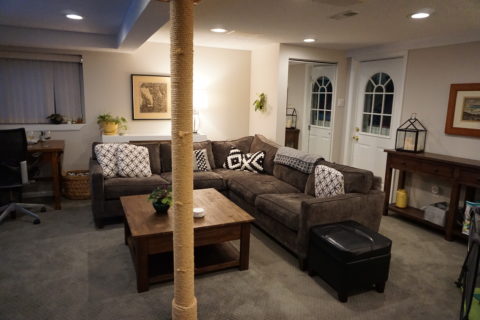
And for a more expansive gathering space, the lower level family room received a new sectional sofa in a durable charcoal fabric and a low-pile small diamond patterned wall to wall carpeting to conceal what had been cold tile  floors and make a comfortable room for all seasons!

Purrrrrrhaps someday they’ll have a cat to climb that crazy rope-wrapped pole!!!!!