Young Family Prioritizes Remodel

We all know that traditional housing floor plans are changing to maximize smaller footprints. The result is a more open layout. This preference, often seen in “loft” design where warehouse space is converted to living spaces – without many walls and with an eye on the interestingly industrial finishes of the existing space.  But this same concept applies to new home construction for starters or down-sizing to smaller homes and is definitely applicable in remodels of existing traditionally compartmentalized plans.

Lifestyles too have opened kitchens. Although often to maximize smaller spaces, they are also more open as cooking is more celebrated in the home and related activities are shared.  Kitchens have truly become the fulcrum of family life. So when this young  couple purchased their first home, the vintage 1960s split-level plan was not quite right.

The kitchen was a narrow galley-style tucked into a rear corner of the main floor. And although it had recently been remodeled, it was confining and not conducive to entertaining and growing a family.

The point of arrival was an open space with entry wall about 12-15 feet from the front door. To the right, the living room had a focal fireplace and the adjacent dining room made an “L” back to where the kitchen was tucked behind that previously mentioned entry wall.

So this progressive young couple thought way beyond merely  opening the wall creating a pass-through bar to better connect the kitchen to the living spaces. No, they said ” Let’s blast this baby out of here!” And with that they proceeded to visualize the point of arrival being the actual kitchen in full-view as guests arrived. Hello!!!!!

The former kitchen containment was revealed to present the new elongated welcoming bar counter-top, luminous glass pendants and supplemental recessed down lights, to meet and greet all who pass through their front door! Original hardwood floors were refinished in a dark walnut stain.

Their priorities were to create a larger, more functional kitchen with a clean, modern look and feel while making all open to better interact with their soon-to-arrive baby!

The clean white on white finishes in the kitchen are fresh and crisp. Lest you think they saved and added to existing cabinets, they did not – all cabinets are new!

And this might be considered gilding the lily, but we added a splash of artistic expression when we hand-painted the small squares in the new brushed stainless cabinet pulls to give them a bit of extra pizzazz!!!

By using the Carrara mosaic as a wall-covering, rather than merely a back-splash, the walls get a truly finished built-environment “read.”

The upper bar counter-top bows at bar-level to offer a more comfortable conversation scene.

The living room became a cozy sitting area off this wonderfully open kitchen and dining area.

Existing brick walls were softened with a grey-taupe to contrast with the white trim making it POP!

The fireplace now has a complimentary new Carrara mosaic in a diamond pattern to coordinate with the new herringbone mosaic of the kitchen wall.

And baby accoutrements adds colorful animation to the beautifully finished scene!

“HELLO!” they say. “Welcome to our beautiful new home!”


Mirror Mirror on the Wall – Do You Even Notice Me at All?

Designers use tricks, “trompe l oeil” – ever heard of it? Parlez-vous français? It’s a trick of the eye – and how handy is that to create an effect? Often murals are painted to give the illusion of depth or a scene that is not real, yet might fool you into thinking it is.  Similarly, mirrors can create the illusion of dimension and improve spaces – especially small spaces or rooms that feel particularly one-sided. Like the idea? Want to hear some fun designer tips?

Large decorative mirrors expand the dining space in this restaurant. Faux finish  composite material give the impression of hand-carved wood – not!

Mirrors in the Bath We know mirrors are commonly used for practical purposes such as bathroom vanities. They can be simple over-the-sink functional elements or framed versions for decorative pizzazz.

Below,  a built-in tiled surround is nearly a full-wall treatment but with a little relief.

an a more encapsulated/inset mirror shown here

or full wall-to wall treatments that “go away” leaving only the illusion that the room continues beyond…you don’t really “see” the mirror, you see the illusion of space that it creates.

Bathrooms can be intimate spaces of decorative interest


or expanded to be grand spaces of extraordinary volume.

Dining Room Décor and Expansion Other rooms of the house can benefit from mirrors too. Often mirrors are placed in dining rooms over buffets to once again give the illusion of space to a room that is often small for the number of furniture pieces and people that gather there. It is an opportunity to add a decorative element as well as expand the space.

Mixing Geometrics A rectangular console table, sideboard, buffet or dresser enjoys the contrast of a round mirror

Mirrors as Artistic Accessories There are also fun additions to existing pieces like this framed grill-work which is given a new element of interest by adding a mirror behind the iron, set into the frame. Depth and interest instantly change the nature of this decorative wall piece.

Yes, the mirror becomes the decorative focal point. Large framed mirrors can become just that – a great focal point AND provide an illusion of depth. Notice too, the entire wall was tiled behind this focal piece adding further drama and interest.

The limitless options for frames and shapes makes mirrors a valuable accessory similar to a piece of artwork!

Kitchen Surprises Here’s a little trick…rather than looking into a tiled wall behind your cook-top, insert a mirror into the back-splash! It will give the illusion of an opening passing through to another room!!

Wish for a Window Add a “window” where you have none. A “fake window” adds dimension to an otherwise encapsulated interior space. This can be with an actual window to which you add mirrored glass to replace existing or merely a grouping of mirrors to suggest a window to the world.

Embellish with Crafts Here we added white shells to have a little DIY fun!

Make it BIGGER – Make it Better Expand your living space, add value and create perceived square-footage!! Truly enlarging a room with a trick of design expertise is to know where to mirror an entire wall to achieve that illusion of a much larger space.

Consider what is being reflected. You won’t want it reflecting an open bathroom door necessarily…You can even enhance the area that will be reflected to maximize the effect.

Theatrical/Dramatic Lighting Effects and Mirrors

ART & Technology As is true with our fast-paced word today, the art of creating mirrors has gone from fine craft to commodity. Phenomenal prices are now available for what once was a luxury item.  Certainly, there are exquisite hand carved, fantastically finished and even gilded wood frames still being designed and handcrafted by artisans around the world,

but the offerings for production pieces of man-made faux wood and other interesting composites are now on the market. Beveling used to be an art. It was performed by hand (and still is – but it is a lost art and it’s not as necessary a trade with the advances in technology to achieve the detail).

Difficult to see the hand-beveled work on this amazing hand-carved mirror.

The effects of a bevel either on the mirror within a frame or here as a frame itself, bevels add detail of angular reflection that add interest to a mirror’s single-plane depth providing the angular plane to reflect other surrounding facets of the scene.

Mirrors are one of the most versatile and effective design components. Look at them, look into them, use them, play with them – they will expand your world!!

A Tale of Two Kitchens

Often with remodeling…it’s both the best of times as the anticipation for the exciting transitions is ignited, but since it takes “breaking an egg to make an omelet”, it is often the worst of times too as the demolition and displacement begins. Thank you Mr. Dickens, you set forth a mastery of profoundly conflicting opposites that I have used here which describe so many design project experiences so well.

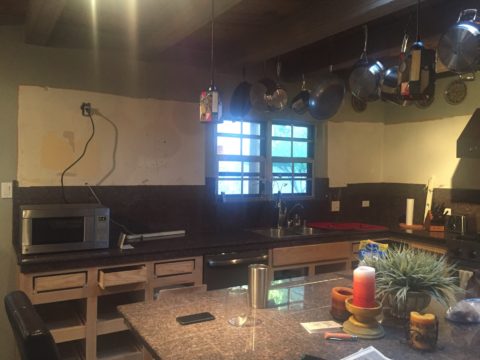
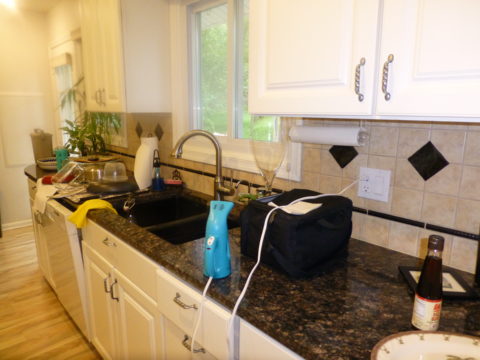
Currently, in our shop, we are designing almost parallel kitchens. They are at nearly identical beginning stages. The owners share little in common, if anything, except perhaps the age of their homes. The sizes are similar, yet one is a bit larger offering different options for design consideration.

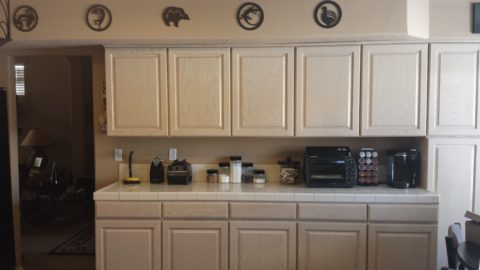
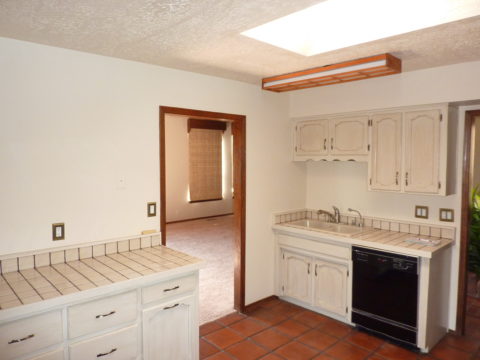
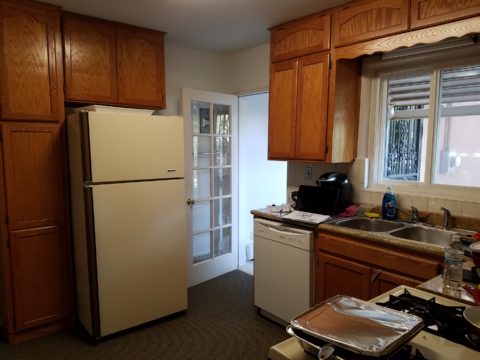
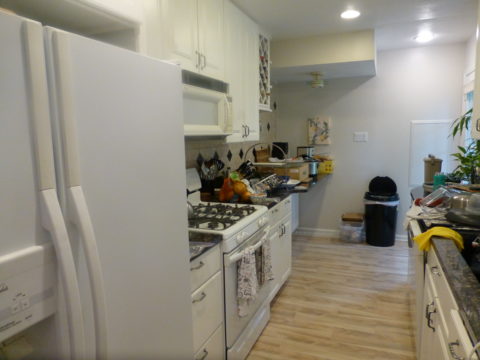
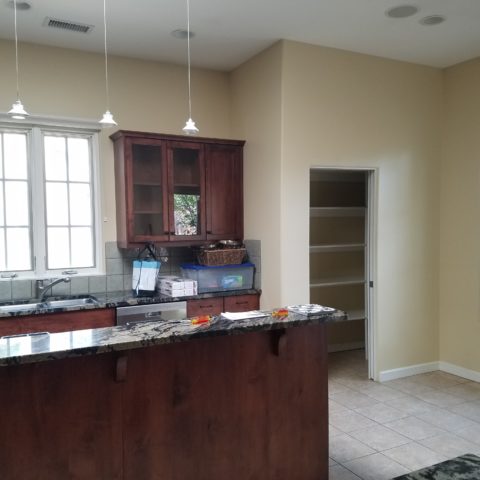
Both kitchens had been remodeled, from their originals, somewhere in the 70s and possibly 80s. One installed traditional drop-panel golden-oak with a curvy valance over the sink.

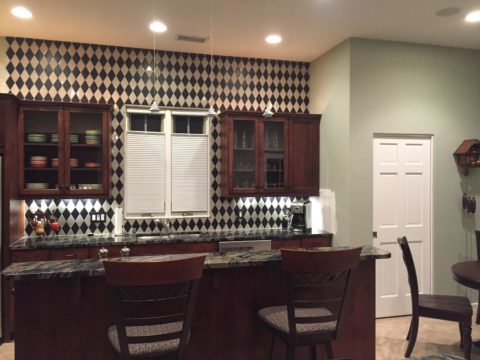
Brilliant blue paint to come will transform these re-purposed/salvaged cabinets with new personality!

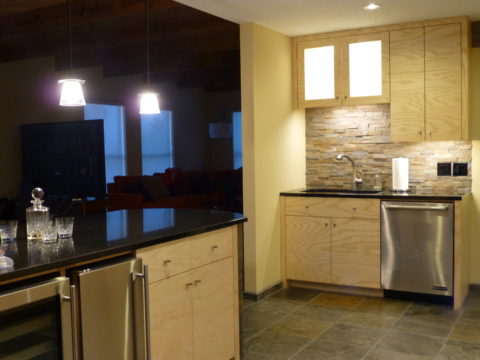
The other flat panel radius corners for a “modern” look – also in lighter bleached oak.

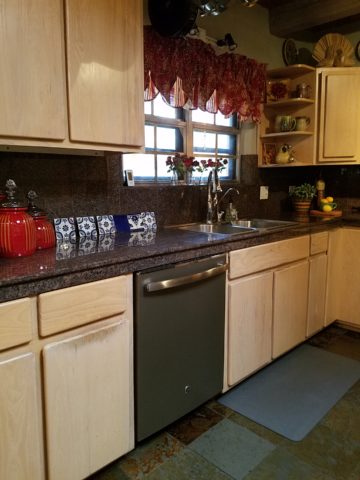
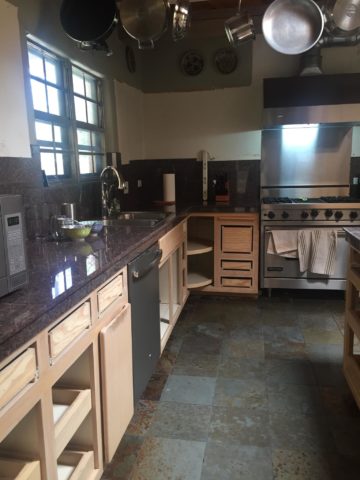
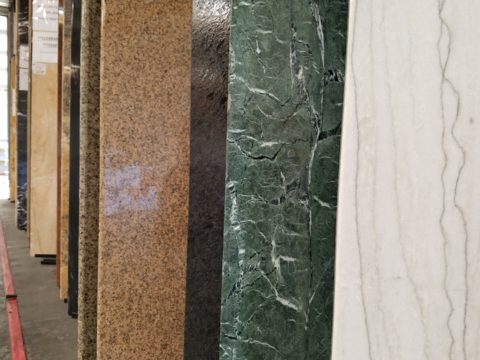
Each set of cabinets were in good condition opening the conversation to salvage versus replace. Certainly we encounter cabinets that have been destroyed by hard use and neglect, but when the boxes are reasonably well constructed – or enough so that some reinforcement will enhance their weight-bearing and usability qualities, we often take the route of refurbishing. (NOTE: As a DIY, this requires much research to insure that a new finish will be flawless, durable and easy to maintain.)

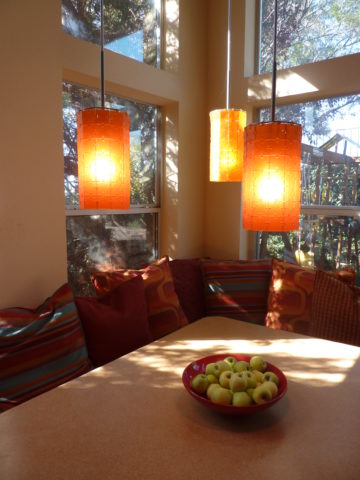
The beginning for each project propelled forward with distinctly different ideas. One to follow the original character of the home’s raised panels painted white doors and trim throughout, the other seeking an entire transformation to a multi-colored fiesta of fun!

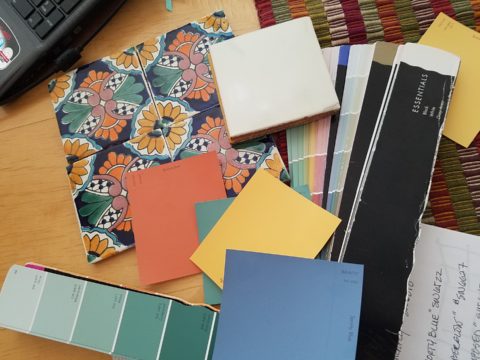
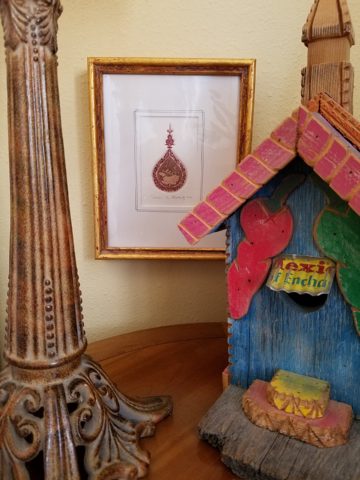
Mexican Talavera tile with Mexican terracotta Saltillo for the kitchen floor adjacent to white oak narrow plank original tongue and groove floor recently unveiled from beneath wall-to-wall carpeting.

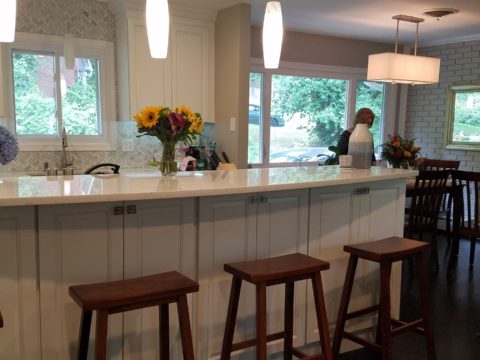
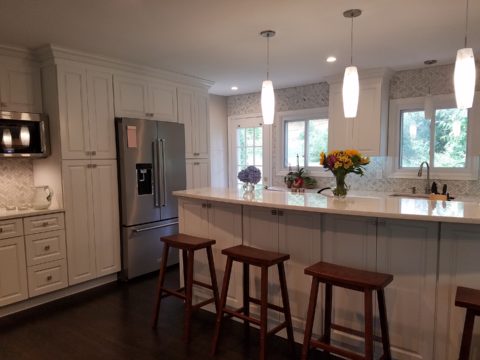
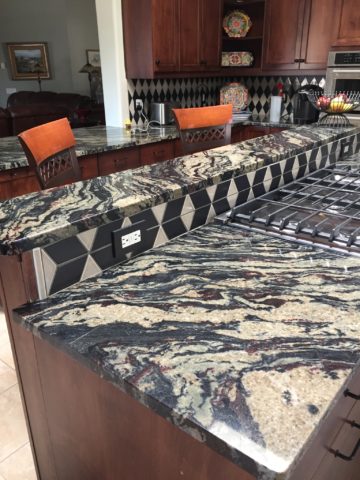
Now that’s not to say that the more traditional soon-to-be white, raised panel kitchen will not be full of fun – as it will ultimately have a “party pass-through” connecting the kitchen through to the patio beyond and counter-top that transitions seamlessly from the sink area inside straight out to a party bar! A custom-sized double-hung window will open the scene in the warm weather months. We know that it’s going to be classic with a tremendous twist of fun!!!

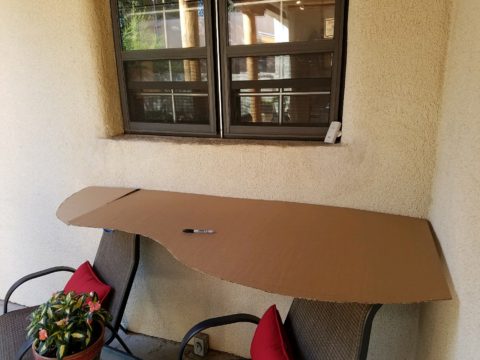
The patio level is a step down. The kitchen counter inside will flow through a new window that is lower – opening directly on the countertop surface – providing bar height outside.

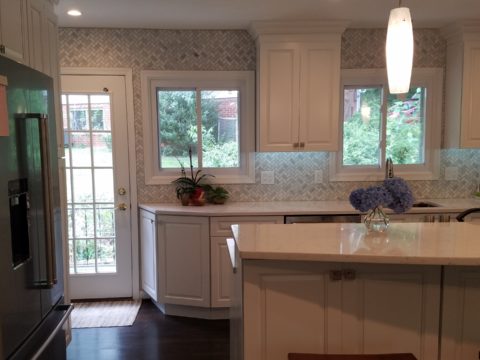
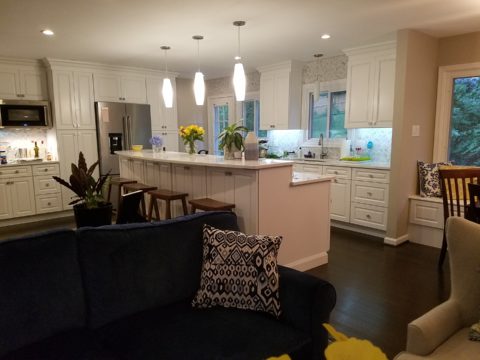
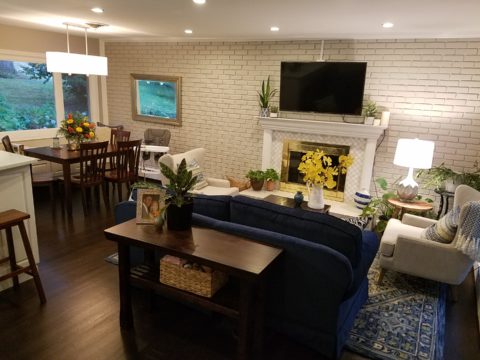
Both kitchens are being “opened” by removing portions of walls which have isolated them in years past. By removing the walls, additional daylight will be evident, a perceive expansion of the space will be realized and a connectivity to the other living areas for personal and entertaining enjoyment will become a reality.

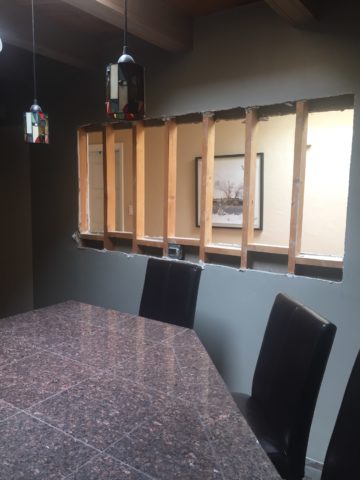
Breaking through to daylight from the hallway skylight – adds not only light, but incredible depth and dimension!!


This is soon to open into the living room and large picture window beyond – a peak at the mountain will be an added reward.

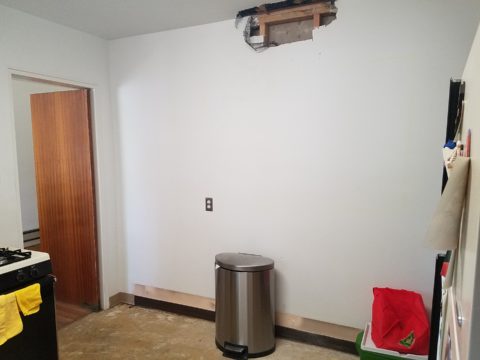
A bit of structural modification to both are resulting in minor delays for permitting processes – other aspects of the work will continue, in the meanwhile, like the continued selection of finish materials, lighting fixtures and cabinet modifications.

In both cases we have discussed the design challenge of existing materials. I have found over the years that often, when confronted with existing conditions you might not have set-forth to include, they add character and an element of unselfconscious cool-ness. It occurs when certain conditions or materials are in place that you might not have chosen or planned into the design. Designs from scratch, that are too well coordinated or too perfectly planned, can lack that element of surprise or unexpected interest.

The first home had slate tile floors with a unusual mottling of colors leading with a cool aqua and including charcoal grays, smoky blues, ochre and rusty tones.

The other inherited period hollow mahogany doors all trimmed with white molding and original cabinetry. Do we paint them white – which would be the customary response or leave them and invite that element of “oh you kept these doors?”

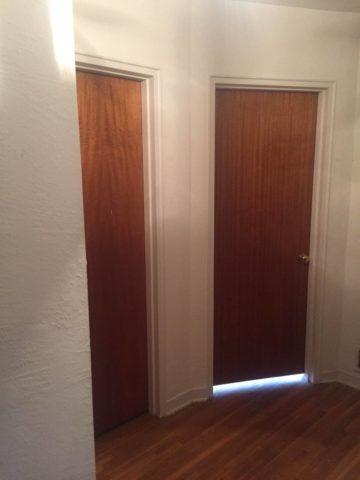
In this second example it would be easy to “neutralize,” if not replace, the dated doors. However, the homeowner, having many fond experiences in Guatemala, appreciated the great condition of the tropical wood, grain and finish – so we will start without painting them and re-evaluate down the line as the new colors and finishes splash their celebration over the scene. As the transformation takes place, the decision regarding the doors can be re-evaluated.

This is a prime example of the design process. Often there are elements on a project that are a puzzlement. The great thing is that often the decision to remove, modify or leave unchanged can wait until the scene evolves. If you have the luxury to design as you go, you will have more opportunities to consider context, contrast, new options etc…that are often obscured by the overwhelming and often daunting task of visualizing the finished product.

Sharing the same vision is one of the hardest aspects of the design process. Full color architectural renderings, illustrations and even sketches go a long way in conveying the intent, but no two people see exactly the same thing through their mind’s eye.  During these preliminary stages of design concepts, nebulous ideas and imagined finished products, the opportunities for misconception are great.

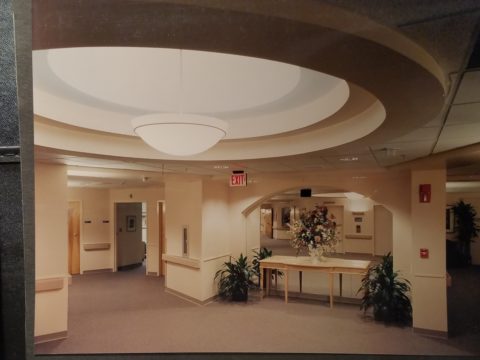
I remember a hospital project many years ago where the head nurse was wincing at our suggestion of maple cabinets, headboards and other carpentry details. She kept quiet, but we (the design team) kept hearing rumors that she loved the color scheme, direction of the interior design and all of its architectural interest and design finishes, yet she could not embrace our suggestion of maple cabinets. One afternoon once we had gathered the materials for a touchy-feely presentation of color boards and tangible design elements, she had this incredibly surprised expression and exclaimed that she had never seen maple that color – it was natural – like a blond, wood, basketball floor. She further explained that she “pictured” the dark reddish Ethan Allen maple furniture of her childhood in her grandmother’s house. Needless to say, she had been having great difficulty accepting its inclusion into a design scheme of smoky lavenders, pastel clay tones, creamy whites, warm terra cottas and maple wood (in our mind’s eye – natural – and in hers, what she always thought was natural maple – dark reddish brown!!).

Communication is a powerful tool… often major decisions, opinions and actions can result in miscues due to miscommunications. To avoid such misunderstandings take care to provide thorough explanations along with tangible samples and other visual aids.

As we progress with these two kitchen remodels, we look forward to dramatic transformations, exciting phases of design work, some anxious anticipation, and ultimately four happy clients each enjoying their personal spaces, reflecting their lifestyle, home style and distinct personalities.  Watch for updates and before and after dazzlers!

Selecting Stone

Stone. How do you select your stone? How did we become so fortunate to have so many choices? So many that we “take it for granted” or with a bit of stone humor, “for granite!!”

I’ve previously noted that trends come about as a result of changes in technology, availability, or the mere on-going need to keep creating and to keep the economy moving forward with the insatiable need for the newest – whatever.

In the early last century, plastic laminate – commonly known as Formica by both brand and composition – was invented and, over the ensuing decades, grew in color, pattern and application. It was THE counter-top material for cost and availability for generations and is still widely used today expanding its reach with quite remarkable textures, colors and faux finishes.

Stone – natural and timeless has been the luxury material – an alternative for only the rich and famous or those fortunate enough to live next door to a quarry. Stone has been the heart and the natural art of the world’s structure – the fantastic geology of our earth since the beginning and has formed with astonishing beauty and variety with the evolution of the planet. Quarried for centuries, ancient civilizations installed magnificent structures in close proximity to the source – natural resources with monetary resources at hand resulted in everything from edifices to interior finishes and furniture.

Voila – then technology and supply chain logistics made the cost and availability more accessible bringing stone into modern kitchens everywhere. Stone transported from Brazil, China, Italy and nearly every pocket of the planet offers a world of choices for YOUR counter-tops (and more). But with so many choices, how do you chose?

This will be a focal point of your kitchen. It is either the neutral against other lively patterns and textures or it is a matrix of color or perhaps a bold prominent swirling, sweeping statement of fantasy and magical movement. It is valuable to remind yourself that you are studying geology. Nature formed this. It is nature’s art.

Even in a tight matrix stone, irregular surprises of deposits can occur. The choice is to capture those statements adding character in your countertop or dodge them in favor of a more uniform, expected appearance. You either appreciate the wild nature of the seeming imperfections and regard them as fortunate finds or your prefer the expected uniformity of the overall look of the stone you have selected.  To accomplish this one way or another is to select your slab.

When ordering from a big box store, you often do not have that opportunity – they draw from an assortment of stocking sources and you won’t have the chance to pick your slab – just your variety. This can result in happy or not so happy surprises. Stone is a natural material.

Stone can be finished in a variety of textures from very highly polished to honed and even rough leather-like textures. These features are further details and enhancements that will make a significant difference in the overall style and impression of your design decisions. It’s a big investment – study your options and combinations of adjacent materials.

Samples of stone are just that – samples – cuttings from a slab – but no two slabs are alike. The sample you hold in your hand and place against cabinet and tile options might have a streak running trough it or be primarily one color that you picked because you loved – but the actual slab might not be that same composition.

The closet thing you can get is to have consecutive slabs cut allowing amazing pattern matching and anticipated designs. But it will slowly morph away from the specific design as the slabs are sliced illustrating the natural evolution of the stone’s formation.

When you have the opportunity, pick your slab. You can then see the actual details of the stone and more specifically you can layout your countertop template directly on the stone to know exactly what will occur where and how the finished countertop will look. In any case, a natural stone surface is a unique work of art!

Here, a unique warehouse of pre-cut slabs all 2, 3 or 4 x9 feet. The cost is reduced due to bulk fabrication. Field cutting handles most installs while other fabrications shop can be engaged to create custom installations.

Every piece of rock extracted from the earth has its own character. From color, pattern, and mineral specks, enhanced by the process of cutting and polishing. Like a stone washed by rain, the colors are more rich and brilliant…that same stone dried has a softer dull appearance. This distinction between shiny or mat, polished or honed is another choice depending upon the context and look of the intended design.  Knowing what a natural thing can become either used in its raw state or enhanced to modify its appearance is the key to more choices.

BONUS offer!!! You can have your island in a different stone for contrast or complimentary reasons!!!

Once you’ve selected your stone, you then pick the edge detail. A few options are – square for a clean modern look,

radius for a more durable edge and softer statement. Notice the seam that results from laminating two thin slabs for a larger bullnose  subtle and if done well, not noticeable without close inspection.

Broken edge for the rough natural look – granite (the tough choice) and also shown here, sandstone (not the best choice for a working counter-top, but rustic and great for wall caps, benches, mantles and hearths.


An ogee edge for a more formal detail.

Natural stone is durable and easy to maintain. Have no fear! It tolerates heat and is terrific for transferring hot baking pans or dishes from the stove or oven. You can chip the edge with a strong blow – but otherwise will not be easily damaged. The stain issues are nearly non-existent. While some stones are more prone to staining, others are more imperious and with improved sealants, most are warranted for anti-stain. Furthermore, stains – IF they occur, can be usually be removed/restored/refinished on-site. The only other concern might be susceptibility to acid etching which varies with differing stones. As is true with staining, these areas can often be repaired on-site in your home.

If you want to be certain of your stone’s properties prior to purchasing, use a sample and apply the dealer’s suggested sealer. Put test patches on it with things like tomato paste, citrus juice, oil and wait a few hours…wipe the sample clean and you’ll know how it responded. Each stone’s resistance to staining, scratching or etching varies with the source, composition, color and finish.

Now natural stone has a lot of competition from man-made materials, solid surfaces, engineered stone, concrete…they vary according to their fabrication, composition and finish, but most do not possess the same durability and impervious properties of natural stone. Investigate each on its own merits. There are often times when design decisions favor the aesthetic of a man-made material. As always, make your decision weighing the pros and cons.

With so many choices…how will YOU decide?


:


10 Tips for Remodeling: To Improve and Enhance

I’m currently working on an urban loft apartment.  The criteria with which I was presented, upon our first meeting, consisted of three items: One – to enclose an open bedroom to provide privacy, Two  – to provide alternate access to the shared master bathroom. (There is also a powder room, but the shower and tub were only accessible through the master bedroom), Three – because it is a relatively small footprint with voluminous tall ceilings, he was hoping to create a small second tier for additional square-footage.  I understood these items to be his intended “improvements.”

While on-site, at the first meeting, it was (and is always) impossible to limit the observations to only those isolated areas of concern without seeing all else that is occurring around the space.  Therefore, I consider the extra comments that I offered for minor changes to be “enhancements.” These are things that have not had or do not have  priority in the eyes of the client and might have even gone unnoticed forever. Items such as adding a wing wall at the front entry to screen view from the door through the kitchen, concealing a new tall closet of matching cabinetry directly behind the wall to add storage to the kitchen,  add a clerestory window and bookcase with cabinets to the new wall between the master bedroom and living area for borrowed light and additional storage!

Occasionally these offerings are met with a shrug, hmmm or a “maybe” and not really considered to be of great value, but more often than not they are greeted with exclamations like ‘Oh, I never would have thought of that.”  “What a cool idea!”  “I would love to have that.”  And it is with this enthusiasm that my client responded.

So when considering remodeling or identifying the primary improvements needed, begin with the priorities then layer design details of additional enhancements and you will create a master plan that can be executed over time in phases in a preferred or practical order of priority.

1. Begin with your list to improve the function and enjoyment of your environment.

2.Prioritize the list and guesstimate costs to establish a starting conversation    regarding budget.

3. In addition to cost – consider pairing like-kinds of things together such as adding or removing a wall which involves framing, sheetrock, texture, paint – it might be cost-effective to do all items related to these trades even if they are not the same priority.

4. The distinction between improving and enhancing is a fine line because improving does enhance, however I consider improving more practical and enhancing with embellishments that are less critical, but make further improvements and enhance the quality of the space. Such as crown molding, improved base trim, unobtrusively installed mirrors, windows, updated hardware, etc… https://bit.ly/2HCYrU

5. Storage is always welcome. Look for opportunities to add cabinets, vertical spaces to maximize your footprint, second-tier countertops, raise cabinet heights even furniture to provide additional storage. https://bit.ly/2GZglUa 

6. Passing daylight through to interior spaces is more common in offices than in residences, yet for the same reasons of “borrowing” light in commercial spaces, skylights, vertical slivers of glass, transoms and clerestories are valuable assets when it comes to bringing daylight into pockets of darkness. https://bit.ly/2HCddKU

7.Evaluate your existing lighting. Adding dimmable ambient light to rooms to supplement existing down-lights such as pendants in kitchens, translucent lamps shades on table and floor lamps, even well-concealed under-cabinet lights will add control and mood enhancements. Spot light wall art and sculptural pieces, illuminate corners with up-lights (up through trees, behind chairs), and consider changing to LED lamping (bulbs) for longer-life, cost -effectiveness and a full range of colors!

This up-light filters through the plant from behind the chair casting interesting shadows and illuminating an otherwise dark corner.

8. When considering new flooring know your needs as there are so many options for soft under-foot, freeze-proof to carry outside, ease of maintenance, durability, non-slip, and of course the many aesthetic preferences.

This interlocking vinyl floor has remarkable graining look, color and texture and provides soft “give” underfoot. These new luxury vinyls defy our early perceptions of faux finishes.

9. Stacking laundry machines have provided terrific opportunities for added space in laundry rooms, more cabinets, counter space, laundry sinks, craft areas and more! https://bit.ly/2HpkKih

10.Opening walls enlarges spaces – even a peek-through, but also create the interest of depth and layering of dimension, color and light.  https://bit.ly/2GZrMLj

“Wonder Time” & Creativity

I love the creative process. I love darting from idea to idea – the random electric jolt that results from spontaneous concepts that will create something wonderful, if not significant and the gratification of the final product!

That is interior design – creating something that enhances an interior – an interior (and exterior) space and all the elements within that serve people. Designing an interior which solves problems, increases enjoyment, and hopefully has staying power is the goal. Unless intentionally transient and intended to be impermanent, offering a design that has staying power transcends trends and creates without a framework of only the present.

If you are a client, potential client or an associate in this crazy, wonderful business don’t you ask yourself, “How does creativity happen?” An idea? A need?

So the idea occurred on-site as I sketched a pattern that I thought would be the perfect statement and backdrop for all else in the house.


The kitchen had some expensive elements that were not practical to change. Existing cabinets, natural stone counter-tops and ceramic tile flooring all had to stay.


The original sketch realized in an nearly black, charcoal and cream tile pattern with an added opportunity for the client to turn an error into artistic expression.

Well this client asked and made a creative discovery: “George (young-adult son) Juan (tile installer) and I had a lot of fun figuring out…the tile work behind the stove…That was supposed to be solid black..didn’t even get ordered…and George worked with the left over pieces and designed that (solution) himself!!!! I think it’s amazing and will always be so special bc of how it came to be!!”

“Basically, what happened was we ran out of the tan colored tile and only had some smaller-than-half pieces left from the cuts.” Resulting in George’s creative solution!!

Personal experience with years of working with a variety of people has shown the extraordinary difference in how each individual perceives and proceeds through the design process and related creativity. For some, the design process is an exciting adventure to be navigated with or without the aid of an exhibition leader (professional designer) to explore and travel the amazing paths of color, balance, detail, elements and combinations. For others it is not only not an exciting adventure, but one of frustration, anxiety and sheer obligation to complete a necessary task(s). Like a project with a deadline – finite and compulsory. Where’s the joy?

To design for others is the name of the game – the professional practice. In order to effectively design for others, one must have empathy. To extract a client’s wishes and create for the express purpose of making them look good, feel good, enjoy their environment, produce well and feel empowered all requires getting into their world. When you effectively do so with the genuine desire to make better, you empathize with their concerns, desires, sensitivities, and needs in order to design effective solutions.

How the brain perceives things and how sensitivities are realized, by different individuals, is remarkable. From our amazing, autistic grandson who finds wonder in very focused things from red cars to distinct shapes and colors, words and pictorial representations of them, to my dementia-challenged nonagenarian mother who clings to her very core appreciation for beauty and everything well designed; perceptions, sensitivities and levels of awareness continually astound.

Elsie de Wolfe a Renaissance woman of broad reaching creative ability said “I am going to make everything around me beautiful – that will be my life.” I wonder now if Mom knew of this amazing woman and heard this phrase that so reminds me of her, but sadly she would not be able to grasp or convey any possible recollection of that now.

I place an enormous emphasis on what I call, “Wonder Time.” Everyone needs time to “wonder.” We should all take more time to WONDER. It is in those moments that amazing things can happen. Realizations can be illuminated, ideas are formed and dreams materialize. It is a time for creativity. Do you take time to “wonder?”

For my once-toddler cousin, I remember the moment so clearly. We were on a mission to get something from the car. It offered an opportunity to have an mini adventure and explore the parking area of our beach house. We had descended many stairs to come out at ground level into the dark, shadowed carport of the massive exposed-concrete structure. It was spooky and mysterious in the twilight. As we made our way holding hands through the shadows, she all of sudden said “I wonder…” and was clearly deep in thought pondering something of our adventure that I wish  I could remember. But her phrase, “I wonder” is clear as a bell, to this day, more than 30 years later. I looked at her and asked “You what?” Wonder was such  an abstract word – a BIG word for such a little person – that it made me wonder what she knew about wondering!!!!! We dashed back upstairs and I announced to the gathered group – “She wonders!!” And began to explain our experiences in the depths  of the concrete carport. The blooming result, of that toddler full of wonderment, is today a highly observant and creative young adult.

Being inquisitive is part of that creative process – the “what if” of it all. I use that often in my design practice…”what if”…and “if, then.” It is not finite, it is a process that presents itself and a variety of tangents continuously.  Designer Todd Oldham observes that creative people are different and if you are not one, you will not understand the need to be creative. He knows that “as a creative person, you can actually survive off of your ideas.”

I agree. For some, creativity is a necessary aspect of being. It is a way of seeing. It is unavoidable and random. It is essential. It is life affirming and life giving. You either are one of the “creatives” or you are not. Yet creativity exists in each of us. It is not learned, but it can be honed.

The sensitivity that comes with this profoundly innate sense is sometimes an onerous burden. Being pleased by design details around you from nature to the built environment, from fashion to well-designed freeway overpasses, details matter and a great joy is the benefit. However, details can have the adverse affect, if not well executed. If they are not well placed or well designed details, they can grate and annoy, raise blood pressure and cause all manner of anxiety. It is an onus to be so sensitive to details. Poor lighting in a restaurant, imbalance of surface textures, ineffective or inappropriate colors  – it is all about that phrase “Beauty is in the eye of the beholder” and if the sensitive person is presented with jarring elements that they behold or consider to be in error, it can be most unavoidably disturbing.

The placement of this fireplace an bar so grated on my sensitivities that it was amazingly uncomfortable being in this space. A challenge for correcting without structural modification for sure!

Like creative writers and their critics, who have often expressed their strength in the power of words…for designers and artists of many media, it is the power of color, lighting, pattern, and composition.

Good design is never out of style.

Ten Tips on Mixing Metals – Making Sense of It All

How to mix and not mix metals….that is the question. Is it nobler to stick with one throughout or might I venture into a mix of metallic material? From switch plates to chandeliers, this question comes up all the time – and it’s fair. With all the options and the TRENDS saying one thing or another (probably to sell you something or to stand with a current trend fearful of venturing forth), it is a common dilemma. Here are a few tips to give you confidence in the  metal mixing mêlée.

  1. IF the door hinges are one thing – the handles should match. We often see pre-hung doors with brass hinges and a retro-fit of brush chrome or bronze – that is a no-no. 
  2. Is brass finish out – should I change all my hinges and door handles? In – out…no sooner does one hear that a finish is passé or they think they themselves are stuck with a less than new and trendy finish – be calm and carry on – to quote a couple of “trendy” phrases that drive me up a wall – it’s all good.
  3. If you have brass – embrace it! Fear not – it is all about the manner in which you present it – in what context you design with it. 
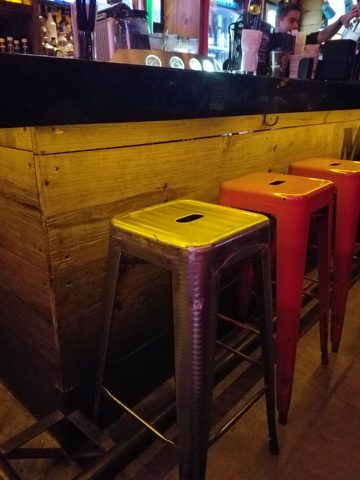
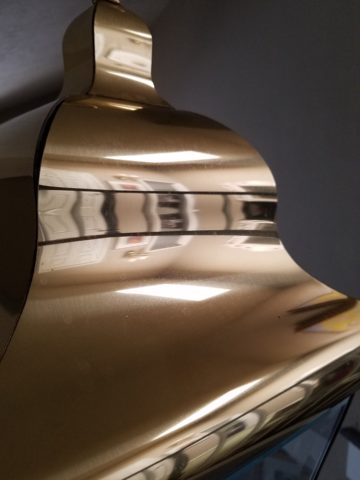
Following trends can be costly, unnecessary and unimaginative. Gold/brass finishes have been making a come-back in recent years. Sometimes it takes time for it to trickle into your purview. But the point is – good design is good design. So it’s not so much about if it is perceived to be good enough or right or wrong…it is if you can design around it and make it great. 
  4. Should you mix a bright brass chandelier with brushed stainless door hardware? 
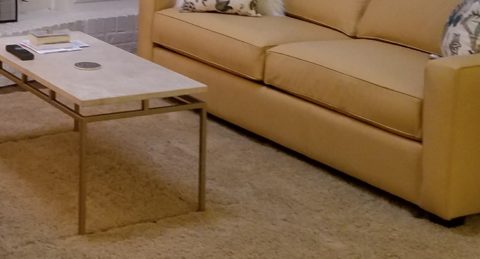
Probably not, but it is not so much about the mixing – it is that to make something like that REALLY work, the overall design would have to be so intentionally mixed that it in itself (the intentional mixing) is an art-form. 
  5. If a kitchen has brushed chrome detailing (appliance trim, faucet, etc…), may I use brass cabinet pulls?  The answer is YES. In some contextual situations, the language of the materials speaks in vernaculars that separate certain groups from others as though allowed to be intentionally different – as they ARE different. The great thing about knowing when to make statements in contrast – not conflict, is just that – knowing.
  6. The old world and contrasting contemporary look of Bronze, the stalwart wrought iron read of Black, the bling of Polished Chrome, the modern softening of the silver with Brushed Chrome or Stainless, the traditions and suggested opulence of Brass and Gold, the warm median balance of brushed nickel – guess what? They all have their place depending upon the context of design. 
  7. New finishes for appliances rule the kitchen. We thought we had it made when Sub Zero and others offered slots for panels for the fronts of appliances to enable matching of the flanking cabinets. But for those who wanted off-the-shelf units, beyond the merry-go-round colors from harvest gold to avocado green, burnt orange to basic white – the colors of the past were challenged by bold black and brushed stainless finishes – the new fab. 
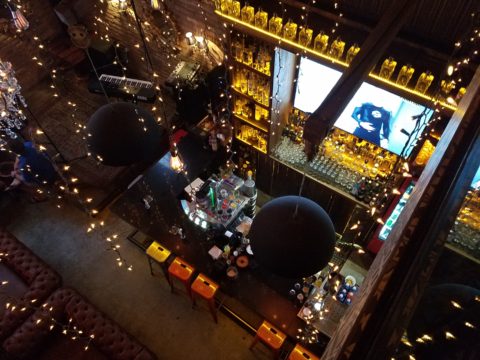
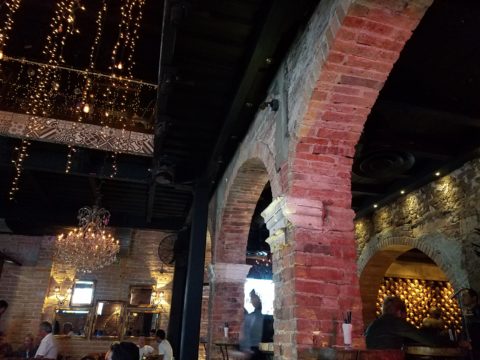
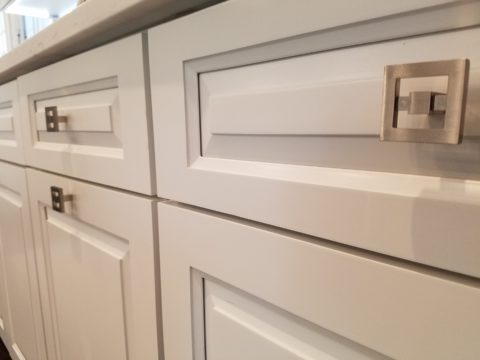
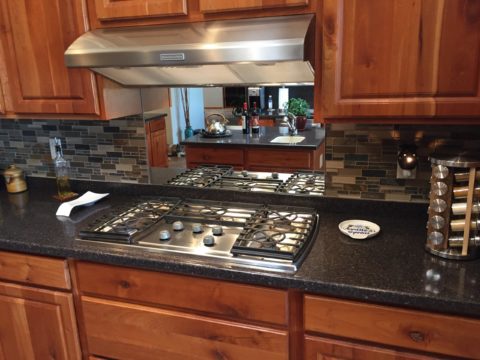
But now we are seeing matte black – and oh is that hot! Complimenting the concrete finishes and raw steel – contrasting with the brushed stainless – punctuating the trend of the clean commercial kitchen style of design. It is a bold yet soft new option for the edgy everyday kitchen.                                    http://www.foodandwine.com/cooking-techniques/look-these-beautiful-matte-black-major-appliances-refrigerator-ranges-ovens-and
  8. Ceiling fans present the same conundrum. Do they match the ceiling and go away? Do they hang suspended like a giant menacing propeller threatening to decapitate anyone who comes near? A black fan against a white ceiling might. A bronze fan in the middle of everything might appear a bit top-heavy. Ceiling height makes a difference. Surrounding decor makes a huge difference. Whether it is to be noticed or quietly disrupt the air for refreshing breezes without screaming their source – those are compelling questions. I cannot even address whether it should match the door handles – it makes me crazy. Unless it is an intentional focal point – like palm-frond paddles in a tropical bar – or industrial mechanisms intended to further that contextual theme, I think nearly all of them should visually go away.  Who wants the focal point of a room to be a fan centered and suspended from the ceiling to hover overhead and command the visual impact of a nose-diving airplane? Unless of course – that is the theme.  The fan designers would argue.

    Oh my – brass, chrome, bronze…where is the focal point? My eyes are darting everywhere!

  9. Fireplace grills…often found in polished brass – they can stay or be painted out – with a flat black that makes them fade into the void of the opening or simulate a cast-iron grate. They can be painted with a faux-rust finish – there are many possibilities – maybe even fire-engine red. The point is, once again, it is the context that makes it successful or appropriate – there is really no right or wrong answer here. 
  10. Tip # 10 is to take each offered finish as it comes, evaluate the context, find your focal point(s), what is the most cost-effective to change? All the door handles and hinges or the light fixture over the dining table? I say it in so many blogs…do not let trends rule your life. Have confidence in your own likes and comfort and go with it – good design never goes out of style. 
  11. BONUS TIP!! Do all my picture frames have to be the same finish? Do I have to re-frame my gold frames or change my maple to chrome or go black on all of them?  
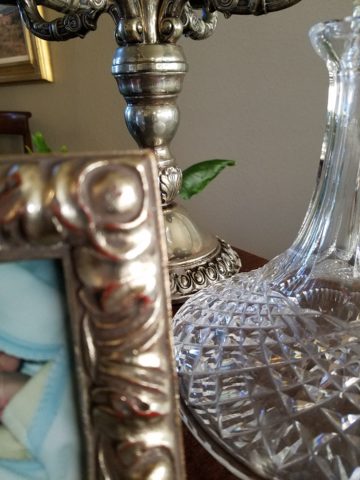
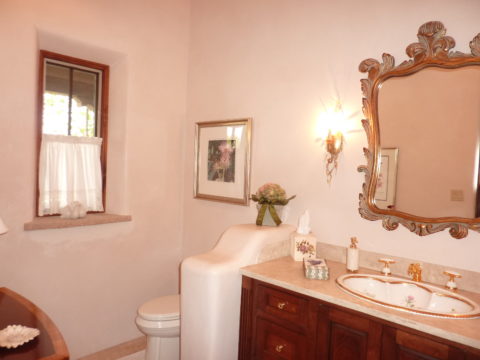
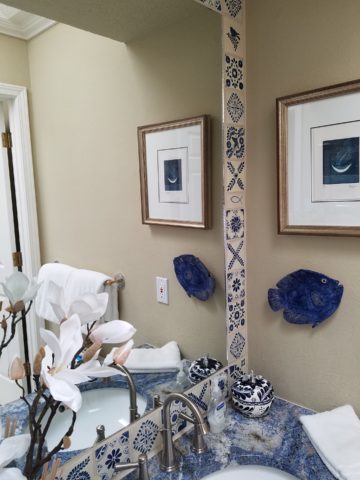
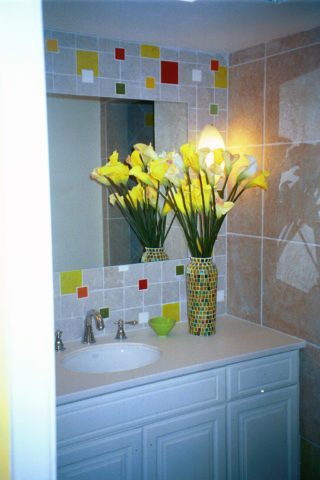
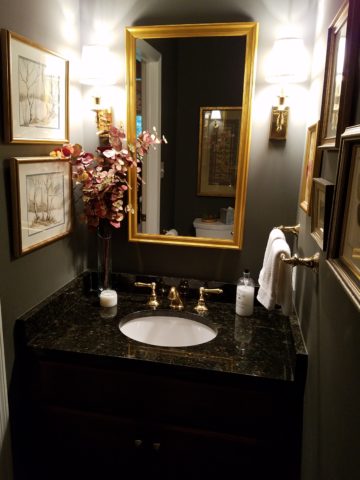
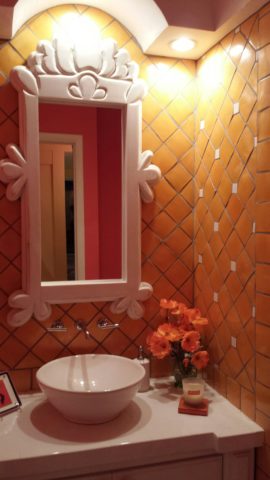
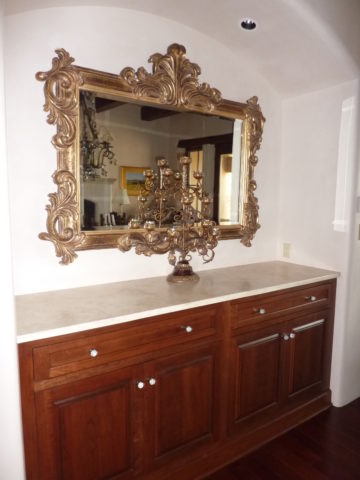
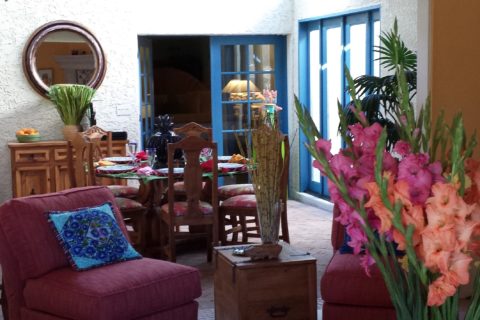
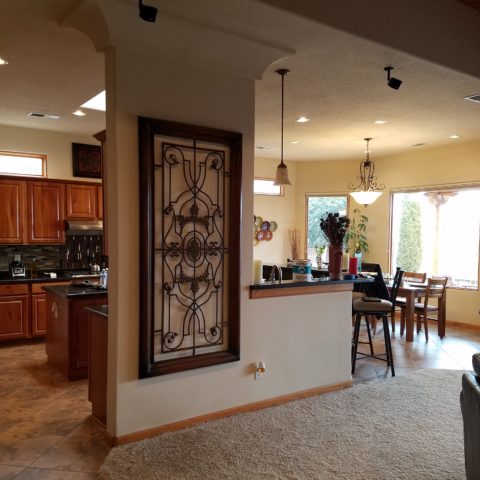
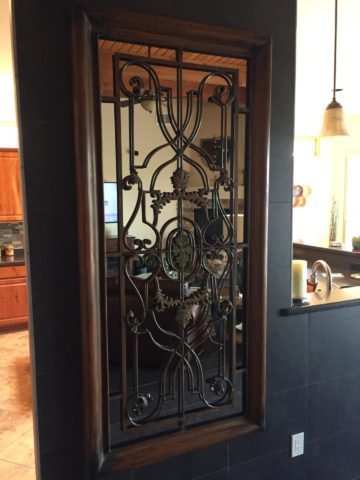
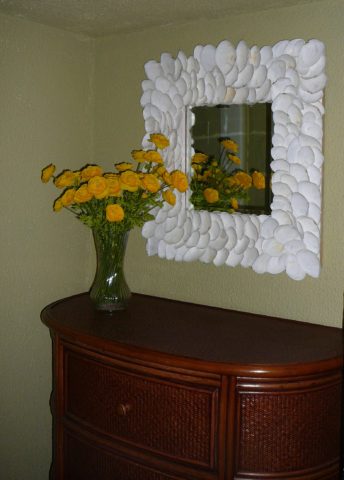
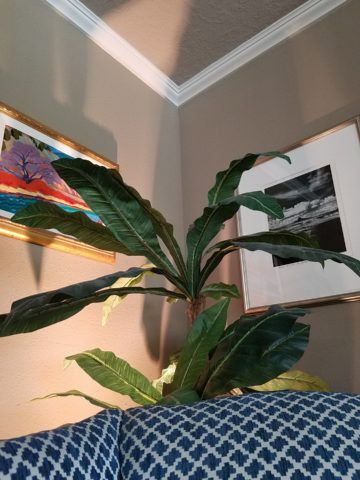
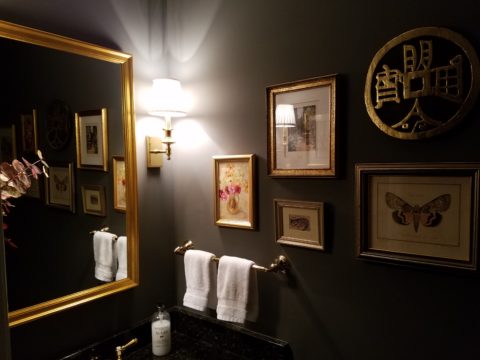
Have I ever mentioned context? Eclectic mixes can be quite fun and interesting.  
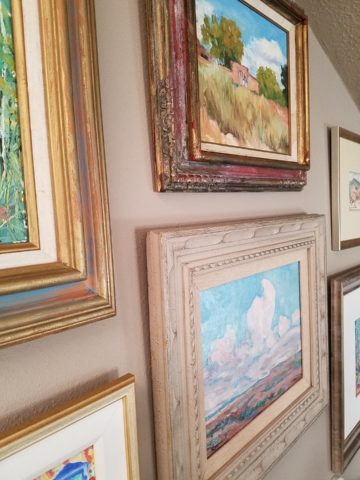
Groupings of identical moldings can be effective.    
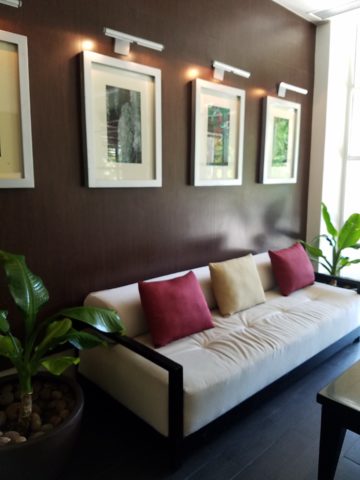
Random pieces scattered throughout can each be singularly nice. So don’t rush out and re-frame all your art. See how you intend to use it, group it, where and with what else. Be sensible and creative – be brave and do what you like! That makes sense!!!!!


Diminishing Dining Rooms – How Do We Dine at Home?

Changes in social interactions, style of entertaining, cost of real estate and family dynamics all contribute to what we are seeing as the diminishing dining room. Yes, there are circles who still maintain and use formal dining rooms in their social repertoire.

Elegant entertaining, grand social gatherings and family traditions still support the validity of the formal dining room. However, the fact remains that the concept is changing.


It’s easy to digress from the focus on design and delve into the demise of the family dinner hour. that time when families truly gathered to share, enjoy, report, critique, discuss, plan…more and more fragmented we are losing what was a very galvanizing core of child development and character-building. But I digress…

Take the bachelor who would rather have his pool table than a dining table…moving it into the house first and making that statement clear.


Entertaining has become more casual, more spontaneous and geared to an open-plan of kitchen conversations, bars and movable group conversations. The act of gathering around a formal dining table after the customary cocktail hour is now more free-form.

Placed directly off the kitchen and connected to the family room – the open plan flows…

The cost of real estate certainly plays a part in the diminishing dining room. Space is limited and therefore consolidating the dining area to one rather than a separate breakfast space and formal dining room utilizes space to greater advantage. Having an unused dining room occupy so much square footage is wasteful.

Family dynamics dictate that with the busy schedules and conflicting schedules, the seeming luxury of a formal dinner-hour have changed. Whether in the breakfast dining space or formal (if there is one), the act of sitting together for a nightly ritual of dining is less being practiced.

Here, this dining area is in the den off the kitchen…a better use of the space by this family’s estimation.

As I was writing this, I stopped and thought of the dining room scene from Meet the Parents and I cracked up reliving the events and they unfolded one ridiculous thing after another…and then I Googled famous dining room scenes to find other examples – because I was amused and curious…I found several memorable examples like the Griswold’s Christmas, Eat, Drink, Man, Woman, Tortilla Soup – oh and Tom Jones with Albert Finney – a classic!!! So many other wonderful scenes – but one day will it all be history? Mere memories of days gone by?

So today the open plans expanding the interaction between kitchen and dining – family rooms melding from the kitchen bar…the concept and lifestyles that dictate the practicality and ultimately the design directions are becoming redefined. And we also see the expansion of outdoor living – additional dining opportunities are ever blossoming on patios…


The exhibition kitchen concept that has driven restaurants for years made it into homes for the same reason – communing with the action and participants, connecting with the preparation experience and even sharing the preparation experience – dinner guests as well as family members often share the food prep as a form of socializing and entertainment.

The limiting idea that encapsulated the kitchen away from the activities surrounding it was in many cases to be dismantled. The disruption of encircling and kitchen, unveiling it and even incorporating it with the dining experience has become more the norm.

Still playing with colors…this wonderful dining room begins to take shape as an adjunct to the kitchen.

The kitchen is the fulcrum of family life. The dining room is not separate from it anymore. The dining space is part of the preparation space or very close to it. A kitchen island with bar stools are often the most popular perch in a home – for family and guests alike.


So this provokes thought about new home design, remodeling and re-purposing space, re-thinking how to best claim family time and related activities and designing around those practical considerations and needs.

A Dozen Tips for Planning a Kitchen Update

As we know, kitchens and bathrooms lead the features that often make or break a house sale. Investing in such improvements can not only enhance your living experience, but also serve you well when it comes time to sell. There are a few basic tips to follow as you embark on this could-be, (but need-not be) daunting project. Here are some important things to consider for all facets of the experience!

  1. To begin, note what things about your kitchen you would like to improve – both functional and aesthetic.
  2. Gather inspirations – make a hard-copy file or at least collect in a folder in your computer things that inspire you in your quest for your improved kitchen. Use kitchen design magazines, Pinterest posts or remodeled kitchen ideas that you Google-search. These ideas are a great springboard to narrowing your design direction and conveying your concept to your design professional.
  3. Based upon your “inspirations” what is your color scheme? This direction will impact options and decisions for finish materials such as flooring, cabinets, countertops, back-splashes, wall finish and window treatments.
  4. Is it merely a facelift? New cabinet doors and drawer fronts? Perhaps new countertops and back-splash. Or is it a complete gut and replace?
  5. New appliances – replacements or additional components?
  6. Sketch the layout of your new kitchen, if applicable. Make sure the available space accomplishes what you are imagining.
  7. Imagine the finished product. Illustrations of the “after” design are the best way to accomplish this.
  8. When in this process should you consult with a design professional? Perhaps after number 3 once you have gathered examples of your preferences…I let the list continue beyond number 3 to give you an idea of where in the process you might feel the need to have some qualified assistance!! An experienced designer will see things you don’t, know things you might not have considered and ideally maximize your budget by avoiding costly mistakes or missed opportunities.
  9. For example, don’t miss opportunities for additional storage – this is a critically creative design detail that results, in great benefit, to the finished product.
  10. In fairness to you and your contractor, try to establish a budget. Do a little homework. Gather rough costs for lineal feet of cabinets, appliances, design consultation and construction costs (a good resource are the home-improvement stores). Give yourself some latitude as this cannot be a finite budget at this early stage of the planning.
  11. With your design pro, discuss contractors that fit the bill to what you are trying to accomplish. If you are only tackling cosmetic improvements, a general contractor might not be needed. For example, new wall finish, countertops and appliances or new cabinet fronts, a new light fixture…these are individual sub-contractor projects. But as soon as you get into moving plumbing and electric, adding or removing walls, puncturing the envelope with windows or skylights – you had better hire a general contractor to take responsibility for the scheduling, coordination, licensing and permitting of the work.
  12. Once your scope of work is determined, you might need to get familiar with great carry-out in your neighborhood!!! That and a few great restaurants too, as you might be without your kitchen during a portion, if not all, of the process once the work begins!!!

Here are a few projects that we have documented with pretty effective “before and afters” to help you consider some of the above referenced tips.

These peachy pickled white-washed red-oak cabinets had classic lines and were in excellent shape after 30 years! The original owners were ready for an update.


Purely cosmetic (except for replacing the lighting) we saved the cabinets in their entirety, painted the boxes, doors and drawers. By shooting the fronts remotely, quality control was insured and caused less imposition at the residence.


Black accent pieces were already in play. The new black finish was a dramatic transformation. Using a special tinted varnish, proper prep and several coats results in a very strong new finish. All other finishes were replaced with a conscientious effort to coordinate with the existing flooring. The result “reads” as though it was all done at the same time. The floor tile looks good as new!


Similarly, we saved the cabinet boxes, but differently from the previous project, we added a few updated cabinet features and replaced the door and drawer fronts to a more classic raised panel detail.


Again the transformation was exciting, but by saving the perfectly good cabinets, we had far less disruption to the home-owners. Enhanced cabinet details for improved drawer glides, additional storage, new counter-tops, new lighting, and as is true with all of these projects “cabinet jewelry,” in the way of new door and drawer pulls and handles, adds the finishing touches.


This very dated kitchen from the early 70s, had a new owner – a single man – and he definitely didn’t want this provincial look!


In this case, a general contractor was in order. We opened walls, re-designed all the lighting, replaced all cabinets with new custom cabinets, appliances, flooring, counter-tops and back-splashes. The transformation is astonishing!


Remodeling? How to Embrace Existing Conditions – Celebrate the Story

This happening scene provided fabulous fodder, to observe existing conditions being incorporated into a design, for great benefit on many levels. Applicable to all remodel projects – see what you think!

In this case, Night Club design. The styles are many, but the concept is of a  commonality comprised of a few basic functions – a fun place to socialize, meet people and enjoy the entertainment of the overall scene often including live performances. We probably all picture the image of a flashy, glitzy environment.

We were recently in a most unusual space that combined the glitz and bling you might expect with a “nightclub” atmosphere, but juxtaposed with rustic finishes that were unique to the original architecture. This brick expressed in some of the remaining structural elements – walls and column/arched spans of structure – was warm and rich providing an unexpected pleasing combination that so easily might have been eliminated – concealed behind slick new finishes.

To play-up the vintage aspects of the space, ornate traditional chandeliers were suspended amidst myriad dangling strands of sparkling, golden LED lights. These provided a glittering glow of ambient light in the upper reaches of the space effecting both the downstairs and upper level of the club. This mixed lighting treatment was obviously the eye-catching  emphasis of the interior.

Ample light was provided by the luminous chandeliers and thousands of dangling LED pin-dot lights along with the indirect lighting of the back-bar shelves. Therefore, the large steel domes that hung suspended over the bar needed not to contribute ambient light, but were limited to effectively cast direct downward light on the bar surface. Their golden interiors provided a warm glow while the exterior surface disappeared into the darkness.

The bar was quite simple and raw, yet read in enough of an interesting and complex fashion, to compliment the scene. The design was sufficient in its components and indirect lighting worked well with all the other design decisions.

The simple Tolix-styled stools were an understated easy fit with the other surprisingly raw materials of the bar.

To answer the need for friendly group conversations, there were comfortable places to gather with zoned seating areas of tufted leather sofas and leopard-patterned rugs,  wooden grouping tables, then hi-top tables with stools and finally barstools along the length of the bar. The various areas provided options for patrons to pick the most inviting or appropriate spot to enjoy the atmosphere with friends.

Having choices in any hospitality setting is invaluable. It allows the patrons to make their own decision how best to utilize and enjoy the space. It answers different needs and appeals to different people for different reasons, therefore inviting a variety of patrons to invest their time and money in the establishment. A broader reach of clientele.  A broader client base.

I’ve mentioned more than once that having restroom design follow the theme and quality, of the rest of the interior, is imperative. As it relates to night clubs, it is often the meeting-ground for dating, meeting new people, attracting new people and therefore,  the restroom should promote attractive feelings of approval and confidence in the guests.

Jazzing up the restrooms in keeping with the jazzy feeling of the club environment should be a natural continuation of the design scheme. That means mirrors – full length – not merely above the sinks,  good lighting without down-lights to cast unappealing shadows on the guests.

Here the placement of sinks outside the restrooms frees up space in the stall areas, while adding interest to the extended restroom area. The design theme presents free-standing bureaus for the sink cabinets. Often shared sinks are used in these anti-room set-ups, but in this case opposing sides of the vestibule provided an attractive vanity area for men and a separate one for women.

What was so inspiring and interesting as we scanned the interior were the various zones all within this complex mix of original, traditional architectural elements and adding traditional if not vintage lighting fixtures paired with modern high-tech lighting effects and large brilliant monitors featuring exotic, playful, getaway beach videos. It worked.

Have you ever encountered a structure that at first glance did not comply with the supposed new program? Awkward supports, raw materials, exposed mechanical…so ,many “unfortunate” things to get in the way of your design. Often the “imagined” design over-rides the reality of the moment. The challenge is to allow the moment – the reality of the existing conditions – to participate in the process rather than being briskly eliminated without thorough consideration.

And the additional bonus might often be cost-savings and budget stretching while not betraying that benefit at expense of the finished design. Brilliant to have incorporated the “whatever it is” – wasn’t that creative and hence, interesting!! OK – I’ll take that!

To have concealed or negated the architecture would have been almost criminal – certainly a loss of architectural integrity and textural interest.

The crime of missing opportunities like the seemingly conflicting traditional elements with the need to be glitzy and modern is to be too one-directional . It’s like having “design-blinders” on that direct and focus a theme without recognizing the value of thoughtful salvage of  content, contrast and context.

All of what we observed applies to both residential and commercial design. The takeaway is to consider existing conditions and, if applicable, embrace them. Give thoughtful consideration to the opportunities before glossing over them, concealing them or eliminating them altogether. Try to appreciate the gifts that might escape you if you insist on unnecessarily hammering and manipulating a space into submission – design submission. Rather, let it tell a story and contribute to the design process – which would more than likely result in a more unique and creative end project for that thoughtful integration of the existing elements.