Designing a Cool Theme for a Vacay Rental Property

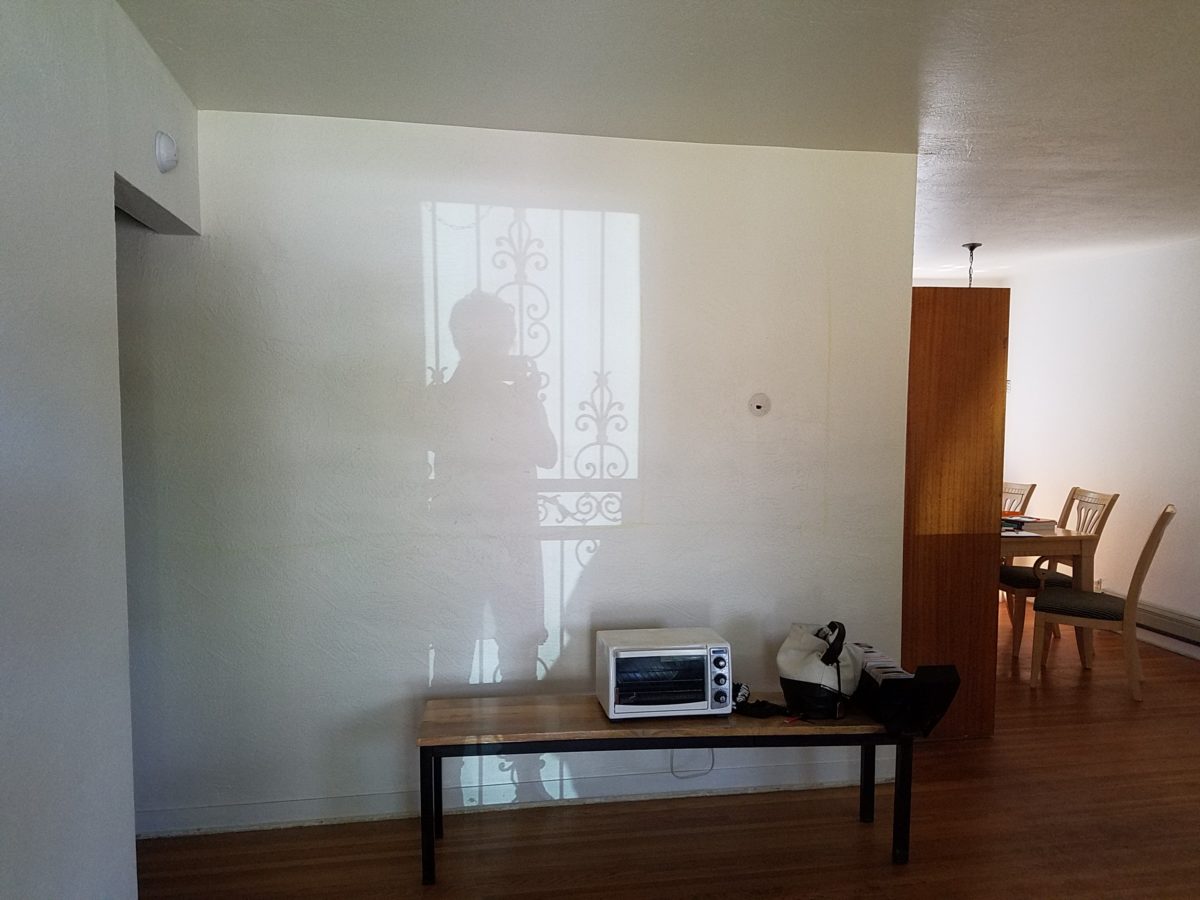
When designing for a vacation rental property, the first order of business is to select things that are durable and easy to maintain. This means finishes to furnishings. I know this from practical life experiences and also working with commercial/hospitality interiors. To do so, one needs time to place and receive the orders with enough contingency for mishap. It is also dependent upon the housekeeping arrangements planned for on-going maintenance.

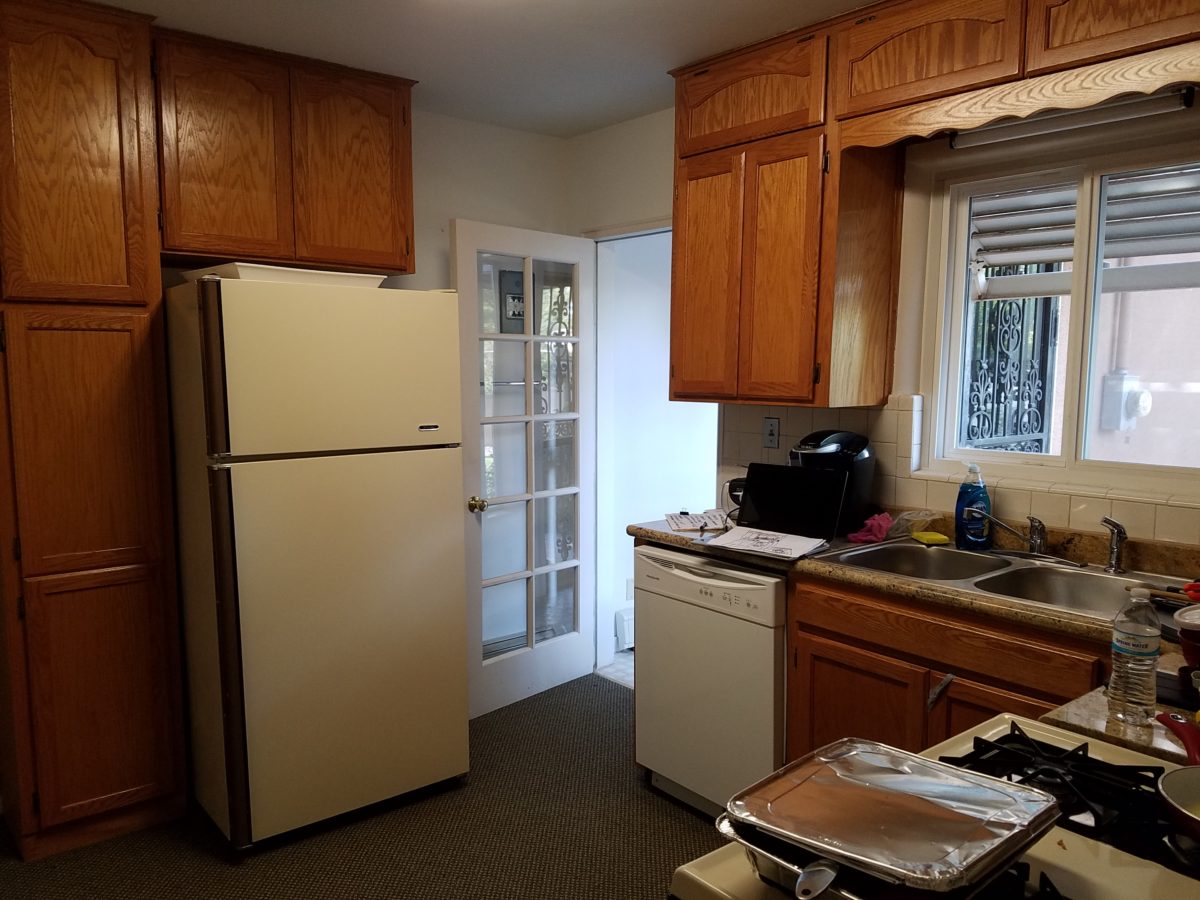
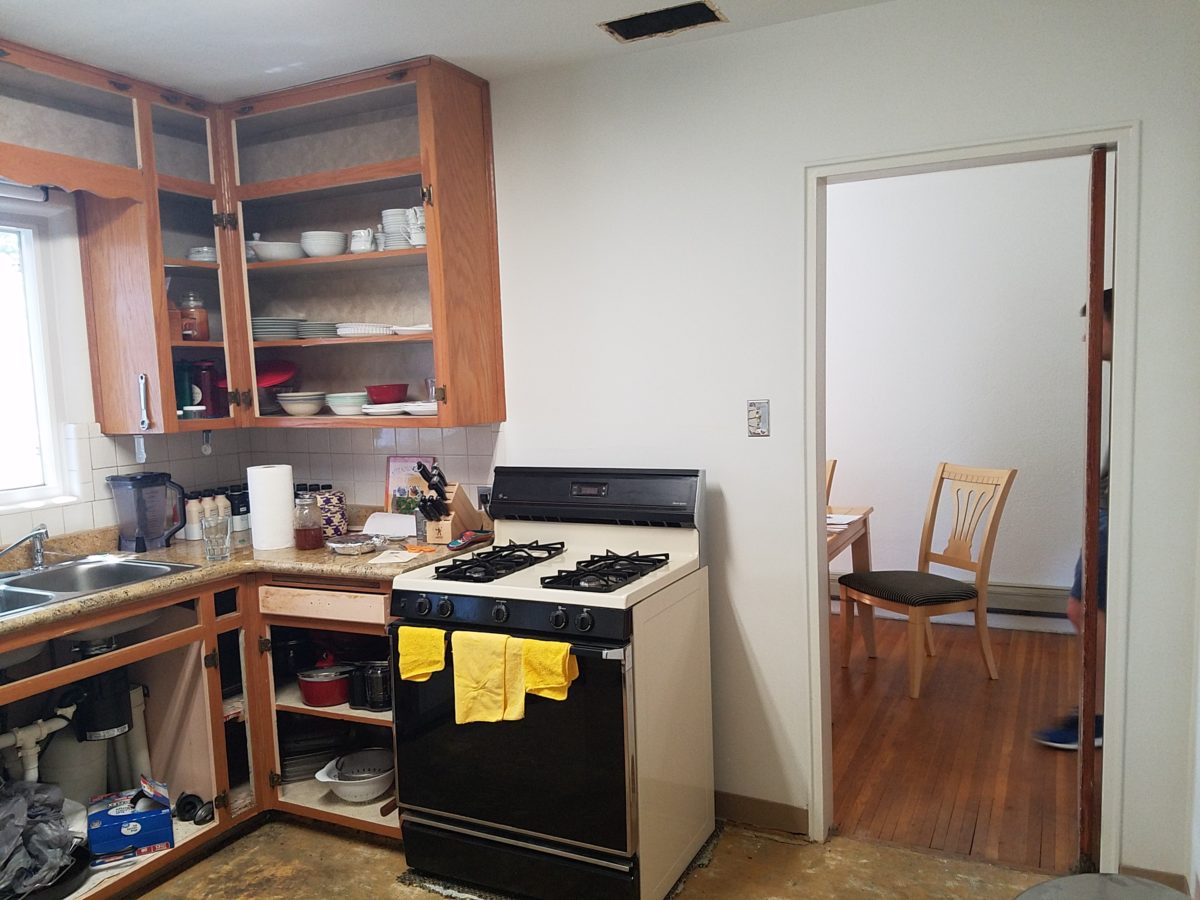
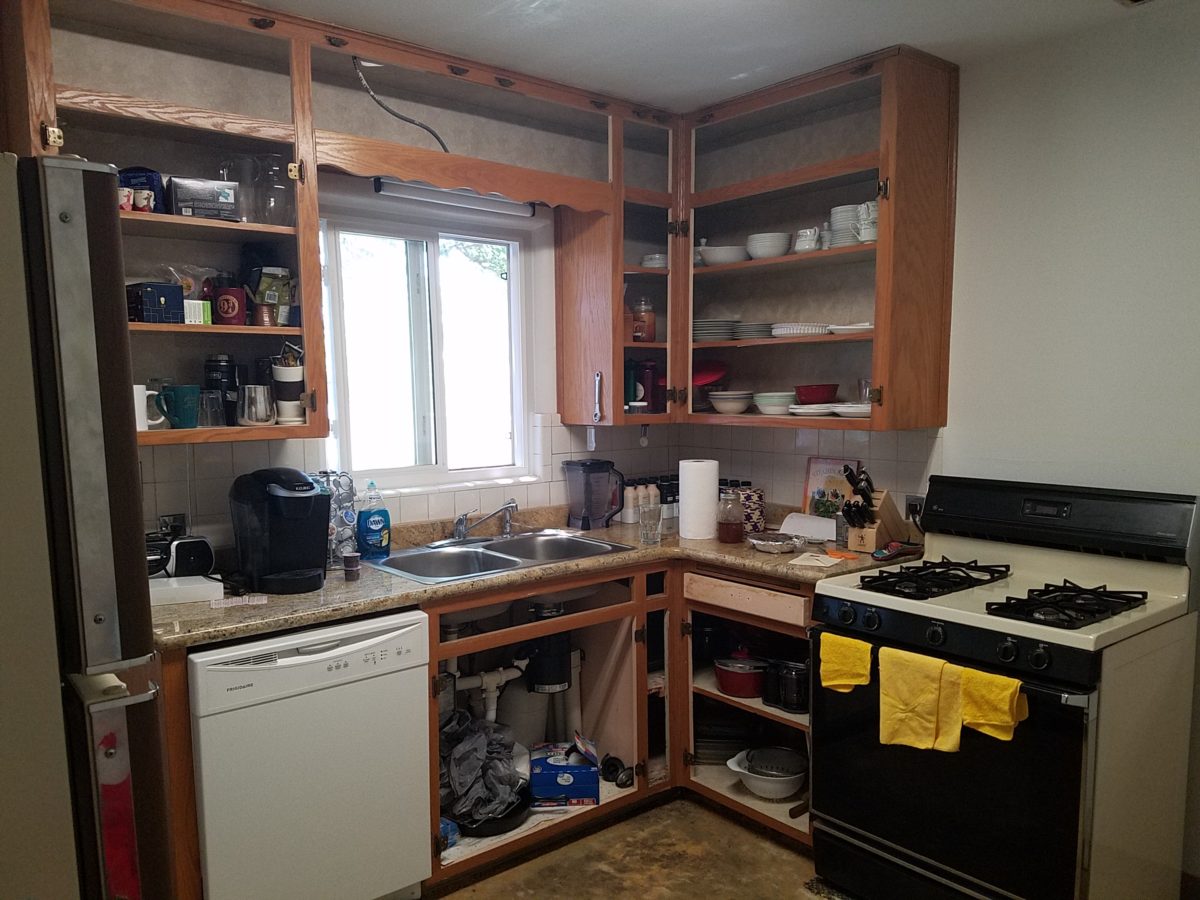
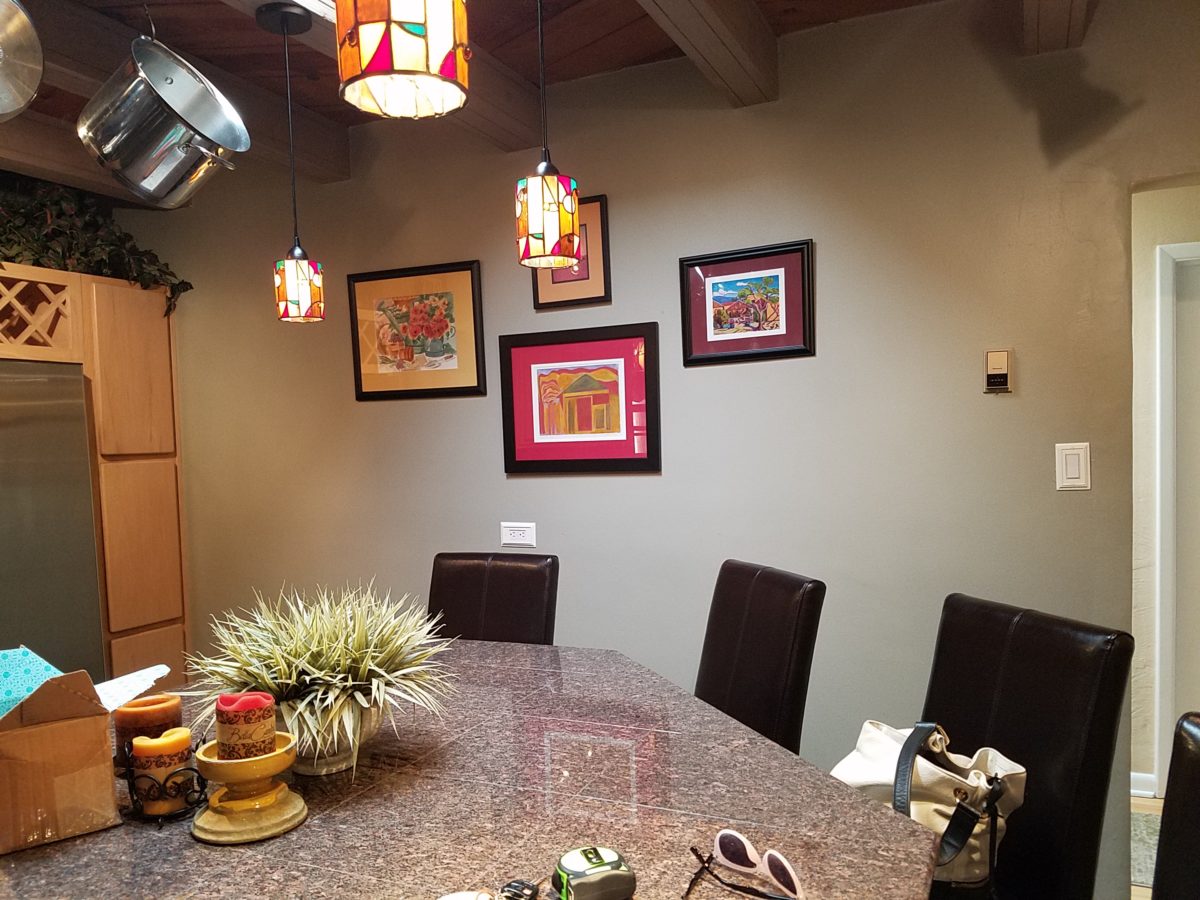
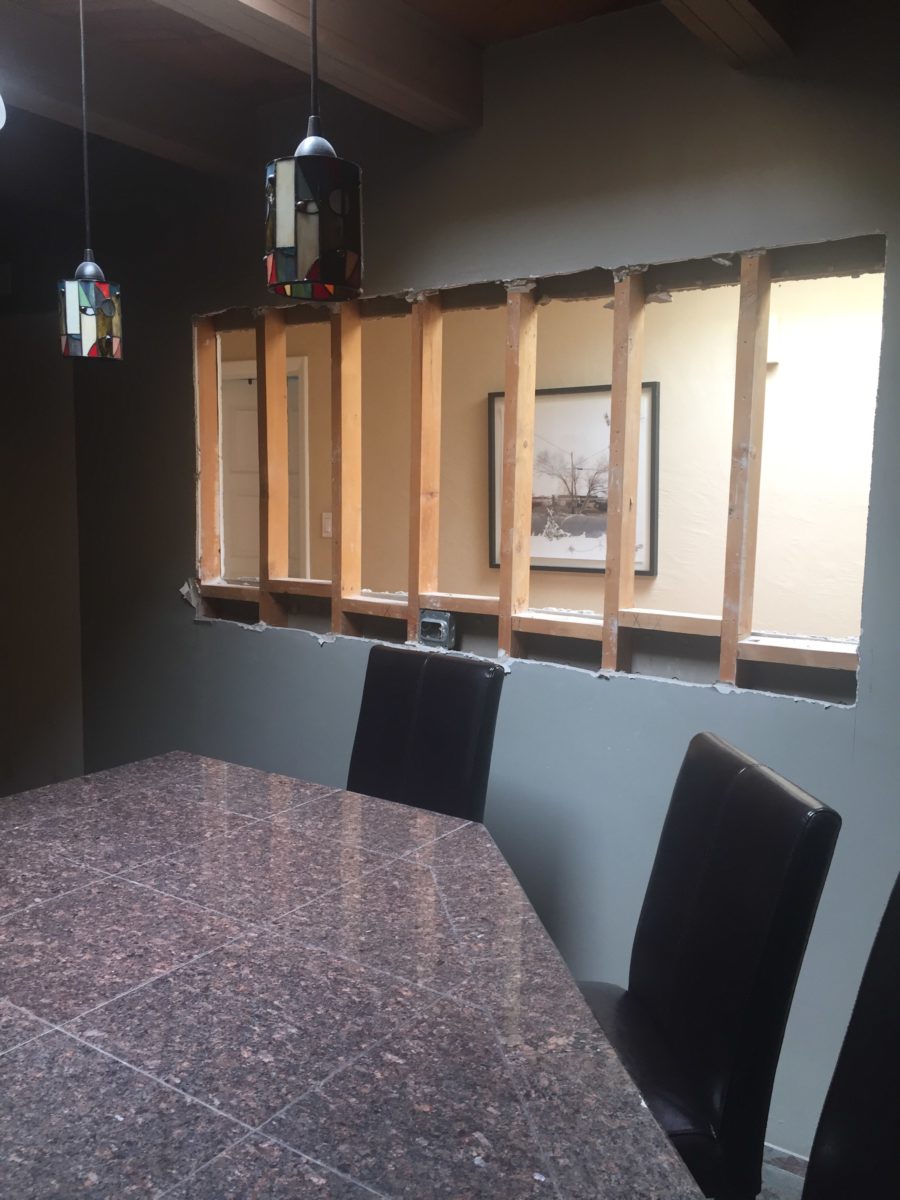
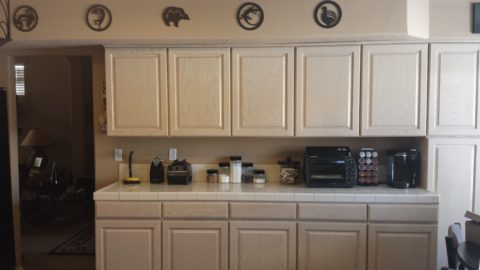
In this recent project, the work began 12 months out – plenty of time you think…but it was all about the physical remodel. We began with the drawings for floor plan re-configuration and specifications for new lighting, cabinets and finishes throughout. The decision to furnish was not made until nearly 10 months later with a deadline to complete in less than 7 weeks. The delay was partially due to an indecision over how many of the 4 units (all on one floor) were to be short-term or long-term rentals. Then a new city ordinance imposed a moratorium, of sorts, on short-term rentals and while that was tossed about over several weeks…more indecision ensued.

It’s a riot to see overnight design projects transform interiors in 24 hours. That’s due to a free-reign for design decisions, a team(s) and vehicles to pick-up/deliver, all trades on deck, a single director calling the shots and an organized chaos that results in a magical finished project – yes, like magic. Open your eyes, be stricken with awe, cry a little and exclaim repeatedly that you “just can’t believe it!!!!”

Real life is generally not like that. Real life has in-put by owners, limited schedule openings by the various trades, little spontaneous decision-making and fleeting time riddled with unwanted surprises and delays. Real life, in this case, was a theme provided by the owner, a preconceived “look” developed in the mind’s eye and scratch paper of the designer during the selection of finishes and floor plan modifications and vacillation for several reasons, of what units to furnish and when. Over the course of a year, leading up to less than the last 30 days, the project was to be fully furnished and finished – ready to rent!

The good news is that with controlled frenzy, changing availability of products, focused efforts and teamwork, we are pleased to present the Lobster! Completed all but hanging the TVs by the requested July 1st deadline, it is beautifully appointed and offers a colorful and a bit whimsical, spacious, clean and did I mention  enviable location- 2 blocks from Pacific Beach in San Diego?

This entire project, except the move-in this last week, was done long-distance with the owner in Maine, her management company SHORE on-site in California and we the design team in New Mexico. This is not at all unusual, but Maine prompted the owner’s desire to name the unit Lobster. Not your spiny lobster from the local waters, but the New England version from the Atlantic with the classic recognizable form that accompanies the imagined crustacean – including the brilliant reds of the often appreciated steamed version!!

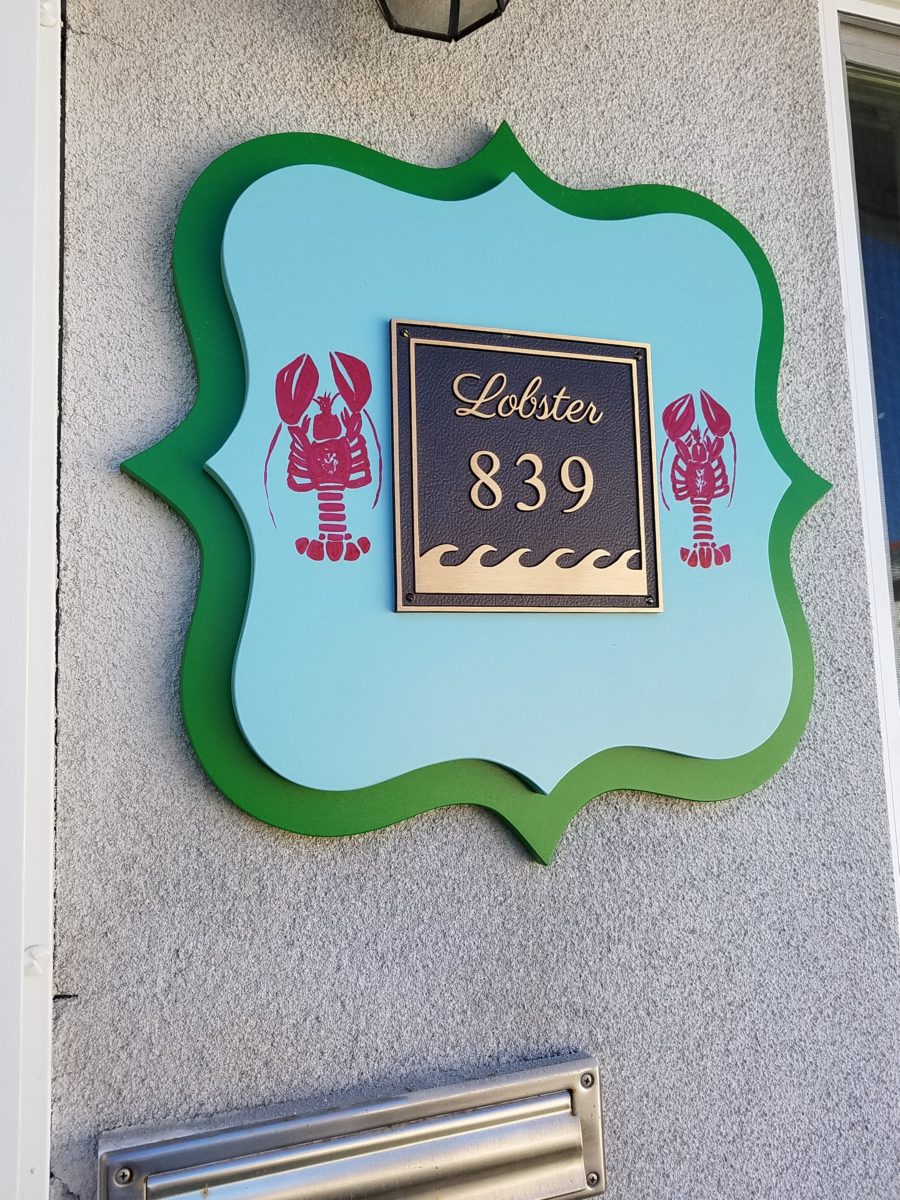
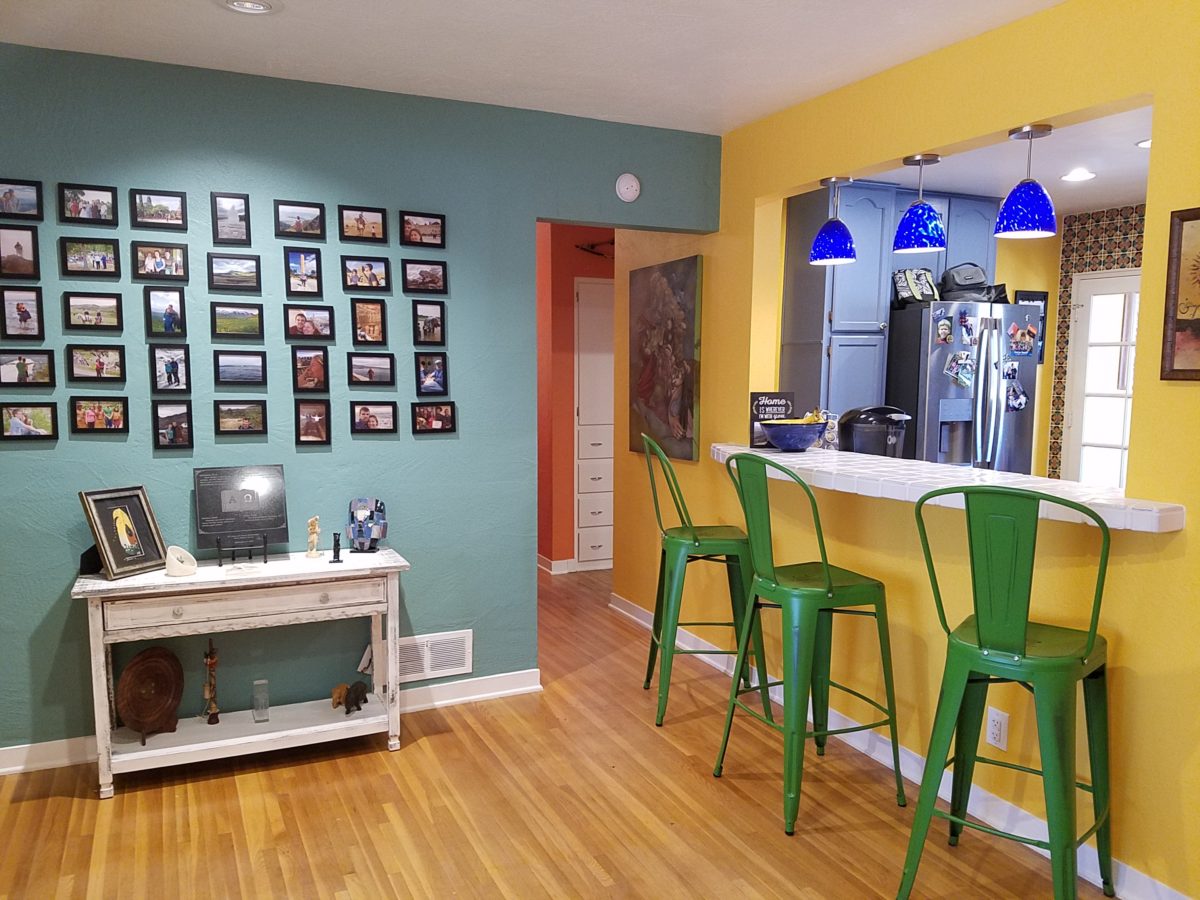
With fond memories of her childhood helping her elders maintain this property, the owner wanted to commemorate the building with an entry plaque visible from the street on the new redwood gate (soon to be completed). In addition, we suggested an individual name/theme for each of the 4 apartments which were all initially designated as fully-furnished short-term rentals – hence the bold identity for each!   I designed the new name plaques and had them fabricated by Artistic Bronze in Florida. The backing was built by our talented Enrique Jimenez, in New Mexico, and all shipped to California. Bronze was selected for its timeless presentation, handsome durability and commanding respect. Parisienne was the font I selected which may now be used to identify the property as though a logo to tie-in with the on-site signage. Subliminal cues that are recognized even slightly are effective reminders and triggers for recognition. The idea was intended to offer a fun, but lasting, introduction and identification which was to be reflected in the interiors. The Lobster was the largest unit with 2 bedrooms. It was ultimately chosen to the be one fully-furnished unit and owner’s second home when visiting the area.

For budget and availability, we sacrificed certain durable features that would have been better long-term investments, resulting in some knock-down furniture that was never intended for much abuse. Fragile painted table surfaces – for example – better in laminate, wood or stone…but time will tell.

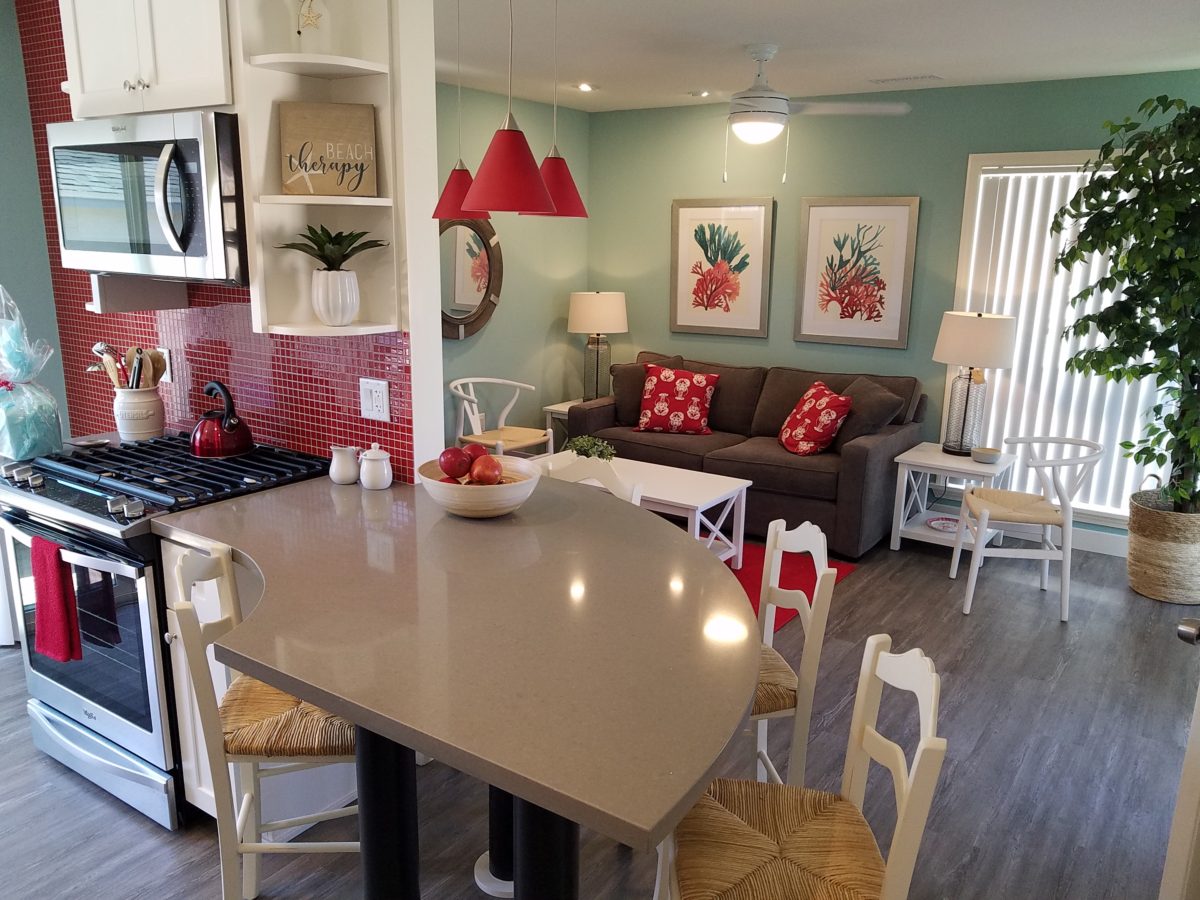
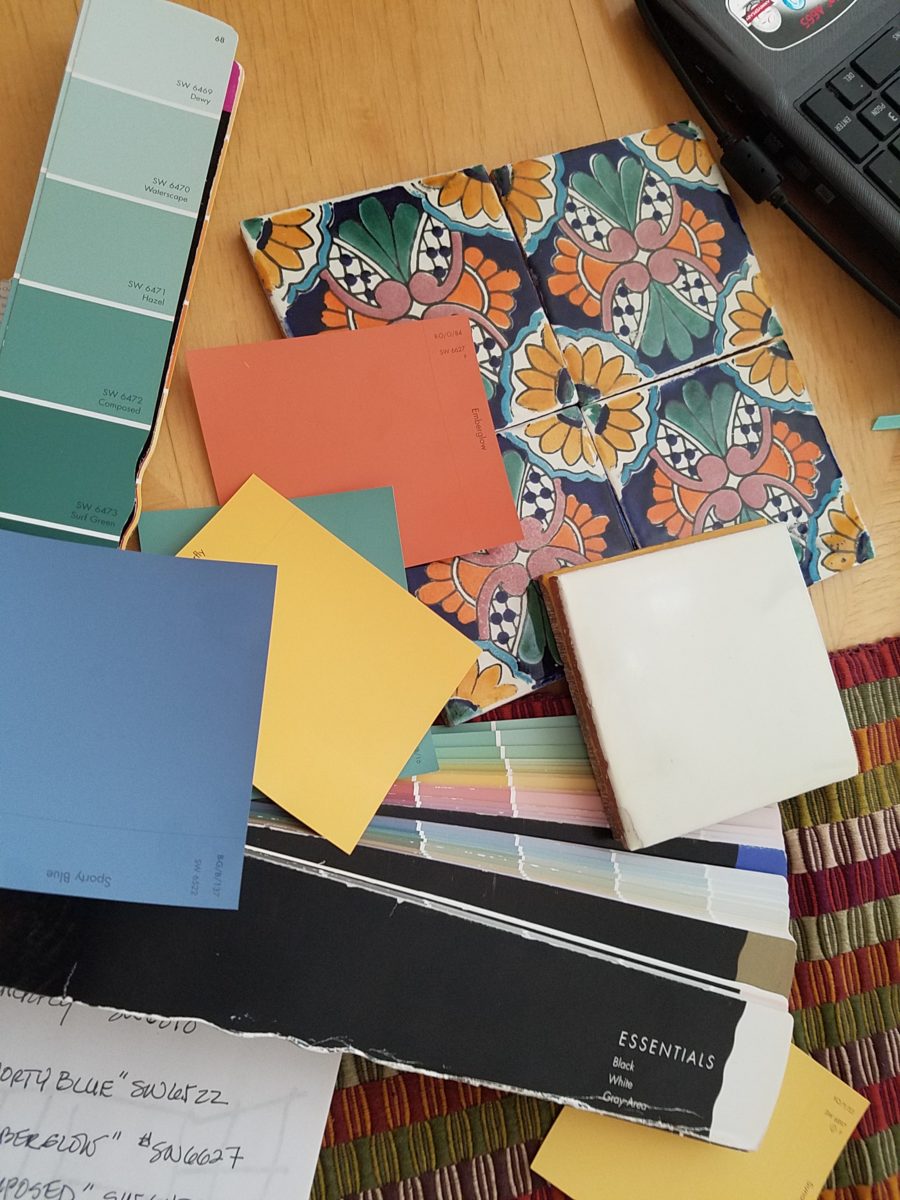
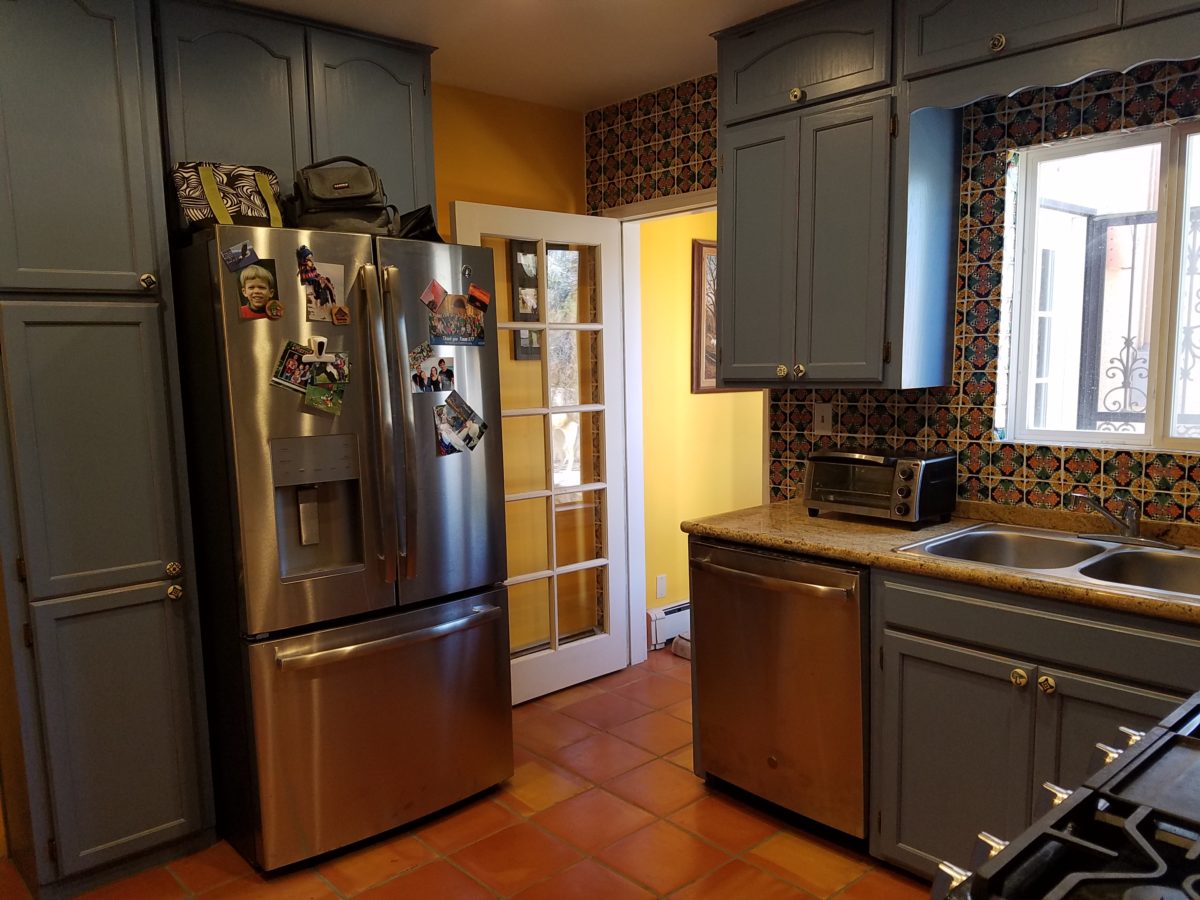
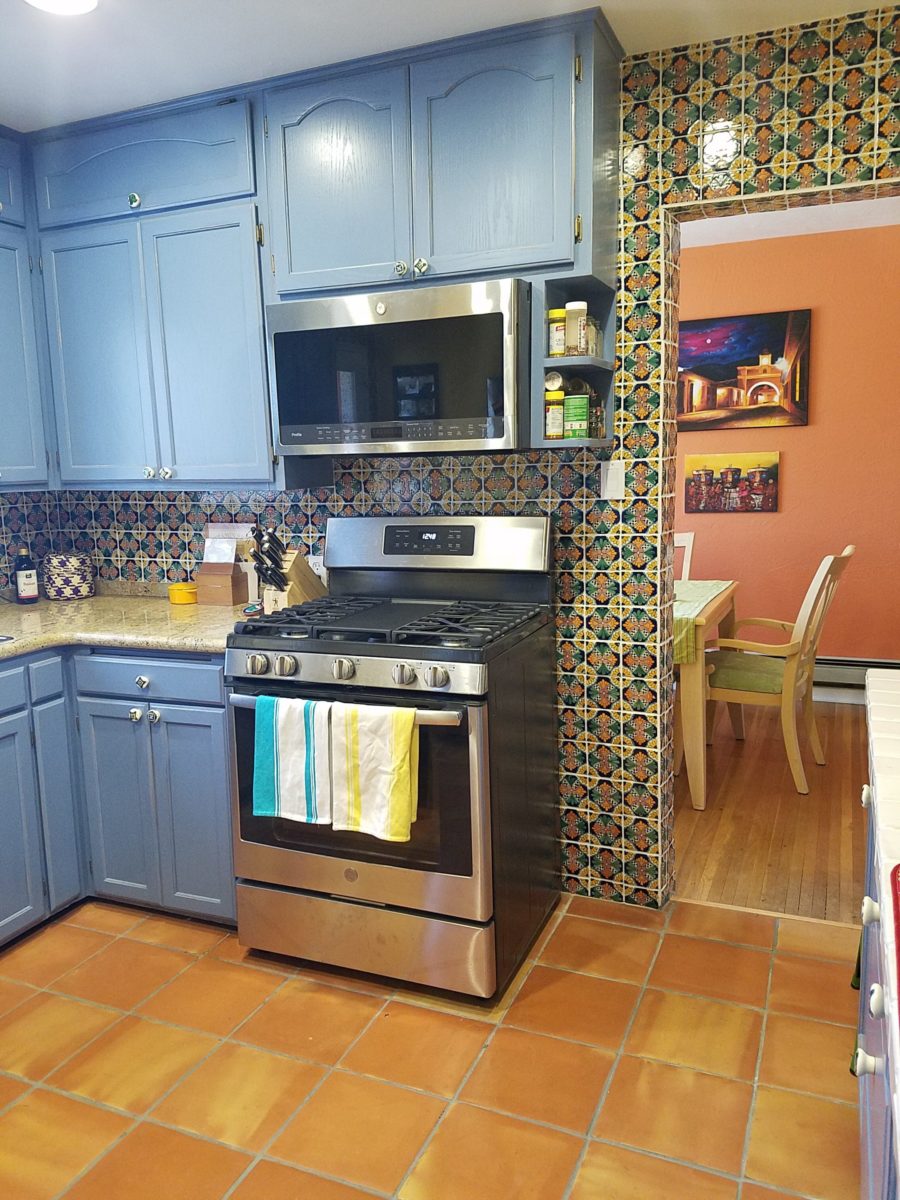
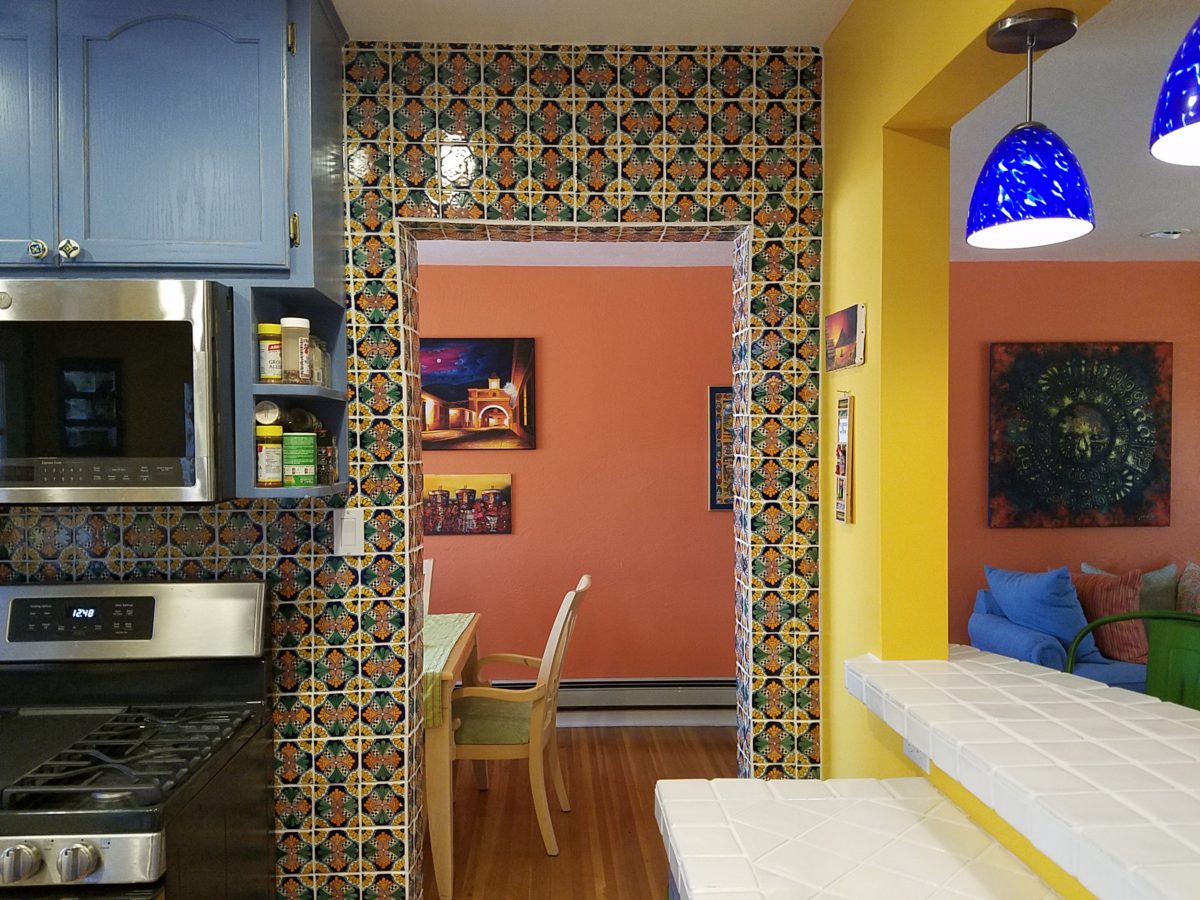
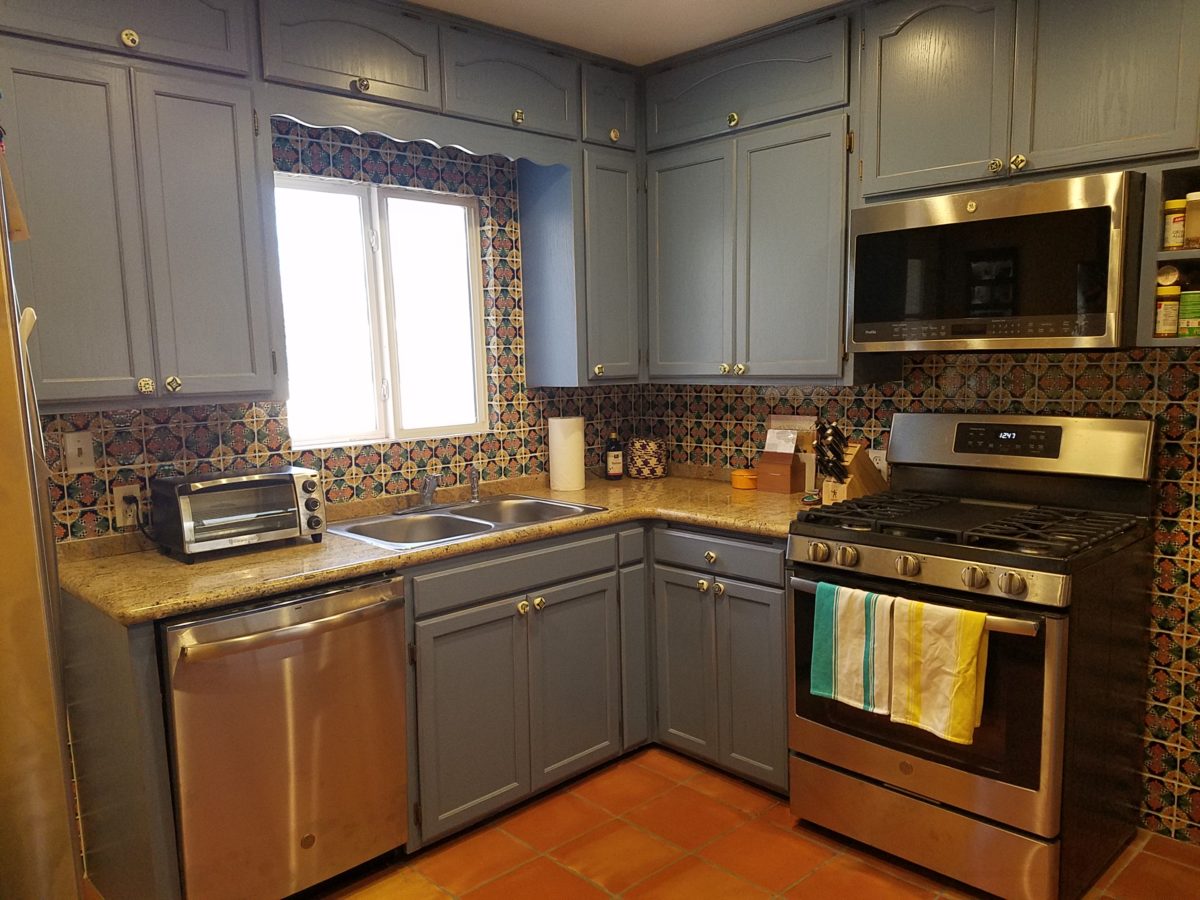
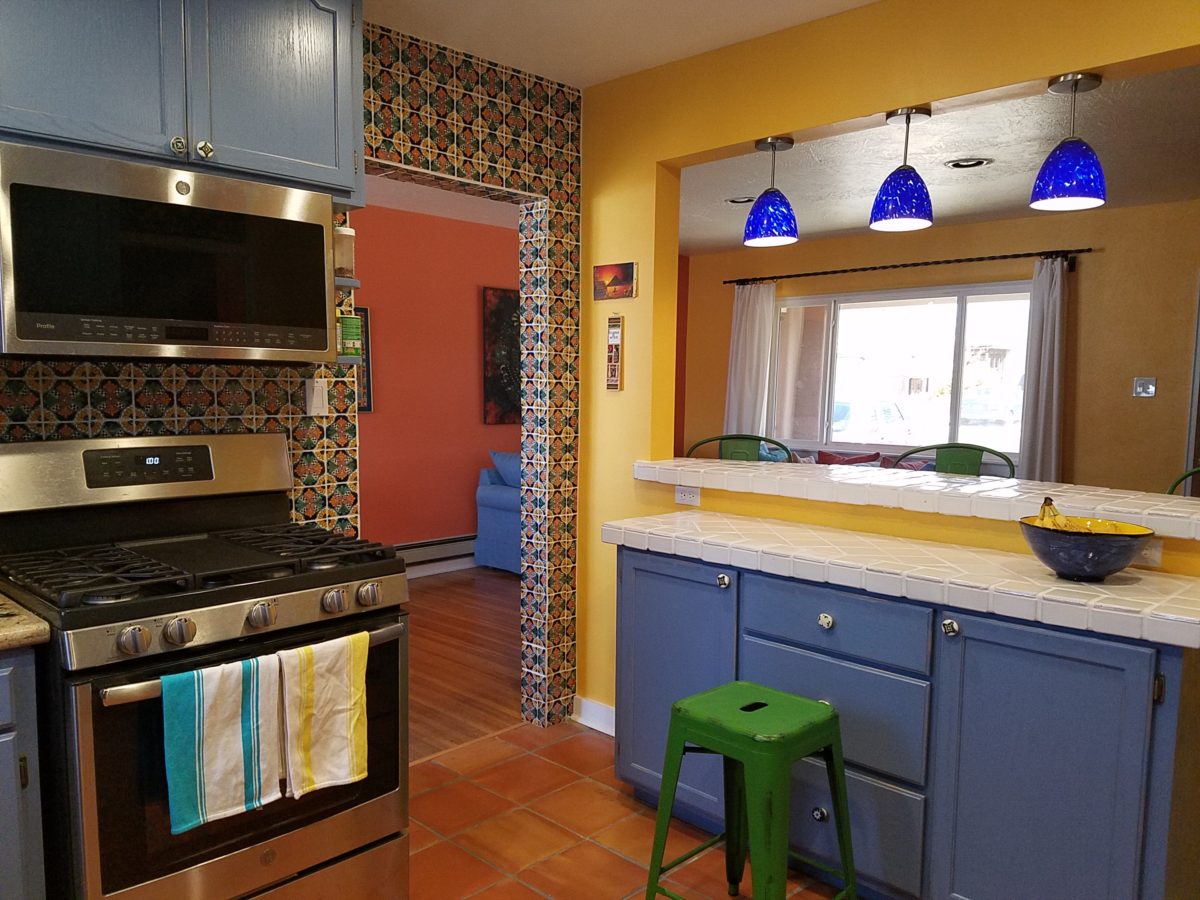
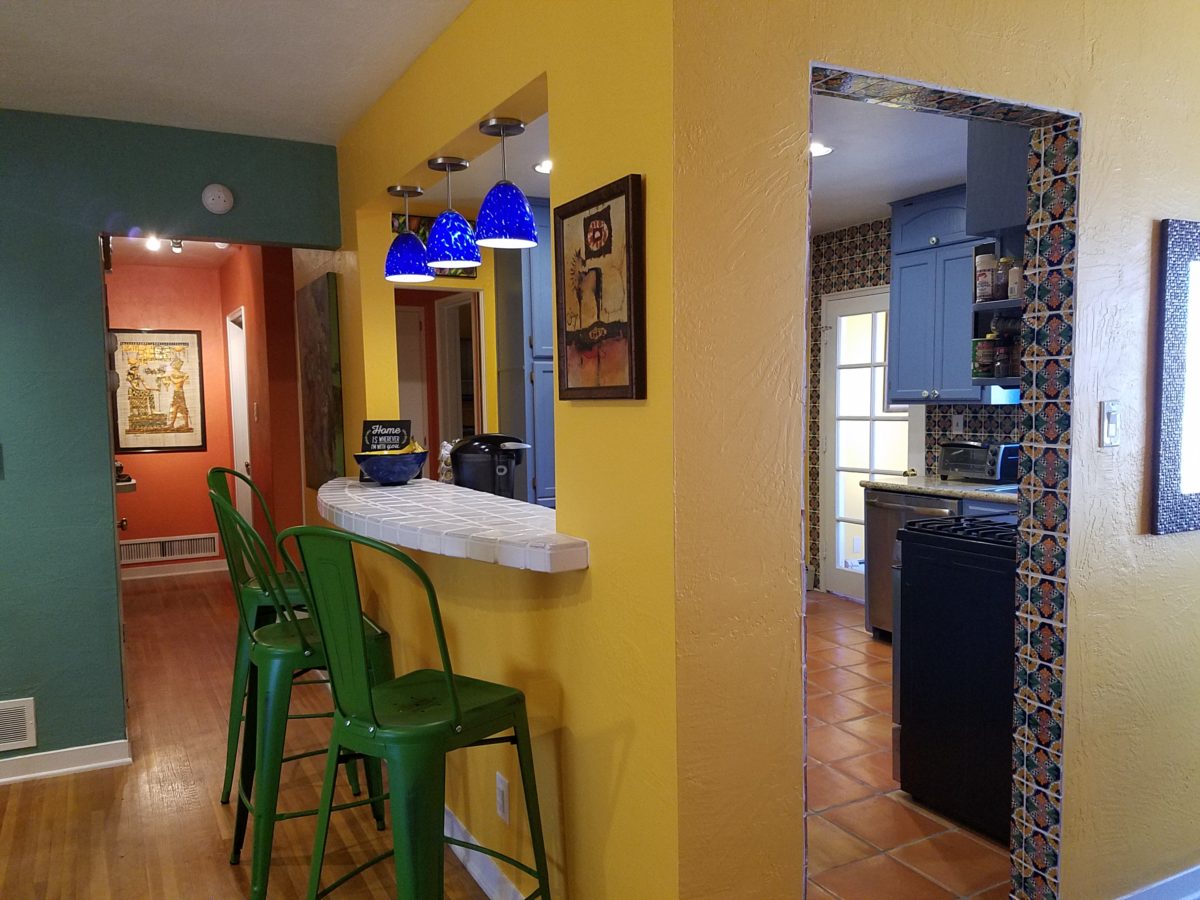
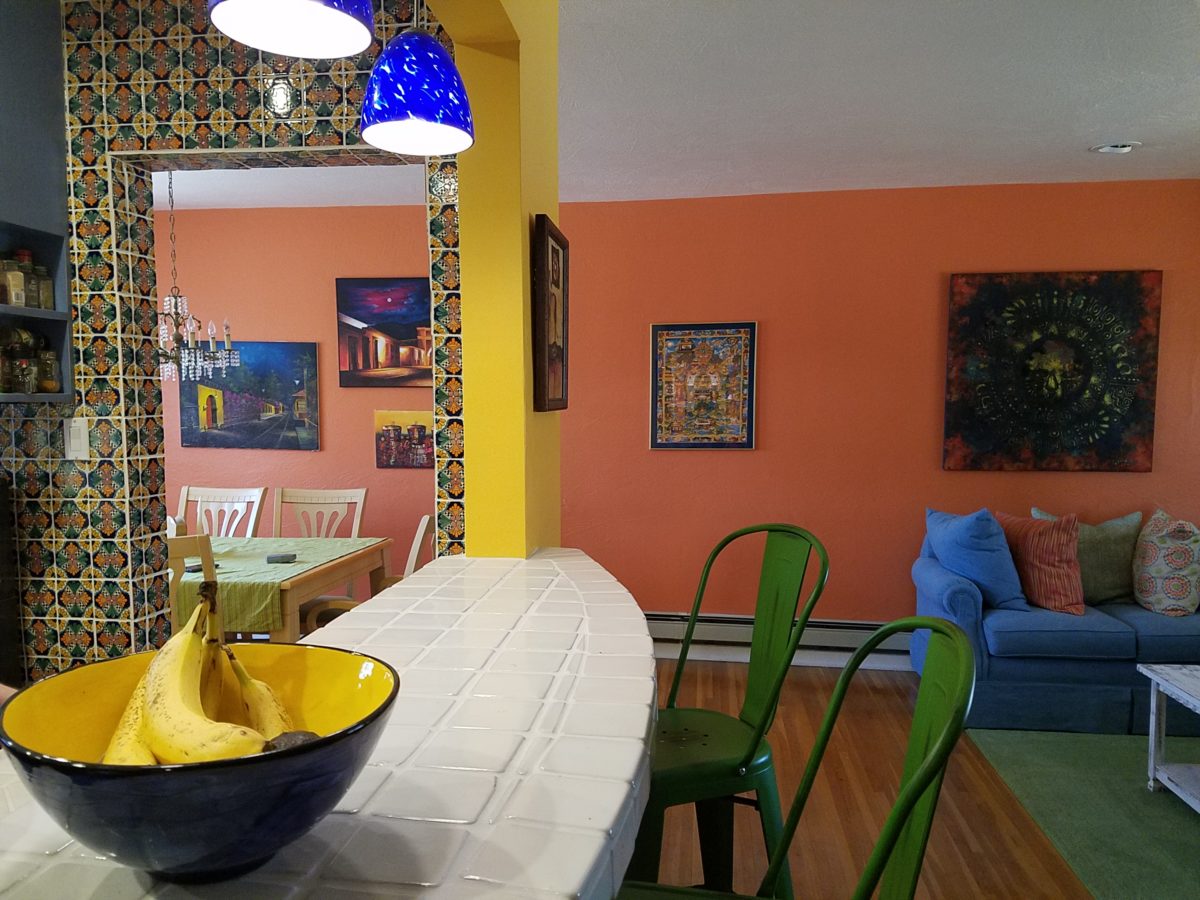
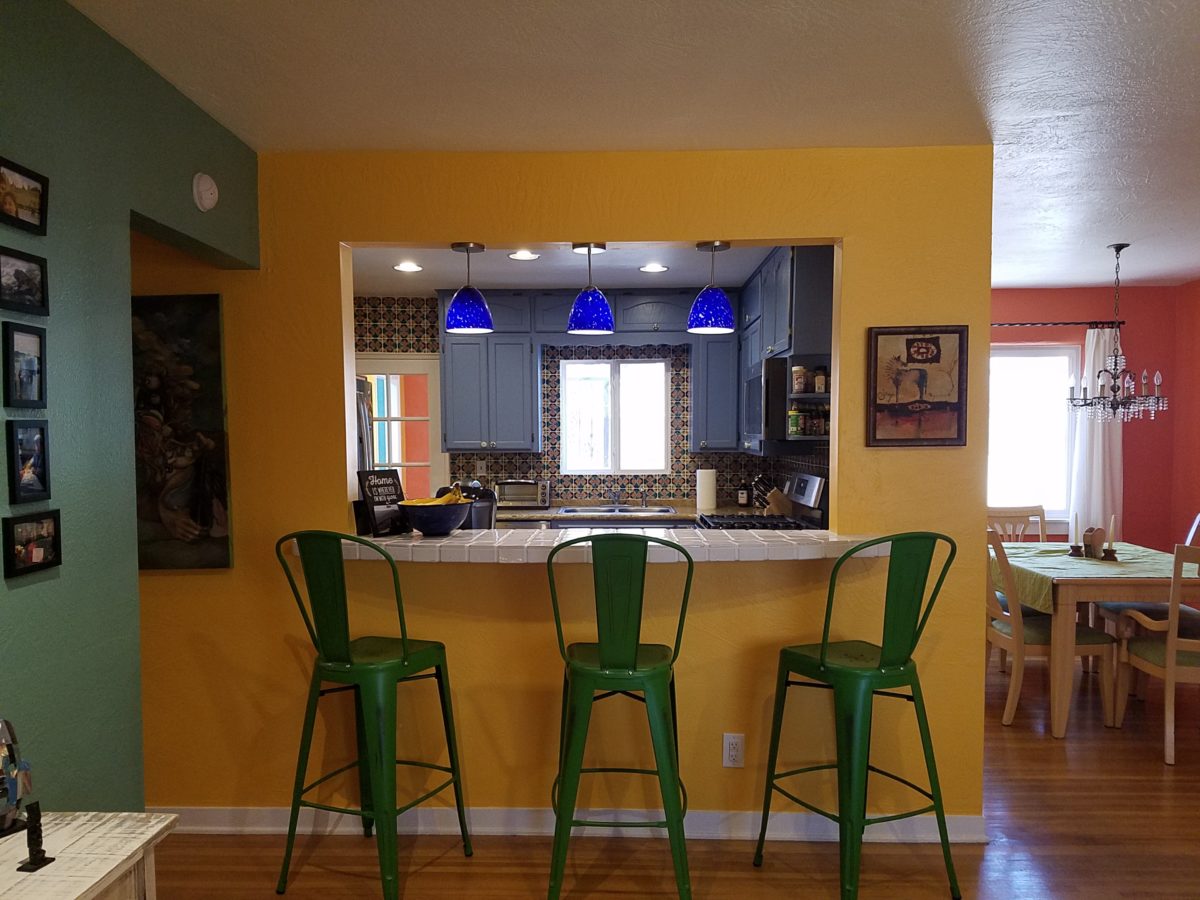
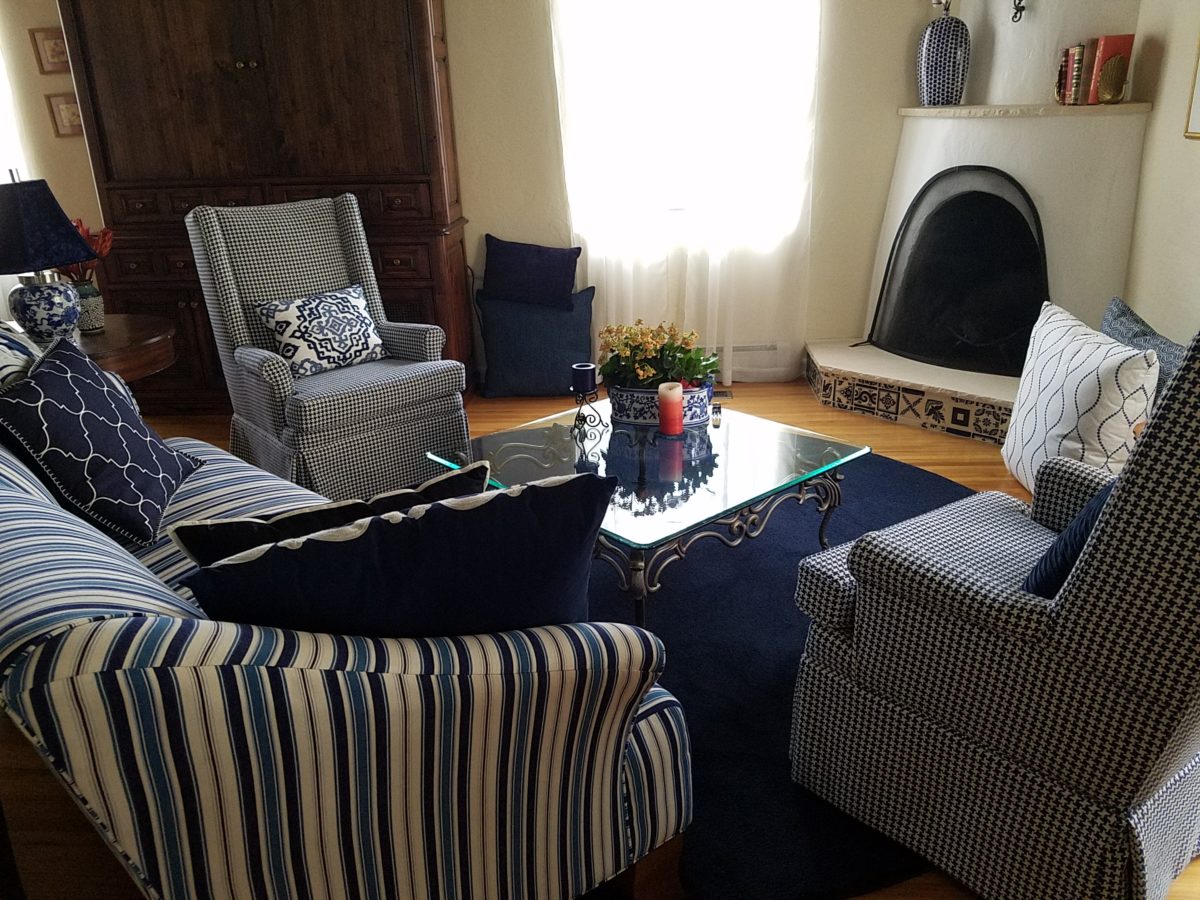
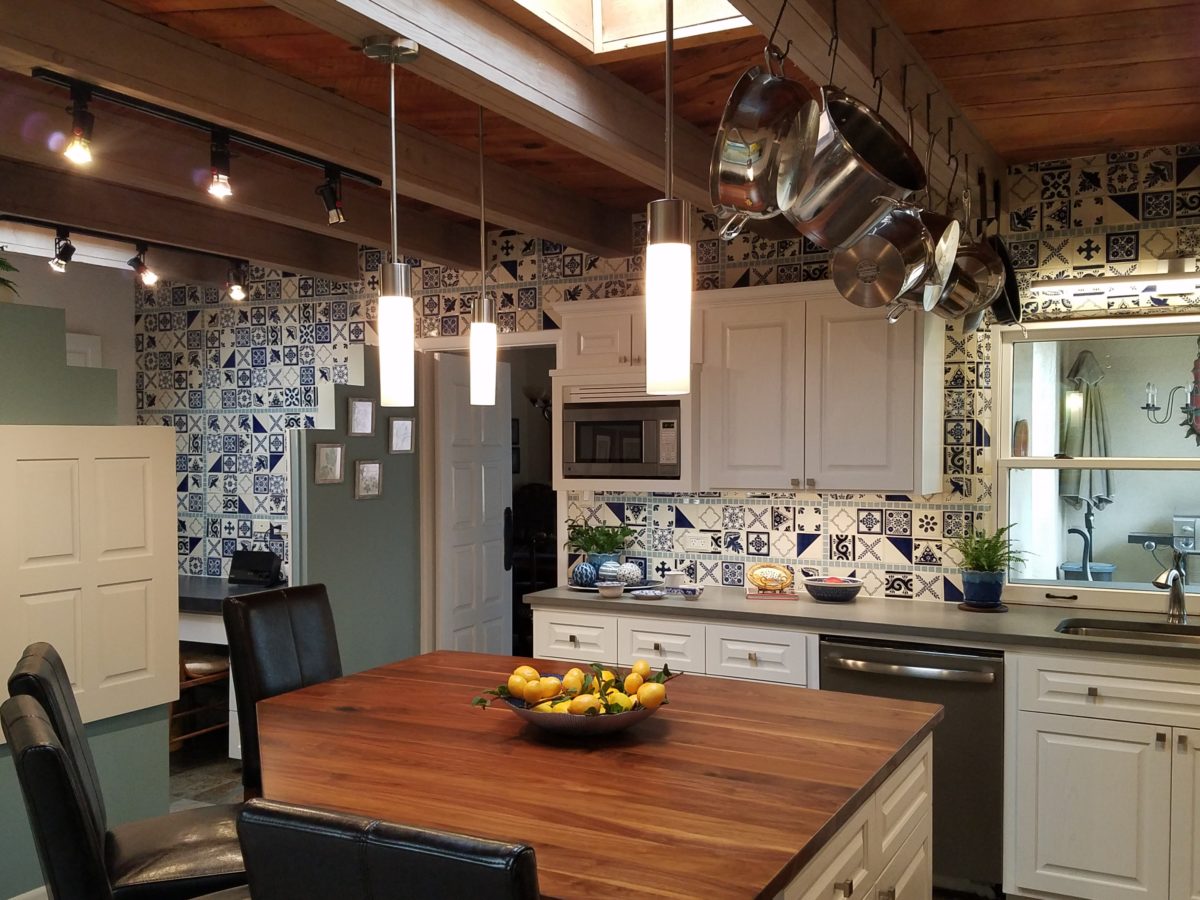
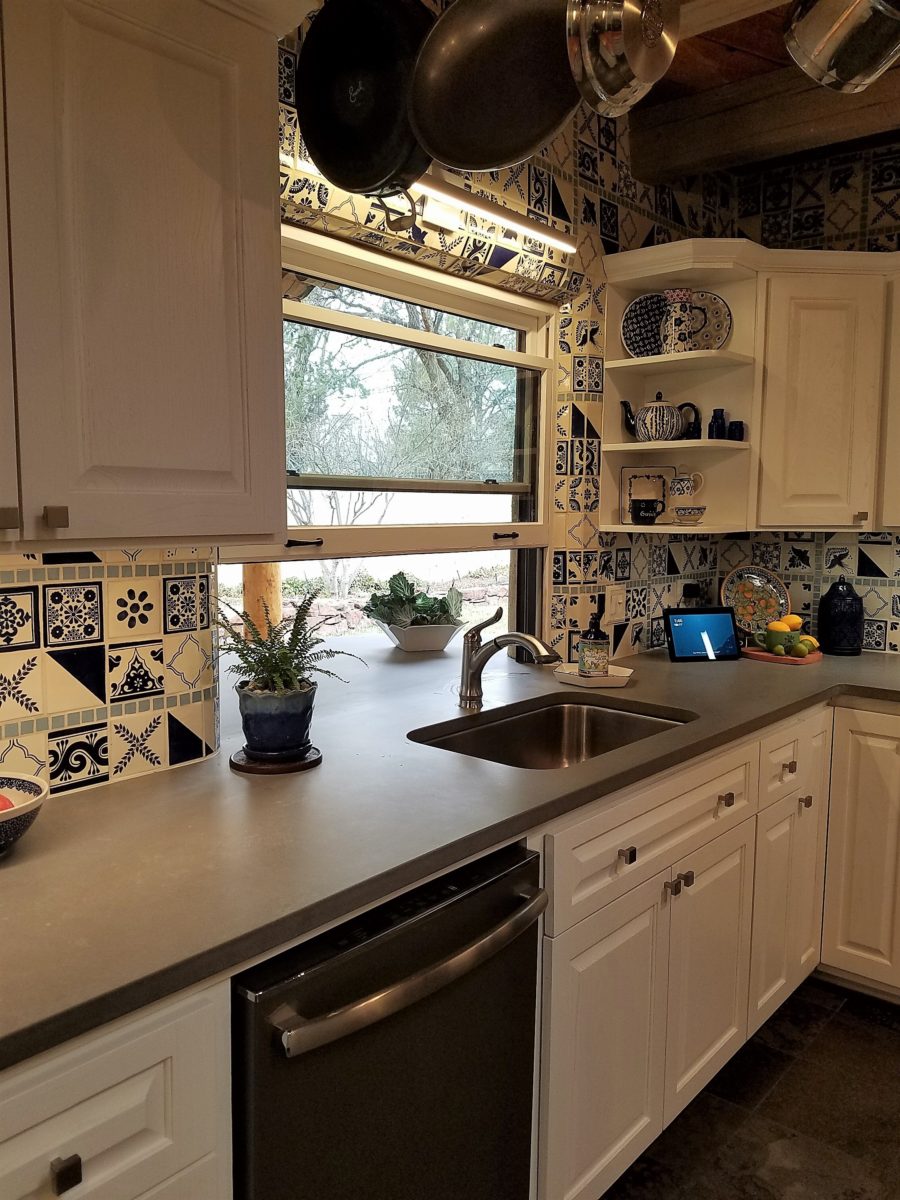
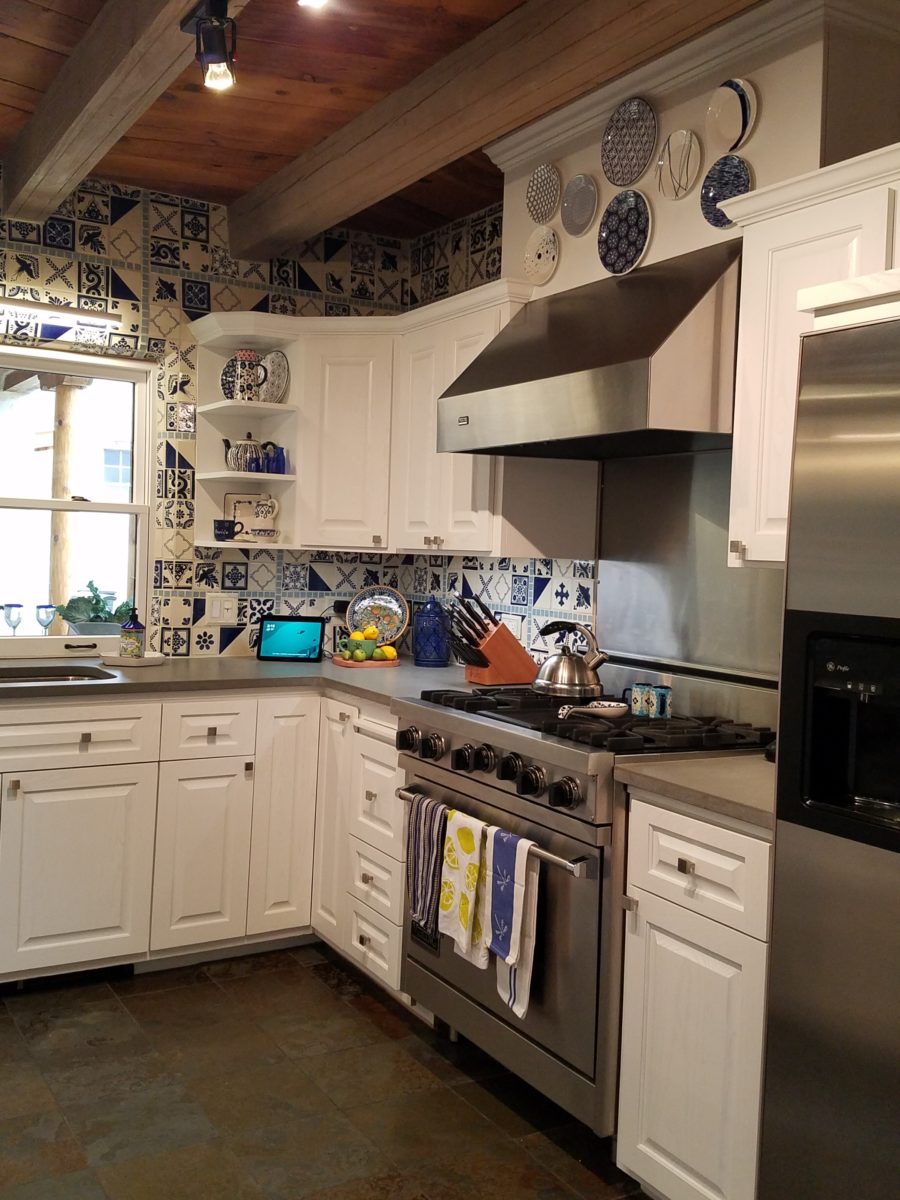
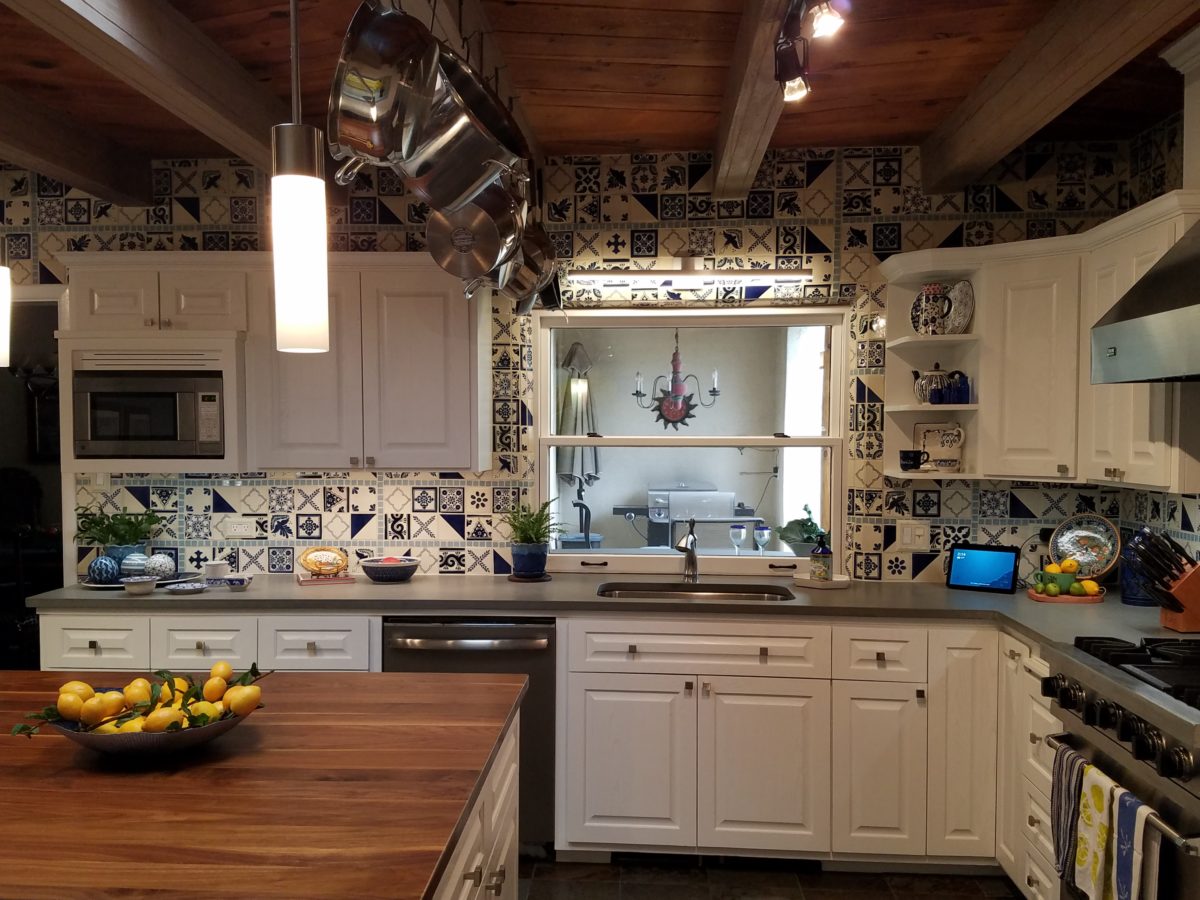
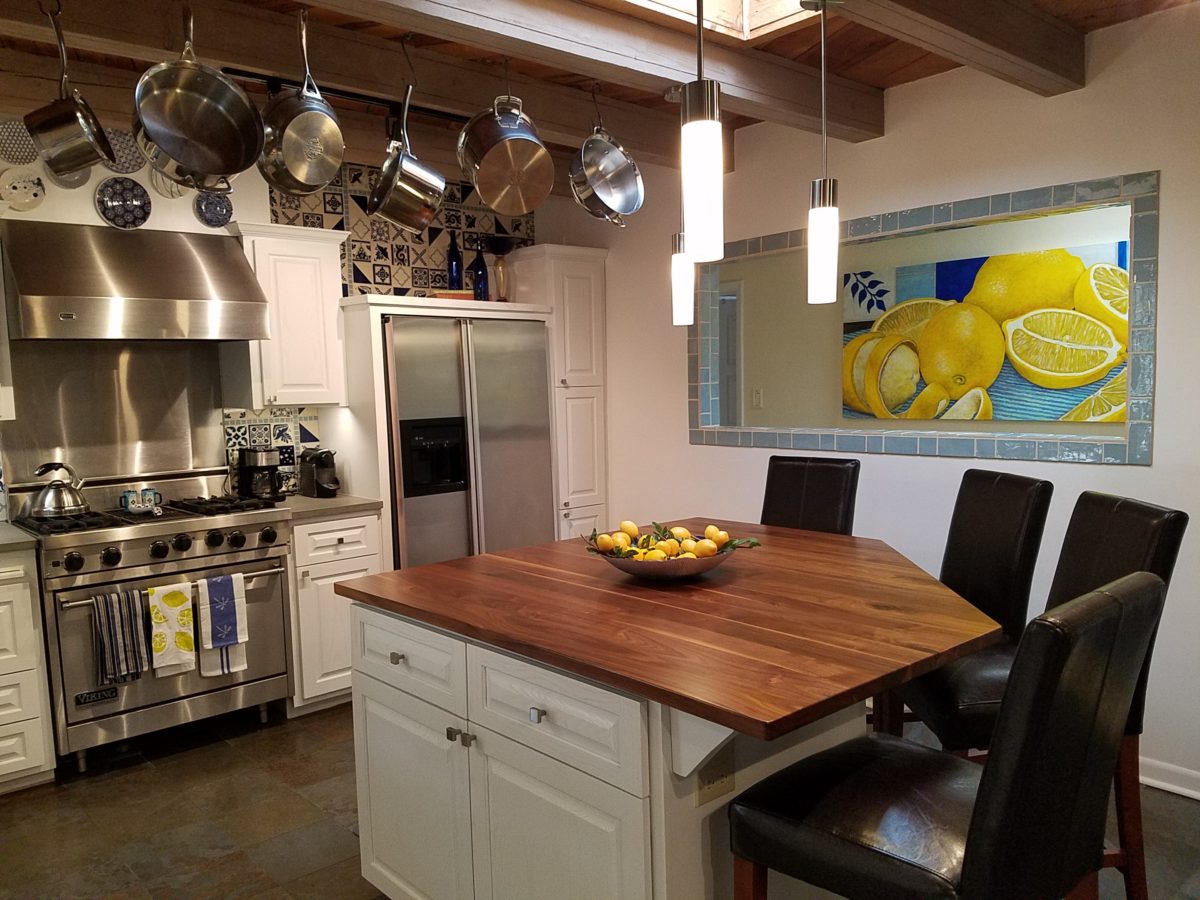
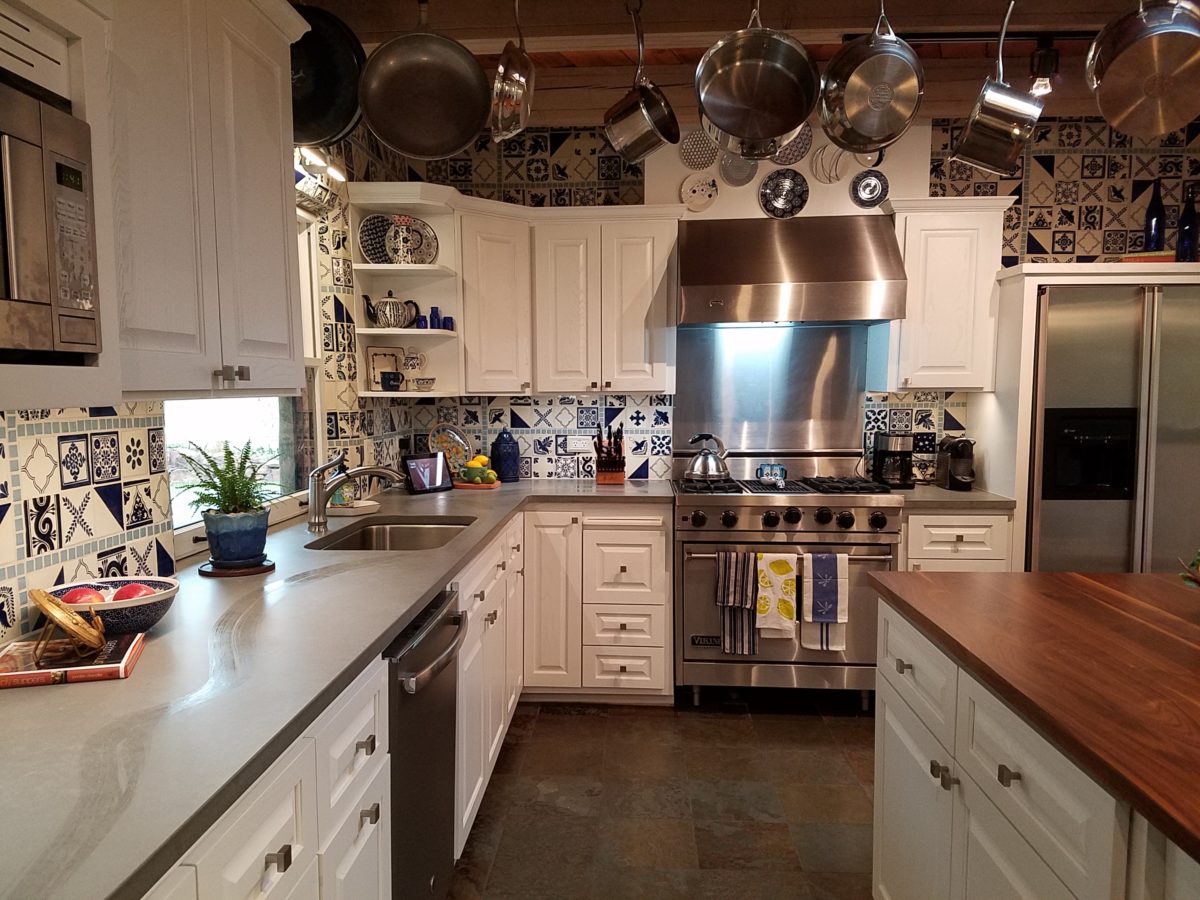
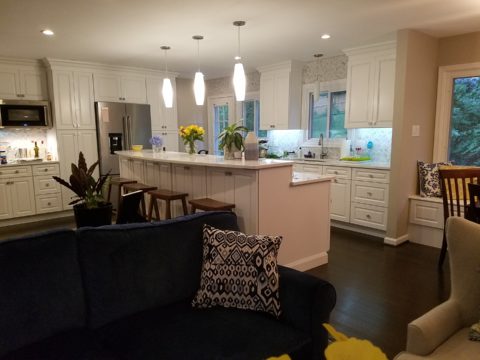
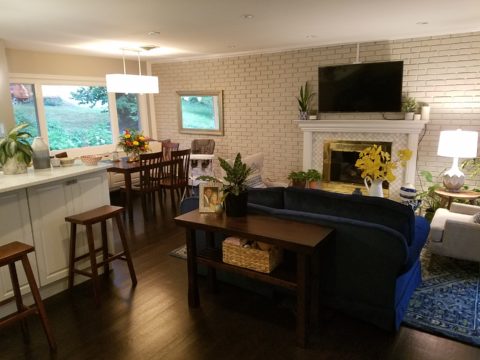
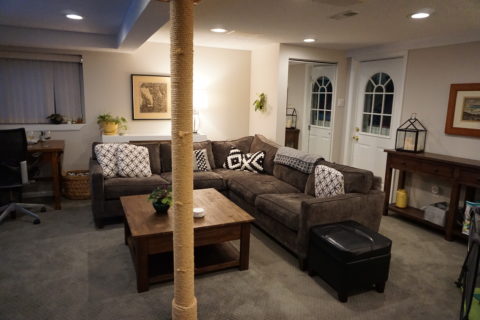
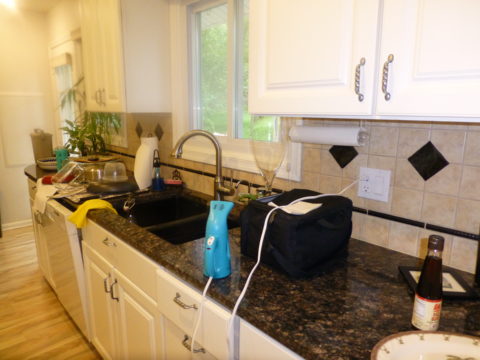
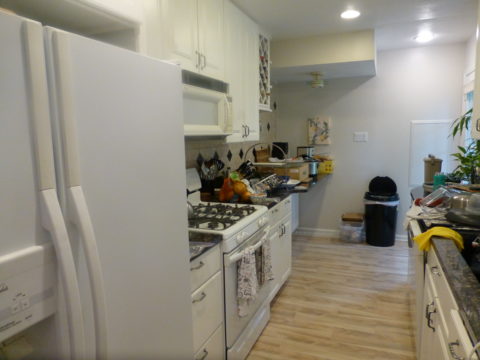
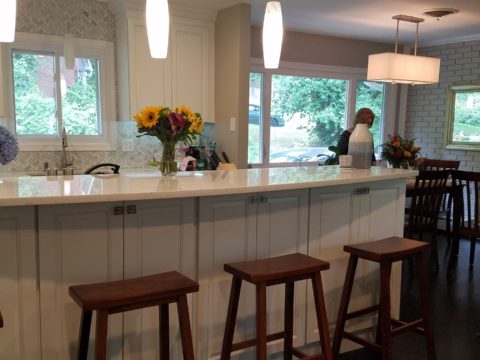
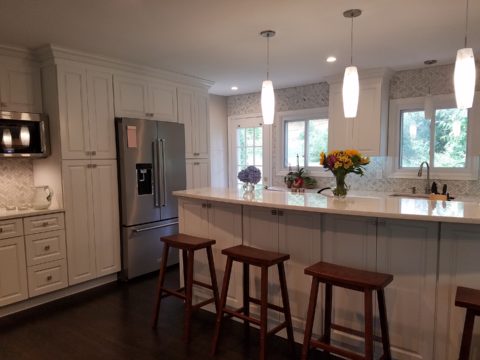
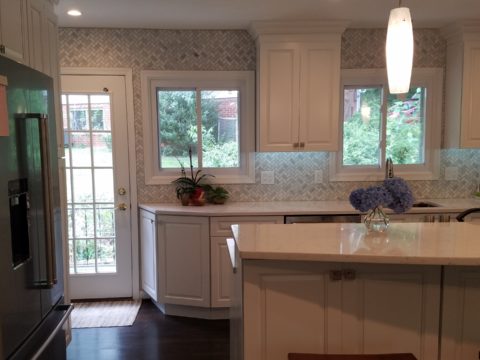
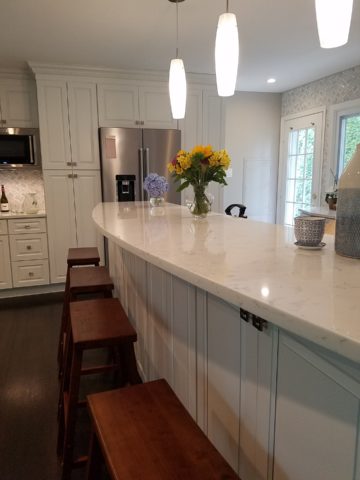
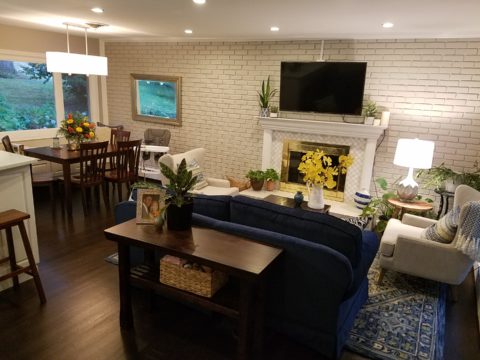
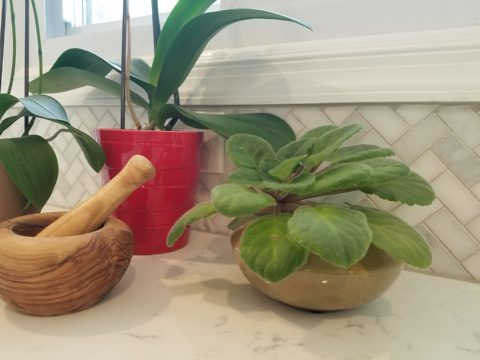
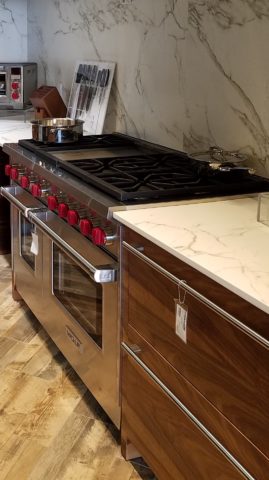
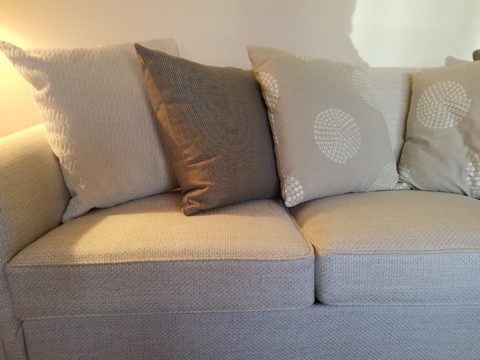
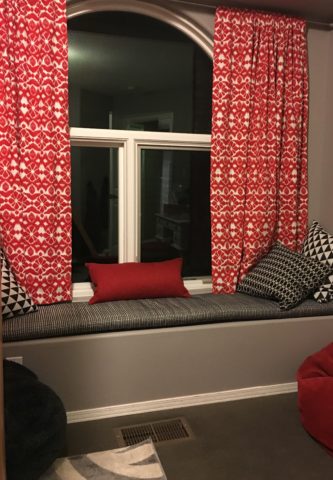
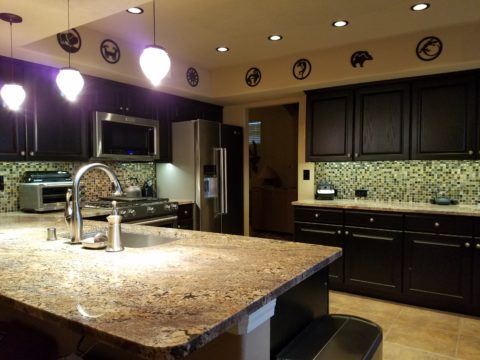
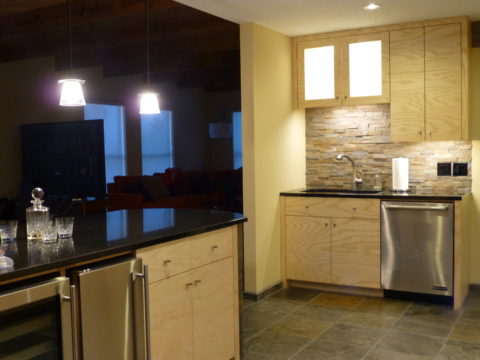
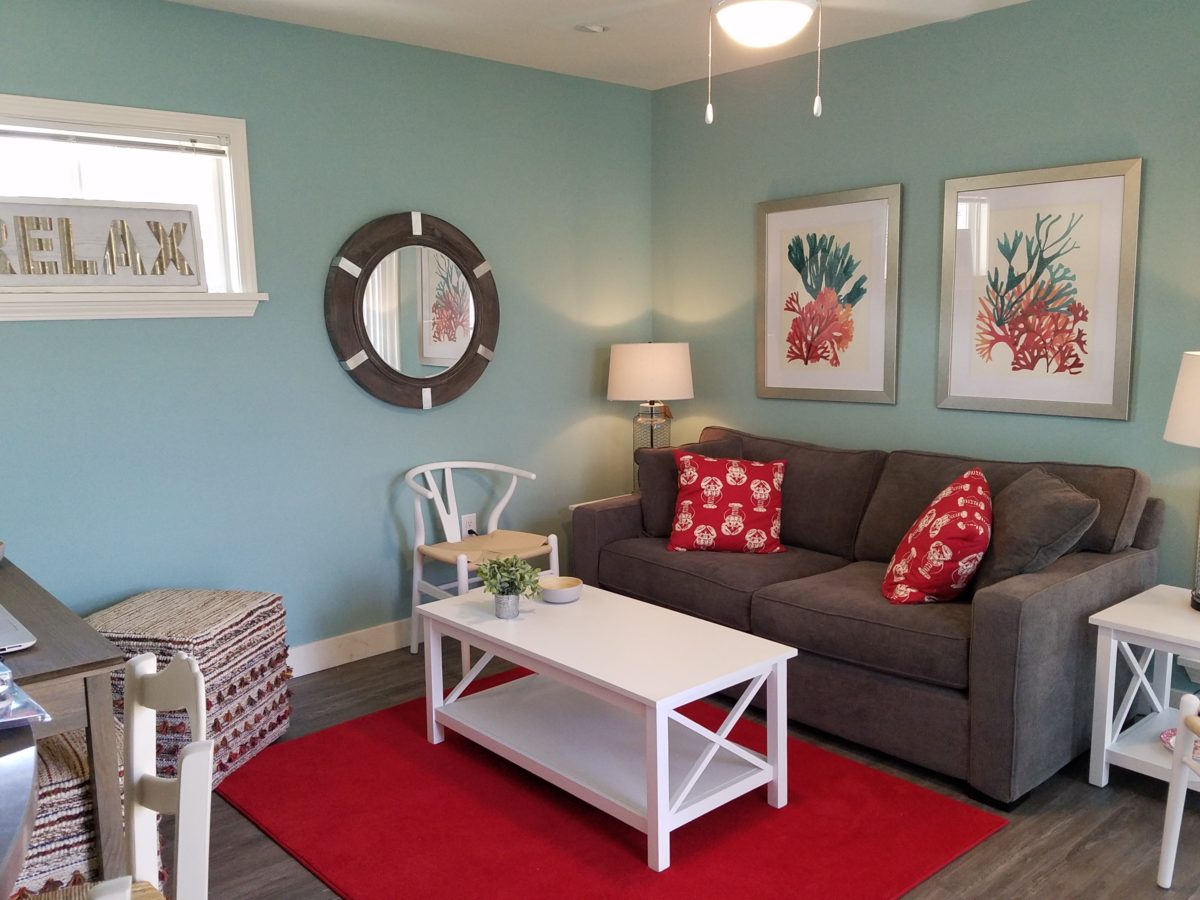
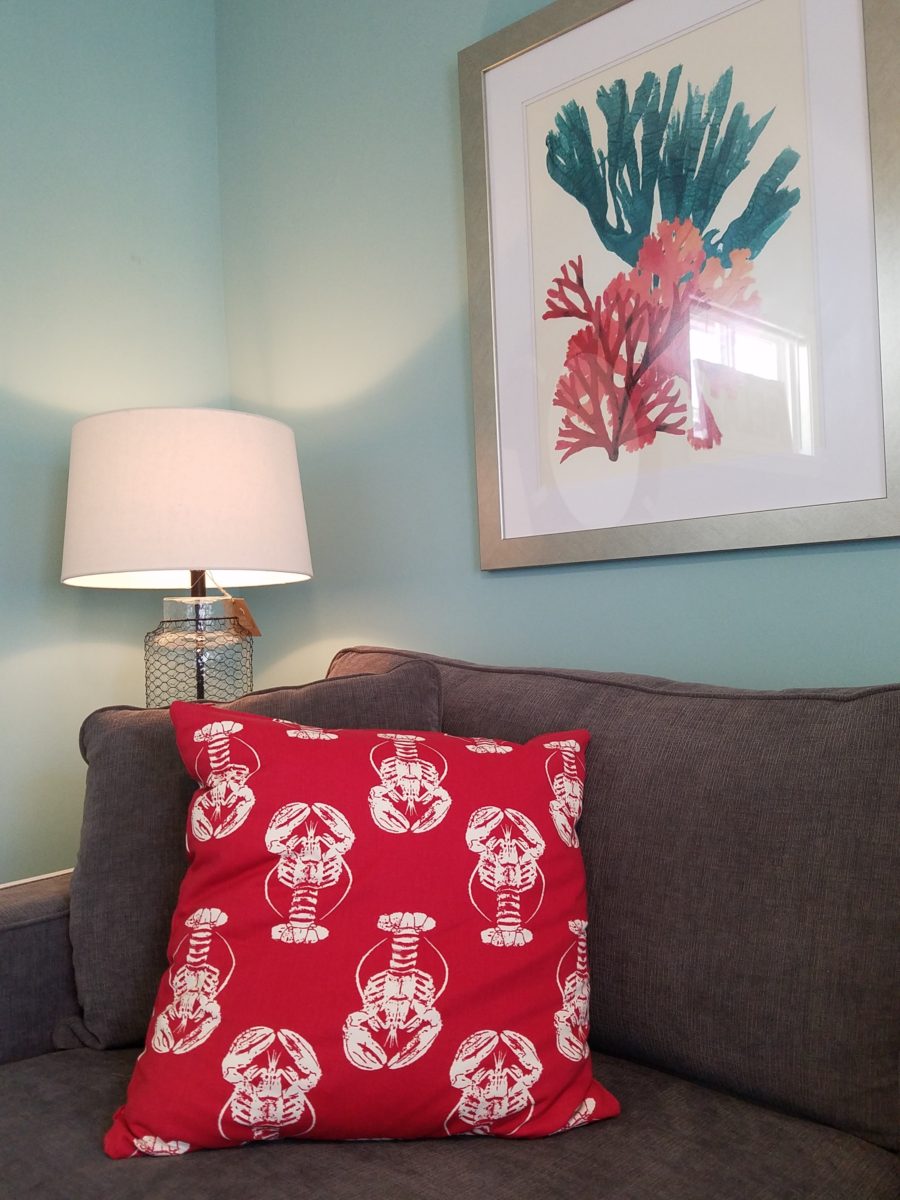
The look is clean and fun, colorful and beachy – with a slightly up-scaled twist. Cool aquas accent a few walls in the otherwise crisp white interior. Red punctuates effectively in lobster accent pillows, decorative accessories and the full-wall mosaic glass tile treatment in the kitchen. Yes, once again, we like to treat tile on the walls as not mere back-splashes, but wall-covering full height and width!

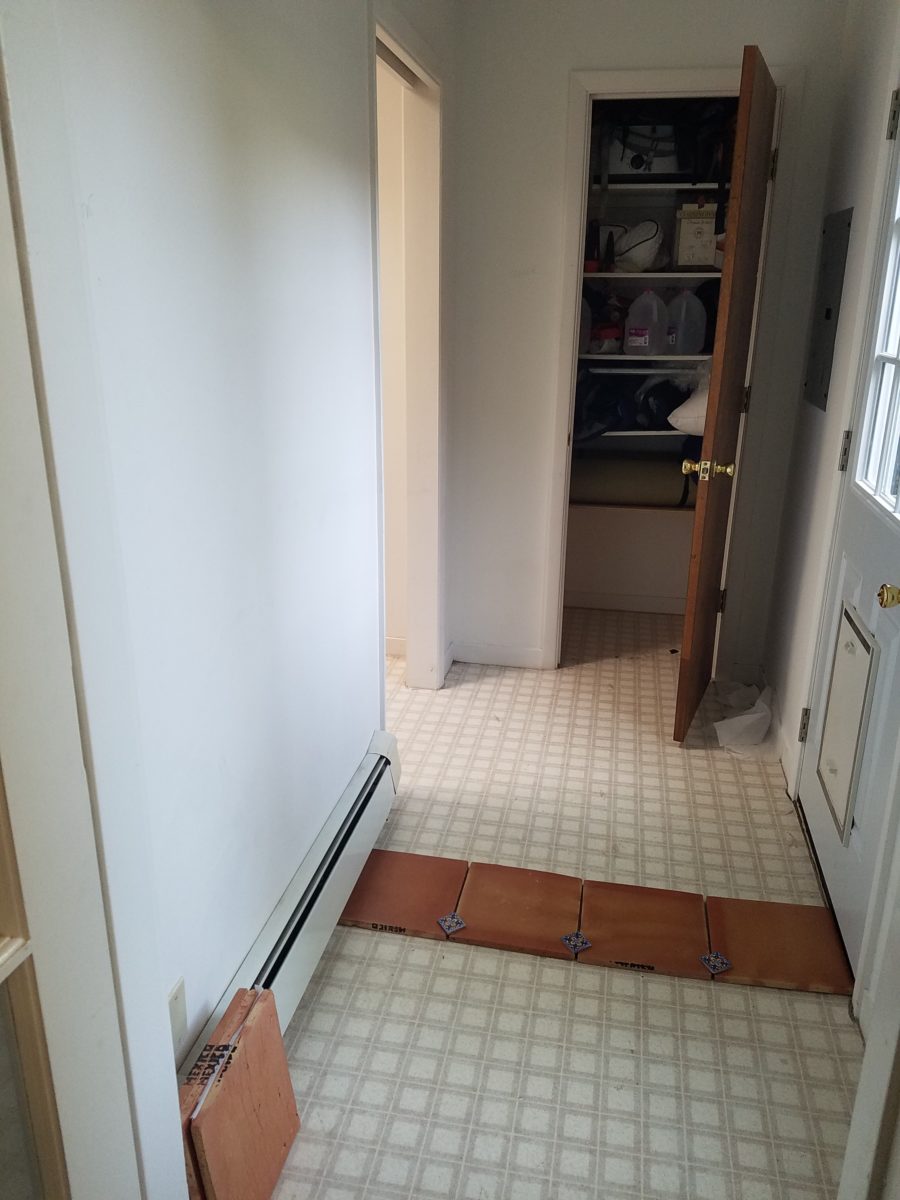
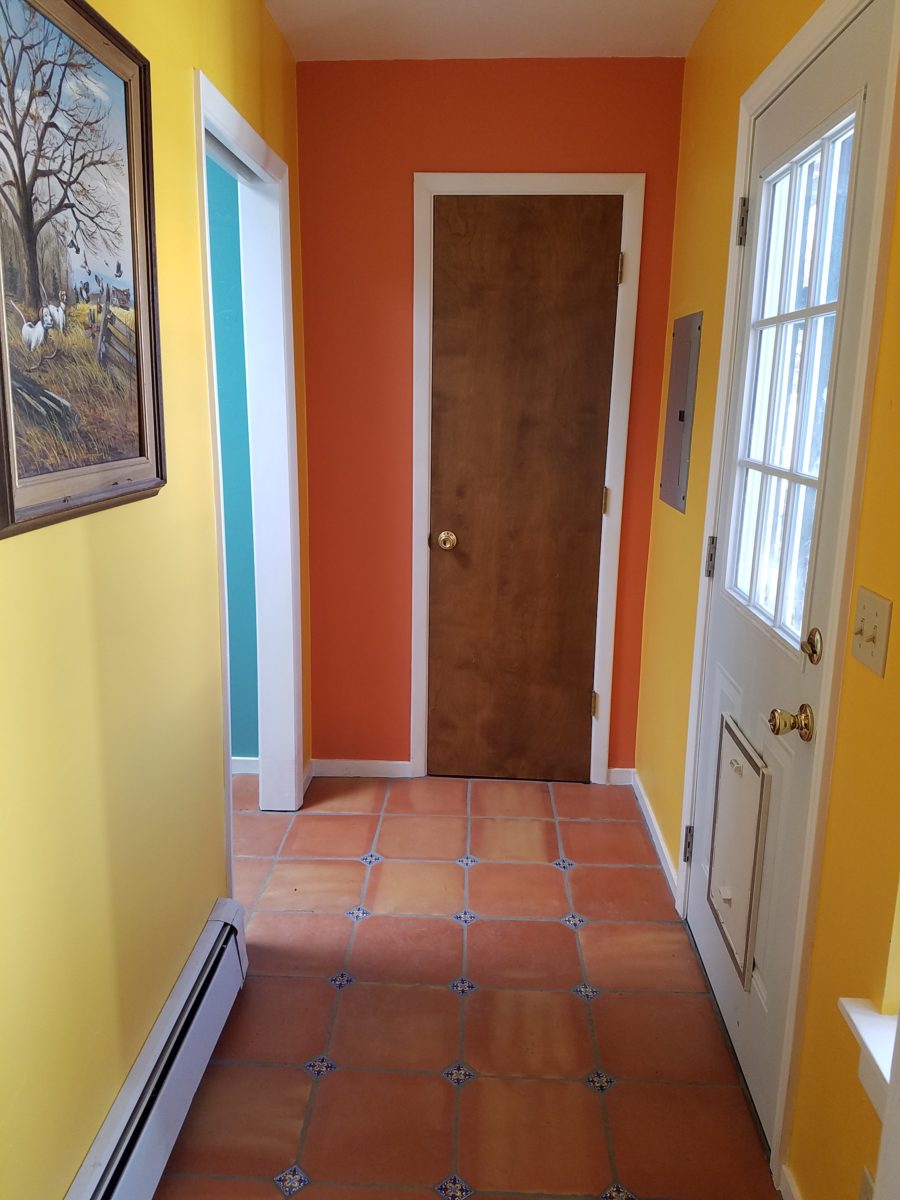
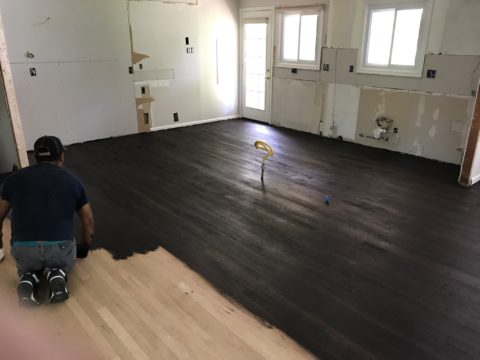
Weathered grey toned LVT (Luxury Vinyl Tile) in the way of interlocking planks were an easy to maintain and durable floor finish. The faux wood adds warmth and is softer underfoot than other hard surfaces. Perfectly matched with all trim pieces, this flooring is fabulous!!

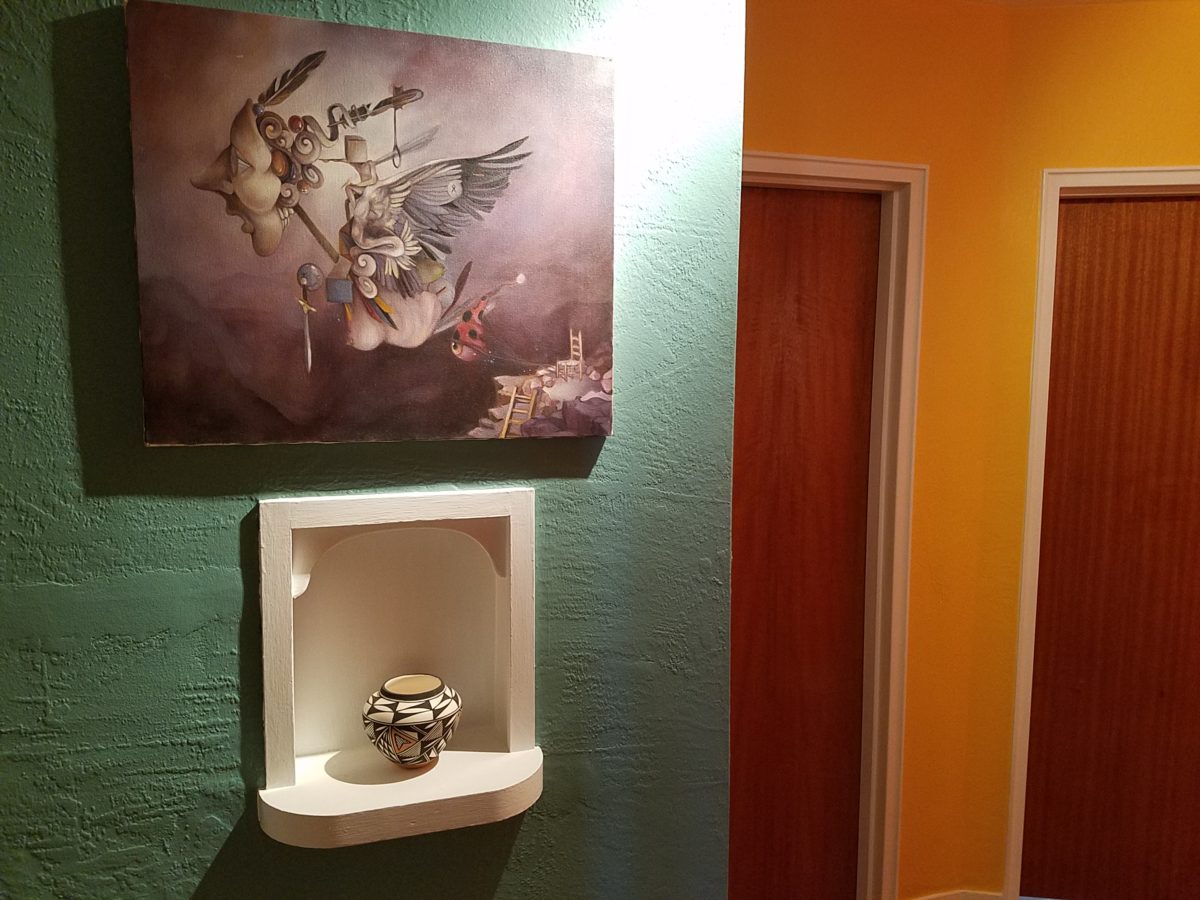
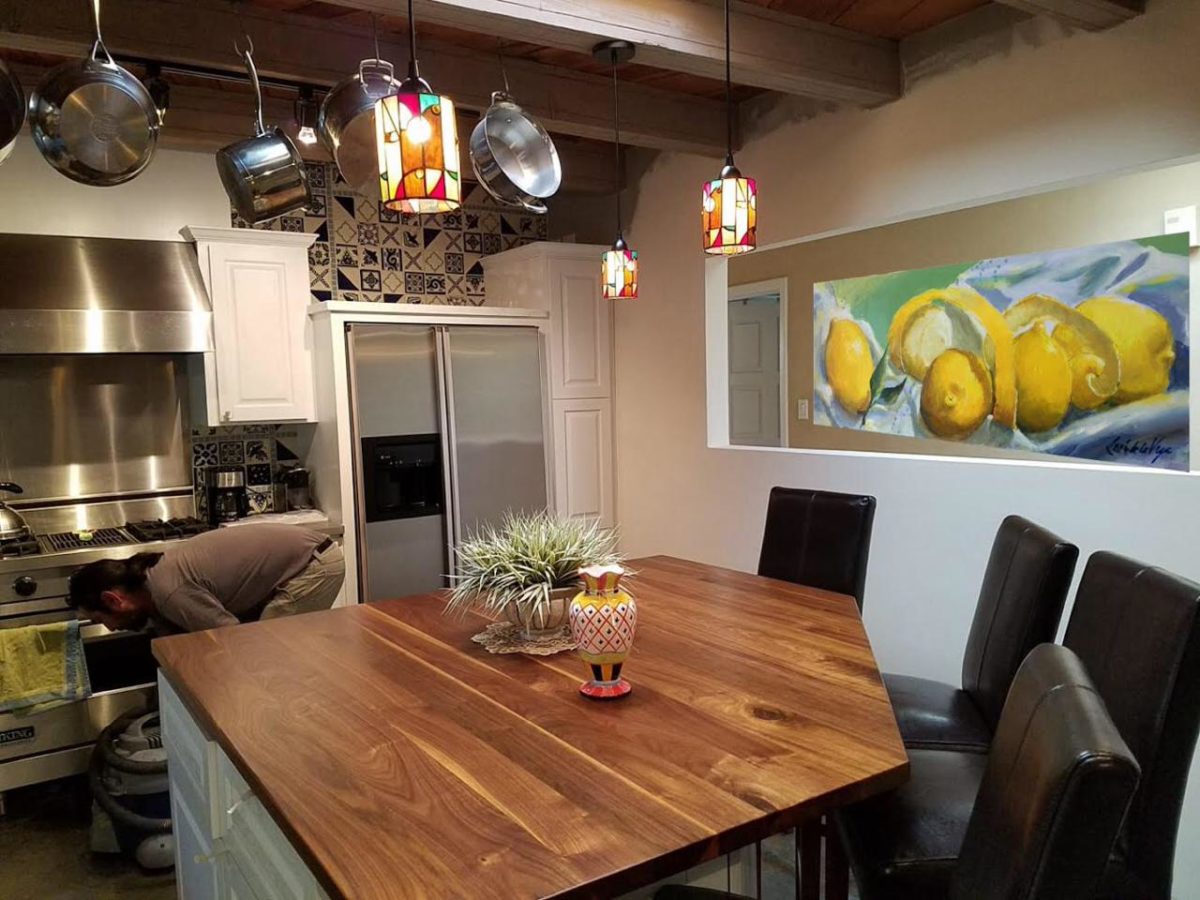
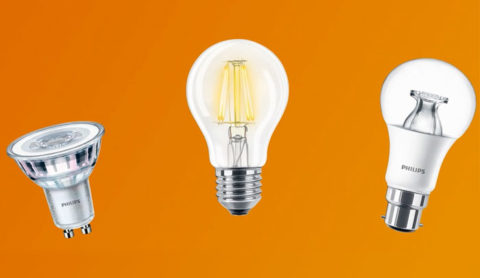
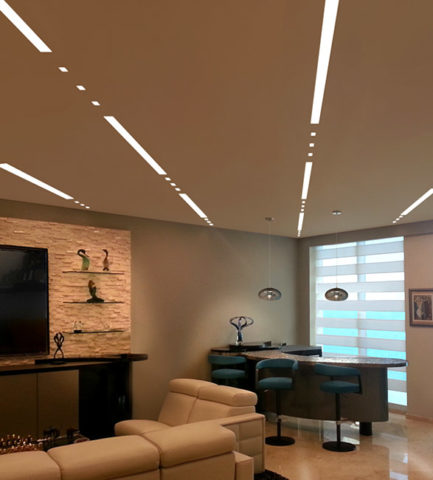
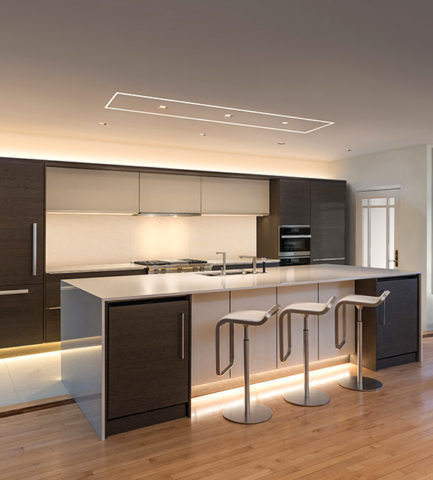
Lighting is key and here we added recessed directional lights to spot the walls and related artwork. Switching was also an important detail to have options for the lighted areas and accents.

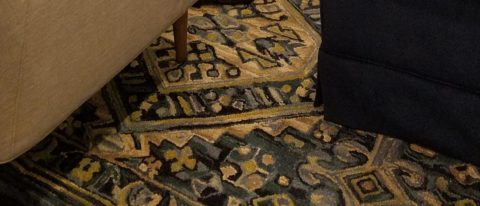
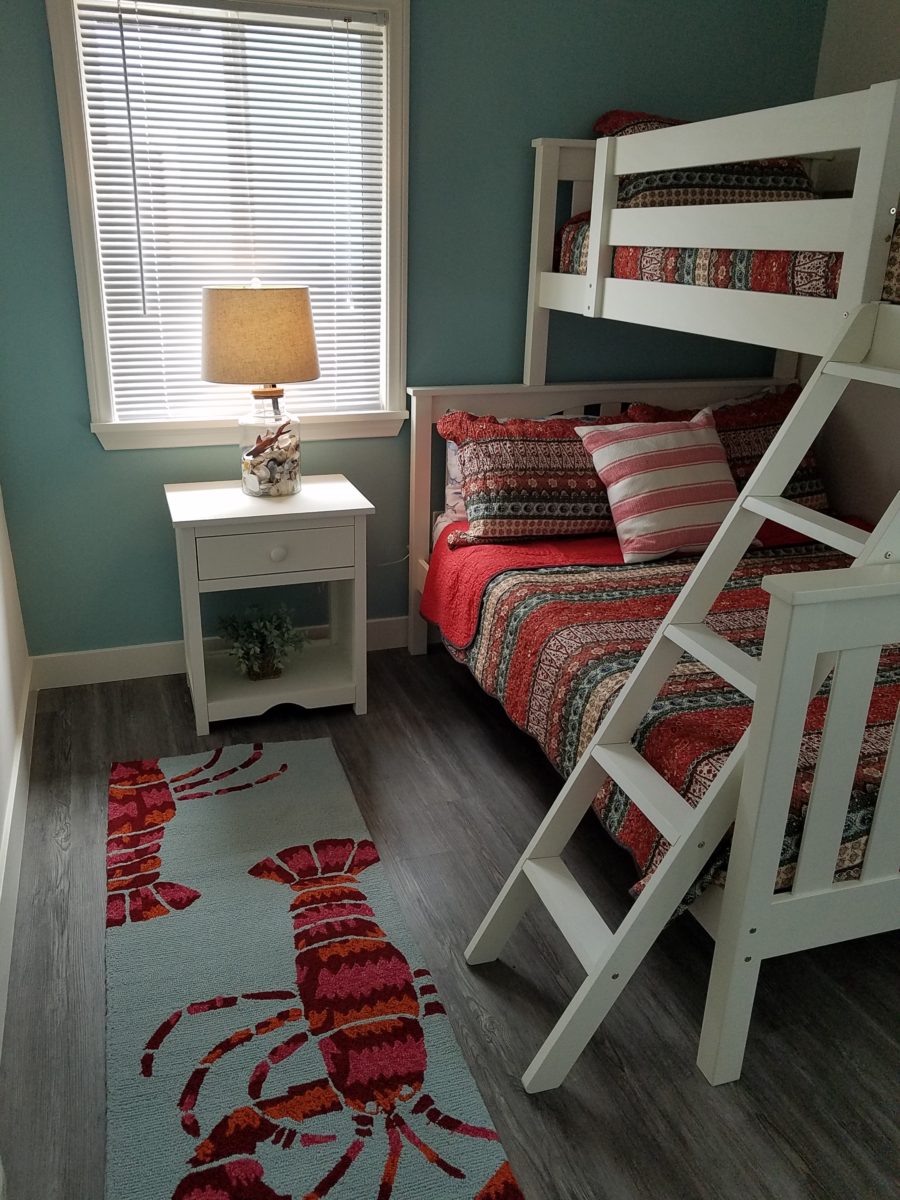
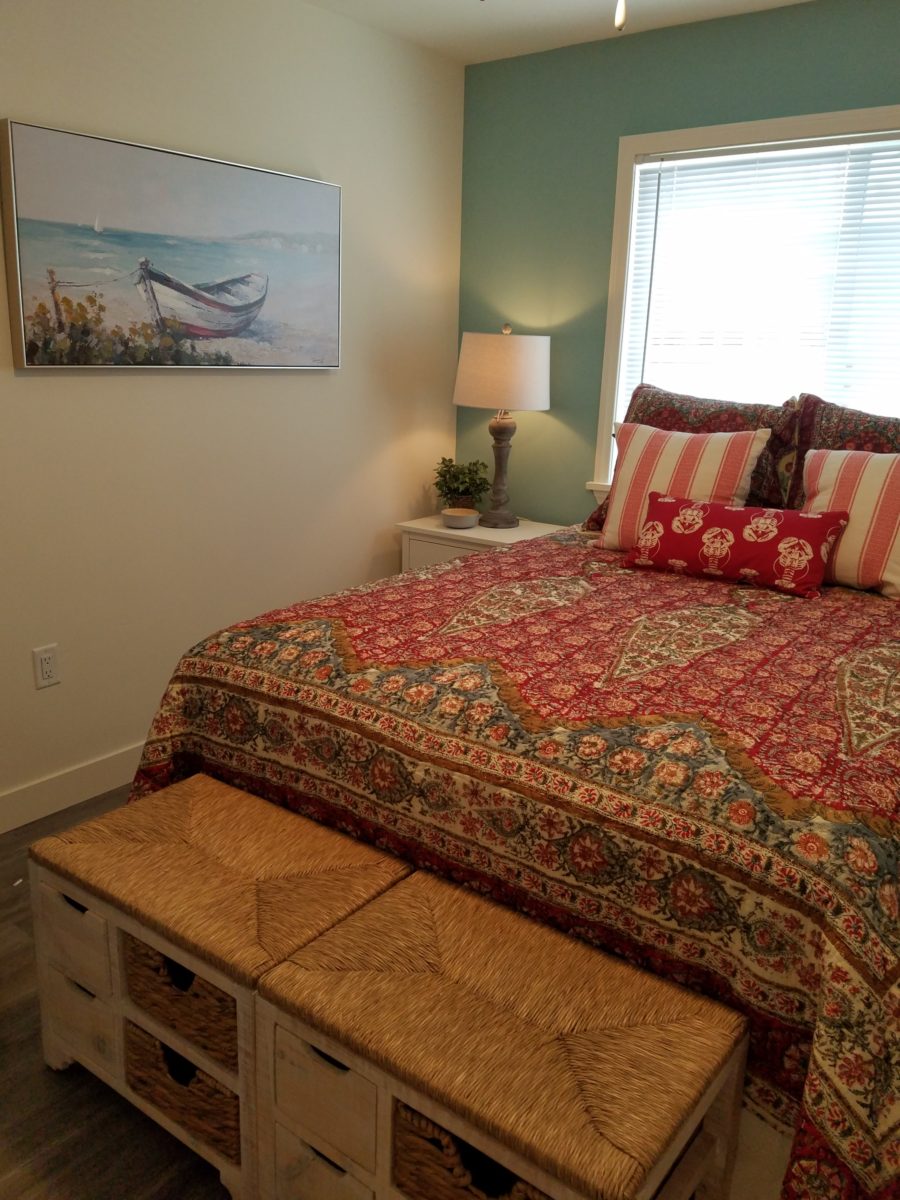
The owner found a novel lobster rug with a great textural, tufted, yarn system that brings fun and great color and warmth to the bunk-bed room! Busy, colorful bed dressings intentionally selected (over the hospitality white that is still trending) contrast against the bright white bed frames stacked for space optimization and a little kid fun!

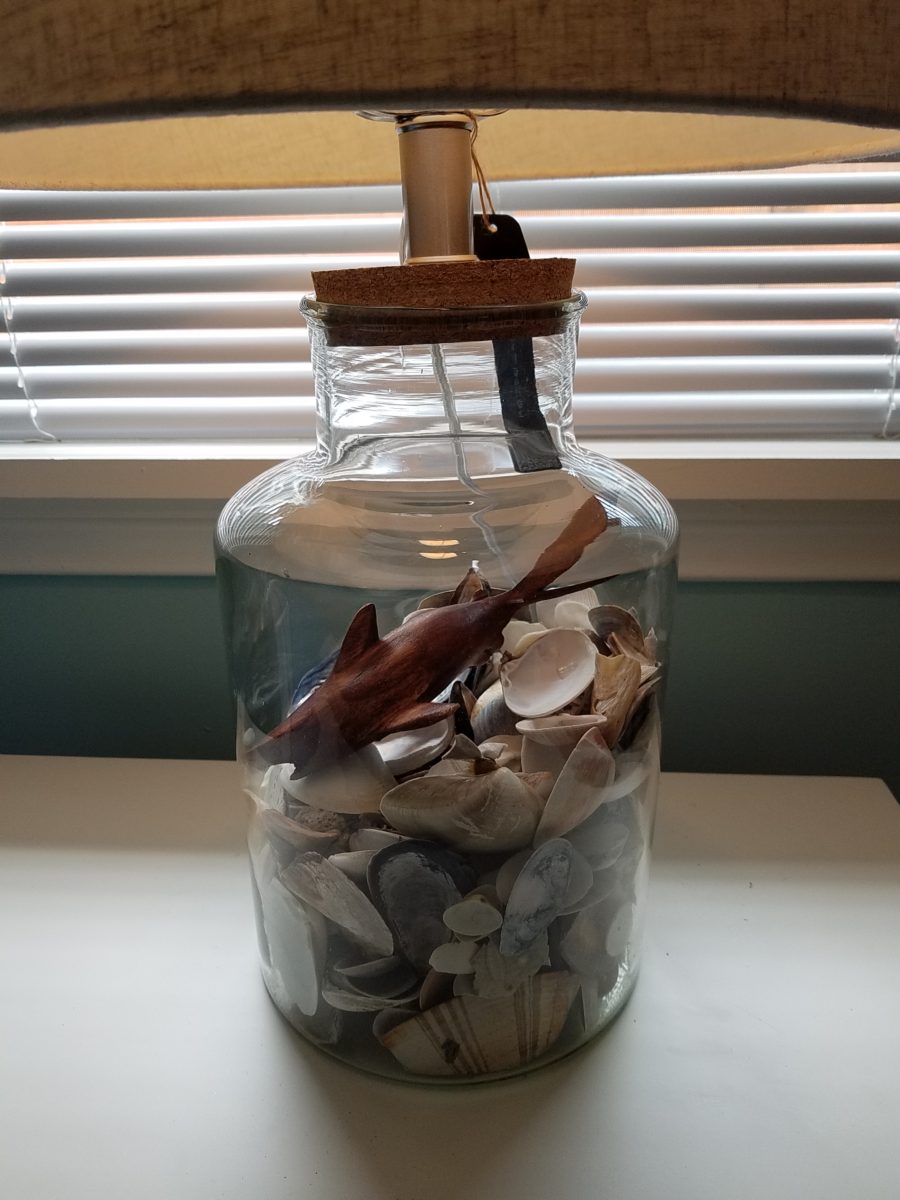
A cool find in the way of the glass vessel lamp…where usually the stem with electrical cord feeds down through the center of the base and of the back, this one feeds from the socket stem with a cork top that removes allowing the vessel to be filled with treasures – in this case southern California beach shells and fragments! And for a little more animation, I found a carved wooden shark to insert cruising above the shells to make the lamp even more interesting!!!

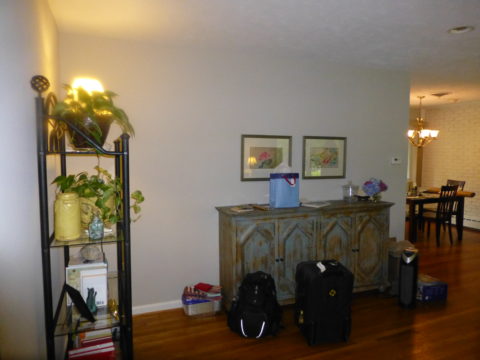
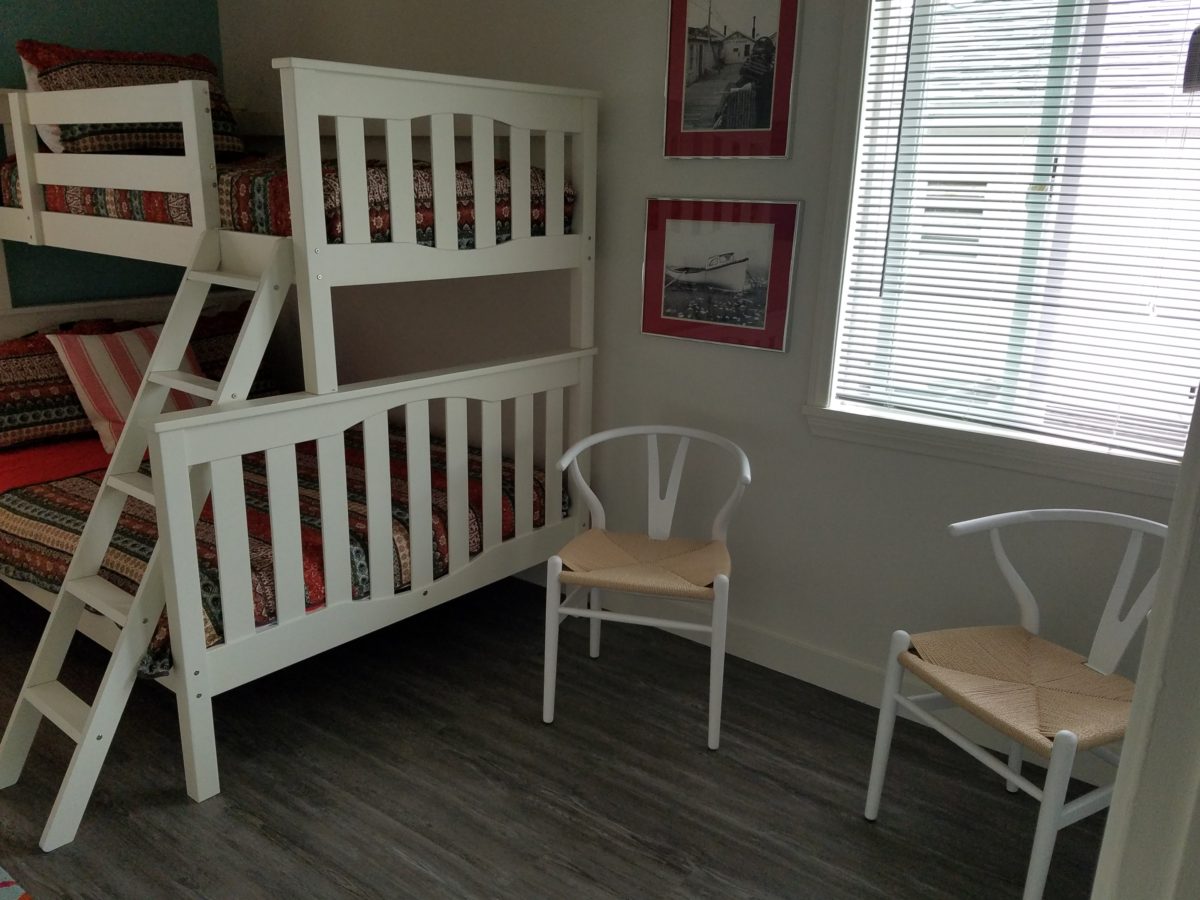
A pair of vintage photographs of a lobster shack and fishing boat contributed by a friend in Albuquerque – taken by him in Maine in 1962 – were enhanced with bright red mats in their original polished silver metal frames along with a large painting on canvas of a Maine lobster/fishing boat sent by the owner in Maine provide interest to further perpetuate the lobster theme.

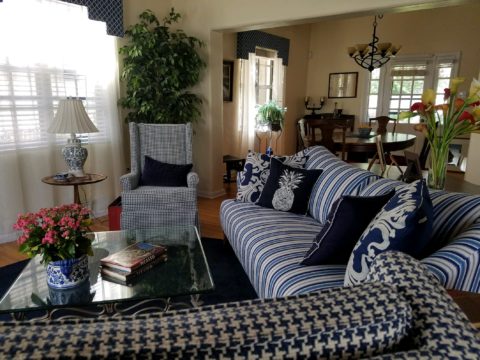
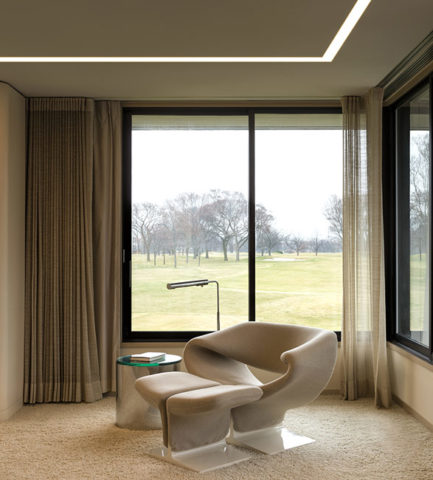
The master bedroom is a comfortable retreat with another lobster pillow for punch! To give the room the best approach and make it feel as large as it can be, placing the bed in front of the windows was the solution. Beds facing the entrance to the room are always preferable to arriving into the side of them – for visual space and a more inviting orientation.

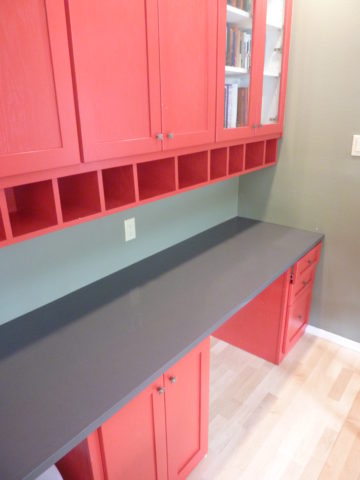
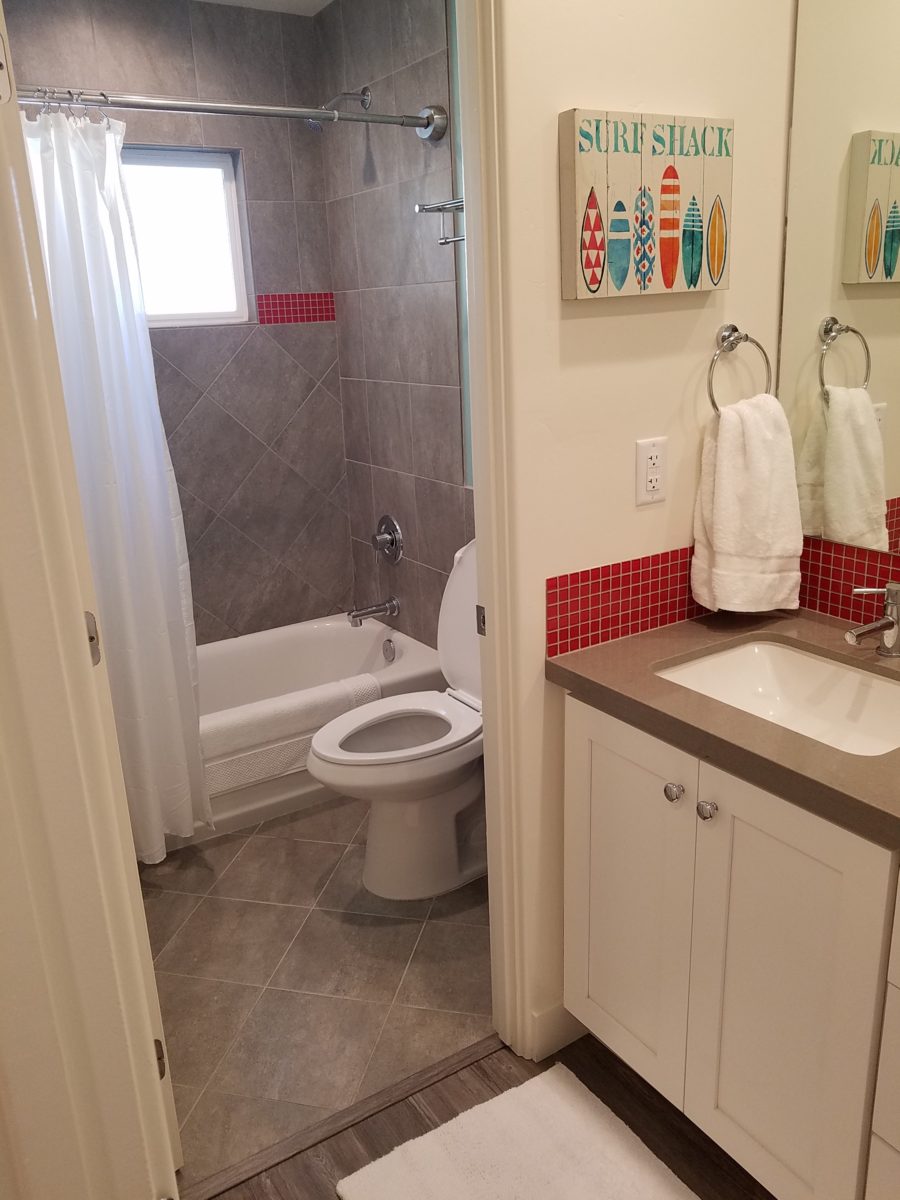
The original bathroom layout was all one space with tiny appointments jammed together…so we removed the tall storage cabinets and sink vanity allowing more room for the commode beside the tub/shower and added a privacy door. Then the new cabinets and counter have their own space with another privacy door resulting in a two-compartment bathroom area for maximum use and enjoyment. Red mosaic glass tiles were repeated from the kitchen to further coordinate the theme. 

The bold color scheme was thoroughly distributed throughout the unit which is an intentional design emphasis especially effective and novel in a short-term vacation rental – where such a thorough scheme might be too intense for one’s primary place of residence.

Effective design both functionally and visually should be a significant asset in the marketing of rental property. When used consistency in marketing material with logos and repeated features, this and other properties with attention to detail should attract the discriminating guests. Once there, repeated stays are the key to maintaining a strong guest population – of desired visitors.

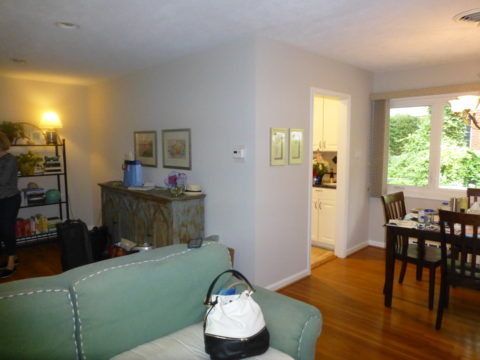
Please watch for the entire slide show of before and afters of this dramatic transformation in the commercial projects section of our website, in coming weeks, entitled Emerald Green Beach Rentals – Lobster!

BEFORE AND AFTER for Busy Young Couple Making First House a HOME

Busy lives in a new town, he in his residency and she working in a busy OR, they bought a house – their first house – and asked for help making it theirs.

They have traveled the world and collected art along the way, a disparate inventory of things that caught their eye, spoke of their experiences and reminded them of people, places and things to savor once home.

Home, that was the task. Create HOME in this new, old house. Built mid-century, it was simple, clean with some patchy remodeling from previous owners reflecting rather common decisions, with limited funds. We needed to discuss priorities and budget, evaluate what should stay and what needed to be changed.

They both had a love of Guatemala. Their travels there left them with dreams of color and pattern, handmade functional art and an exotic sense of place. Having these elements ingrained in their longing, they expressed a desire to have that sense, but with a bit of a modern twist.

Assembling the colors and materials…

We salvaged the existing natural granite slab countertop and unfortunate surface-mounted sink. The granite was a practical save and the sink came along for the ride. In order to integrate the granite as though intentional,  I selected a multi-colored Talavera tile that specifically had a dollop of mustard glaze in the design picking up that Dijon field color in the speckled granite. As is my usual preferred mode of installation, we took it wall-to-wall as a complete wall-covering.

We also saved the cabinet boxes and doors, but needed to give them a lift from their median caramel stain on oak. Deconstructing the colors in the design of the Talavera,  we knew we wanted blue cabinets – so the paint shades were fanned and the color pinned-down. To give the cabinets that wabi-sabi look of loving wear, we sanded the edges after the painting was finished. We also added cabinets over the stove for additional storage space and utilization of that blank wall.

We removed all the doors and drawer fronts, filled the holes from the old pulls/knobs and painted them off-site. We painted the boxes in the field. Granite was salvaged along with the sink.
New paint, Saltillo flooring, Talavera tile and cabinet pulls along with new appliances gave an updated look to the scene.

In real life, when  practicality rules, certain things have to give way for the good of the whole. The whole being the pocketbook and other elements that take precedence at the time. So we live with the radiant heaters, keep the chandelier for now, until they have one fabricated to their specifications, use a machined rug instead of a handcrafted piece and know that over the years they will massage this starting place and truly make it their home.

Continuing to dissect the colors from the new wall tile, our colorful young couple wanted more color…we chose individual values of bold paint colors –  smoky turquoise, slightly burnt orange and brilliant golden yellow to intersect the planes throughout the space.

Typical mahogany doors common to that era of home interiors, the decision to match the white trim would have been easy, but we labored over the existing natural, tropical wood and decided to keep it in the mix.

Although the nearly immaculate, original hardwood oak floors were revealed after removing the wall-to-wall carpeting, the kitchen floor throughout the rear vestibule and laundry room was an inexpensive and uninspired sheet vinyl.  Saltillo clay tiles were the answer to furthering the Guatemalan feel. More commonly associated with Mexico, these clay tiles are historically the plebian choice. Taking many forms, some artful enough to be the cornerstone of patrician interiors in fine mosaic installations and other patterns and designs, clay tiles – glazed and unglazed always add an artful, soulful human element. Speaking to that, we inserted 2″x2″ glazed Talavera accent tiles into the floor’s  new Saltillo field in the vestibule creating an almost area-rug-like definition.

The dated floor-plan enclosed the kitchen separating it from the rest of the living area. The very first comment made by our clients was questioning if we could open that wall – connecting with the living room and large picture window beyond.

The mottled cobalt blue light fixtures add another punctuation of color over the bar along with the parrot green barstools that our home-owners spontaneously nailed in an irresistible lust for even more color!!

Rather than trying to continue the existing “Dijon” granite, white Talavera tiles were used on the new pass-through bar counters – both high and low on the new cabinets.

The first phase of this colorful project has set the stage for an enjoyable work-in-progress for years to come as they now have a basis for design, more collectibles to come, and all they enjoy from places near and far. The upcoming annual trip to Guatemala, in April, will reinforce the joy and appreciation for this special place “home base” in their lives.

The dogs look in eagerly, but are limited to their expansive backyard, their vestibule and full run of the master suite.

Although they selected a durable denim twill fabric to reupholster their sofa and loveseat that they were gifted from a friendly neighbor, the primary living area is – for the most part – “off-limits,” but that seems to work for everyone in the family!!!

Time to Remodel – Finding a Theme

Time to remodel the kitchen!! This charming little bungalow had already experienced its share of remodeling – well, not so much structural – although, many interior design transformations had occurred over the decades. In the mix, the well-used and enjoyed kitchen was feeling a quite tired and dated.

You might remember I have used this now completed project, in the last few months, during its transformation process to identify certain features and design practices. Here is the as-promised unveiling of the before and after photos for further discussion about the design process, intent and results.

We loved the mottled color and organic character of the existing slate floors and opposing green-grey beams with spanning boards of a caramel stain. These were the two elements that went well together as though intentionally planned. Yet in between, the pale, peachy pickled oak cabinets with their radius detailing and red-rose/black matrix of the tiled granite counter-tops, didn’t seem to speak at all well with the ceiling treatment and slate floor’s greens, rusts and charcoal tones. It was a dark, confused space.  

When observing and “listening to” the house, it was evident that the current kitchen, in addition to being poorly coordinated, had absolutely nothing to do with the original architectural intent. The new owners had brought a few very fine antique pieces into the home. The mid-century circa 1964 age of the house accepted them on its original hardwood floors also adorned with their fine antique rugs…but something was missing. There was no cohesive thread running through the house. Over the years finishes and decorative elements had been selected and installed without any consideration for original materials or an attempt to introduce compatible and harmonious materials for the good of the home’s overall theme.

In all fairness, had the entire interior been gutted and a contemporary interior been uniformly installed into the framework/shell of the structure, I might have considered it a success. However, this multiple decade decor was a mix of disparate trends and preferences that had no commonality.

To begin the process of bringing this home into a cohesive design last year, we had redesigned the living room. There we introduced a classic blue and white color scheme derived from the Persian rug in the adjacent dining room.

To the corner kiva fireplace, we added a sandstone hearth and mantle with just enough blue and white Talavera tile trim at the base of the hearth to subtly coordinate with the new scheme. The Talavera was an appropriate material for this New Mexican bungalow.

The original fireplace had a dark, broken brick quarry tile hearth and no cap on the mantle.
The face-lift replaced the hearth material with broken-edged sandstone slab and matching mantle cap with Talavera detailing at the bottom.

With this living room having been so successfully re-designed, the obvious thought came into the discussion to continue the vernacular of the blue and white Talavera into the kitchen. As a bit of a purist when it comes to application and termination of materials, I was not content for a mere back-splash.  No, if the tile were to be effective and commandeer the stage, it had to be used wall-to-wall as though an entire wall treatment.

Treating the Talavera tile as wall-covering, it continues from the kitchen, into the adjacent pocket-space housing a desk and laundry machines.

But wait! The addition of an earthy aqua handmade tile from Spain offered an appealing and unexpected accent woven intermittently through the Talavera. It created a coordinating thread from the colors found in the mottled slate floors and ceiling beams.  

Pre-grout shot shows the individually cut 1″ pieces inserted as mosaics into the random field of Talavera

The cabinets were in excellent condition, but the doors were sadly dated and in no way spoke to the home’s other cabinets, doors and finish carpentry.

The confused interior finishes we in need of a transformation!

With the white raised panel theme throughout the home’s original appointments, we elected to salvage the cabinet boxes and replace the doors and drawer fronts with a similar raised panel detail. The same red oak was used and, with a glossy white paint applied, the grain “read-through” with a very intentional yet subtle moiré-like pattern. The new raised panel white doors and drawers, with crowning top molding provided a crisp, timeless motif. The random patterned Talavera used as an entire wall-covering was very effective. The kitchen was quite gussied-up!!

The transformation was dramatically successful!

The existing slate floor was beautifully organic and I felt, from a design standpoint, was a must to salvage. Making it look like an intentional selection – part of the new scheme – was imperative. Therefore, selecting a counter-top that communed with the tones in the floor resulted in a selection of concrete-like engineered Italian quartz material – balancing the floor with the next horizontal plane and ultimately with the stained and green-grey boards of the existing ceiling treatment.

The new concrete-like Italian quartz counter-tops coordinate well with the other materials.

Another asset was the connection to the outdoors, however the existing window over the sink was high and small.

The window over the sink was high and small…

By bucking the warranty of the Pella people, we had a new double-hung window made to close down onto the new counter-top that passed through from inside to out. They would not fabricate the window to do what we intended, so we had the contractor remove the bottom of the new window frame, thus rendering the warranty null and void, in order to have a completely open, uninterrupted pass-through when raised.

Amusing and interesting…existing family pieces of blue and white ceramics are being discovered and used as decorative accessories in the new kitchen!

We also captured the opportunity to open the opposing wall into the hallway adding pass-through light and dimension to the space. This exponentially expanded the space and made the encapsulated kitchen feel much less confined.

Before, the kitchen felt small and dark…
Opening the wall into the hallway brought in additional light and dimension.

To add drama to the newly created dimension, we discussed having a painting commissioned to pop an accent of yellow into the blue and white scheme on the far hallway wall. Lemons, a perfect citrus for the kitchen, was decided for the theme.  

A miniature oil painting by Federico Leon de la Vega was used to Photoshop into the scene to inspire and convey the design intent.

The additional POP of yellow is a dramatically effective contribution to the overall composition. After consideration, the owners selected a local artist to paint the full-scale painting.

A local Albuquerque artist, Thomas Tomlinson rendered the lemons in acrylic with blue and white tile details.

In summary…keeping the original slate floor, existing cabinet boxes (replacing door and drawer-fronts only), with a bling of new chrome cabinet pulls, switching out the stained glass pendants, replacing the island’s surface with a handsome solid walnut top and a new coordinating concrete-like counter-tops on the periphery, with the decorative embellishment of the Talavera tile continued from the subtle introduction at the living room’s kiva fireplace, the transformation of the kitchen is stunning – not trendy – and was truly, uniquely designed for the architecture and forward, on-going contextual design conversation of the home.

Uniquely designed…

Look around and listen to the environment for and in which you are designing. What makes the best sense for the design direction considering the function and context of your project?

Living Room Transformation

As an adjunct to last week’s story about the progressive young couple and their dramatic kitchen remodel, I thought I should finish the subject and tell about the adjacent living room transformation and comfortable family room on the lower level.

When the kitchen grew to become the focal point upon entering and the bar counter expanded into the living area, it reduced that space to now become a comfortable sitting room for guests to gather or the family to relax while activities are  brewing in the kitchen.

Looking through to the dining room where a built-in storage bench was added along the window wall, offers additional seating. A new fabric-shade chandelier softens the light levels. All lighting in this remodel are on dimmers.

The former white brick wall had gently rubbed edges to suggest a distressed condition exposing the red brick beneath.  The fireplace had an unrelated golden oak mantle and surround with insipid tile inset also used to cover the hearth. The tile was a glazed faux marble with a Victorian design accent feature.

By simply painting the oak white to match the rest of the wood trim throughout the home and also painting the brick a soft taupe/grey tone, the look was instantly transformed. But they still had that awful tile…so here’s a design tip: to buy time either while you decide or until you save-up for the next phase, paint the tile away!!! To accommodate a new TV that is to go over the mantle, the wood surround was shortened. Notice the extra piece of wood trim that was removed to lower the mantle.

The hearth was removed and rebuilt (without the cut-off corners) with brick and painted to match the wall. Lucky for them the hardwood floor went beneath the hearth – so when they modified the size, they didn’t have to patch the floor! Tile was removed and replaced with 2×2 mosaic Carrara marble to coordinate with the herringbone mosaic of the same marble in the new kitchen backsplash/wall (see last week’s  blog).

A sofa found, for nearly free, was in good shape and reupholstered beautifully in this plush, durable navy solid.

The classic blue and white motif was punctuated with organic yellow.

The newly refinished original hardwood floors – taken from a golden oak finish to a rich espresso/walnut stain…

…with the blue and white wool hook rug creates a handsome contrast. The rug actually “reads” blue and white, but upon  closer inspection has warm khaki tones, soft turquoise detailing and is quite complex.

This revitalized cozy ambiance of this new sitting area/living room is perfect for this growing young family!

And for a more expansive gathering space, the lower level family room received a new sectional sofa in a durable charcoal fabric and a low-pile small diamond patterned wall to wall carpeting to conceal what had been cold tile  floors and make a comfortable room for all seasons!

Purrrrrrhaps someday they’ll have a cat to climb that crazy rope-wrapped pole!!!!!


Young Family Prioritizes Remodel

We all know that traditional housing floor plans are changing to maximize smaller footprints. The result is a more open layout. This preference, often seen in “loft” design where warehouse space is converted to living spaces – without many walls and with an eye on the interestingly industrial finishes of the existing space.  But this same concept applies to new home construction for starters or down-sizing to smaller homes and is definitely applicable in remodels of existing traditionally compartmentalized plans.

Lifestyles too have opened kitchens. Although often to maximize smaller spaces, they are also more open as cooking is more celebrated in the home and related activities are shared.  Kitchens have truly become the fulcrum of family life. So when this young  couple purchased their first home, the vintage 1960s split-level plan was not quite right.

The kitchen was a narrow galley-style tucked into a rear corner of the main floor. And although it had recently been remodeled, it was confining and not conducive to entertaining and growing a family.

The point of arrival was an open space with entry wall about 12-15 feet from the front door. To the right, the living room had a focal fireplace and the adjacent dining room made an “L” back to where the kitchen was tucked behind that previously mentioned entry wall.

So this progressive young couple thought way beyond merely  opening the wall creating a pass-through bar to better connect the kitchen to the living spaces. No, they said ” Let’s blast this baby out of here!” And with that they proceeded to visualize the point of arrival being the actual kitchen in full-view as guests arrived. Hello!!!!!

The former kitchen containment was revealed to present the new elongated welcoming bar counter-top, luminous glass pendants and supplemental recessed down lights, to meet and greet all who pass through their front door! Original hardwood floors were refinished in a dark walnut stain.

Their priorities were to create a larger, more functional kitchen with a clean, modern look and feel while making all open to better interact with their soon-to-arrive baby!

The clean white on white finishes in the kitchen are fresh and crisp. Lest you think they saved and added to existing cabinets, they did not – all cabinets are new!

And this might be considered gilding the lily, but we added a splash of artistic expression when we hand-painted the small squares in the new brushed stainless cabinet pulls to give them a bit of extra pizzazz!!!

By using the Carrara mosaic as a wall-covering, rather than merely a back-splash, the walls get a truly finished built-environment “read.”

The upper bar counter-top bows at bar-level to offer a more comfortable conversation scene.

The living room became a cozy sitting area off this wonderfully open kitchen and dining area.

Existing brick walls were softened with a grey-taupe to contrast with the white trim making it POP!

The fireplace now has a complimentary new Carrara mosaic in a diamond pattern to coordinate with the new herringbone mosaic of the kitchen wall.

And baby accoutrements adds colorful animation to the beautifully finished scene!

“HELLO!” they say. “Welcome to our beautiful new home!”


What’s Trending? Do YOU Need An Interior Designer?

As we move forward into this new year…the story is the same – only some details have changed or been added to past stories. By that I mean if you search for trends – they are ALWAYS all over the place.

We do find years when really new ideas take the stage – like when the shift from plastic laminate to stone slab counter-tops became a valid trend.  It was a trend brought about by improved technology, shipping,  cost and ultimately availability. After that, the engineered surfaces that grew from this trend broadening the offerings – explored color, texture and pattern and continue to introduce new options.

Myriad surface materials mimic natural stone – when is it preferable over natural stone?


Engineered stone products offer many bold, solid colors from pure white to amazing primary colors.

So right now bold color accents are in,  wall covering that made a come-back a couple of years ago is sticking for the time being and with newer bolder prints. Fabrics too – prints are bold and large scale!

Wood on walls is trending. Printed concrete tile is the big thing. Farmhouse sinks – in different finishes than customary stainless or white.  Vintage light fixtures – enhanced with new technology and lamping.

So, does that mean I can’t have a white sink or shouldn’t have a stainless one?  I should use printed concrete tiles in my kitchen or bathroom? If my home lacks a bold print wall covering am I missing something? If  I’m not sporting some raw concrete, am I out of style? Is the wall full of family photos in my bedroom passé?

Surrounding by existing vintage pieces and family heirlooms, the new living room pieces added some contrasting, contemporary lines with clean, crisp, classic, blue and white fabric patterns.

Oh, the pressure to get it right!!!! Oh so many choices – how do I decide? Do I have to start over? I want to be in style – but I don’t know what that even means between today and 6 months from now. I like neutrals – am I dating myself?

Neutral fabrics in a variety of textures and subtle patterns on a recently re-upholstered sofa.

Be calm and carry on…that’s why interior designers exist!!  Sorting through all the conflicting, changing information and choices can be exhausting! Just get on Pinterest and look for any subject about an interior – window treatments, living rooms, bedrooms, wall treatments, flooring…with each year, the choices expand. The permutations seem endless. HOW does one ever decide?

Mark my word, we will be flooded with interiors plastered with printed concrete tiles, faux printed concrete tiles, filament light bulbs and jarring color contrasts, in the coming months and perhaps even years…These trends have already made their mark. But it will be the creative manner, in which the various printed concrete tiles are used and when the vintage style of filament fixtures is appropriate and effective. What colors are used (where, how and with what) is what will set a few exceptional installations apart from myriad uninspired, if not confused, versions.

An effective interior designer knows what is trendy versus a trend designed and positioned for lasting impact. This is a major part of the equation. Existing conditions with regard to architectural style, existing furnishings, personal preferences, budget, priorities, all play roles in the design process.

A young teen’s bedroom was recently redesigned to reflect her developing tastes and preferences. Bold color and a variety of geometrics and patterns make a bold, fresh statement.

You don’t want to be coerced into making changes just because new style suggestions are being presented. Trends DON’T RULE – despite the fact that the design community wants you to think they do, in order to continually change things up! Don’t be a victim of too many directives regarding what is in style. It’s intimidating and mostly due to access. We have access to so many opinions, on-line sites, magazines and advertisements that the pressure, conflicting information and choices can be ridiculous.

It’s YOUR interior, your style, your comfort and functionality. Yes, it’s all about YOU and yours.

Do YOU need an interior designer?

A Dozen Tips for Planning a Kitchen Update

As we know, kitchens and bathrooms lead the features that often make or break a house sale. Investing in such improvements can not only enhance your living experience, but also serve you well when it comes time to sell. There are a few basic tips to follow as you embark on this could-be, (but need-not be) daunting project. Here are some important things to consider for all facets of the experience!

  1. To begin, note what things about your kitchen you would like to improve – both functional and aesthetic.
  2. Gather inspirations – make a hard-copy file or at least collect in a folder in your computer things that inspire you in your quest for your improved kitchen. Use kitchen design magazines, Pinterest posts or remodeled kitchen ideas that you Google-search. These ideas are a great springboard to narrowing your design direction and conveying your concept to your design professional.
  3. Based upon your “inspirations” what is your color scheme? This direction will impact options and decisions for finish materials such as flooring, cabinets, countertops, back-splashes, wall finish and window treatments.
  4. Is it merely a facelift? New cabinet doors and drawer fronts? Perhaps new countertops and back-splash. Or is it a complete gut and replace?
  5. New appliances – replacements or additional components?
  6. Sketch the layout of your new kitchen, if applicable. Make sure the available space accomplishes what you are imagining.
  7. Imagine the finished product. Illustrations of the “after” design are the best way to accomplish this.
  8. When in this process should you consult with a design professional? Perhaps after number 3 once you have gathered examples of your preferences…I let the list continue beyond number 3 to give you an idea of where in the process you might feel the need to have some qualified assistance!! An experienced designer will see things you don’t, know things you might not have considered and ideally maximize your budget by avoiding costly mistakes or missed opportunities.
  9. For example, don’t miss opportunities for additional storage – this is a critically creative design detail that results, in great benefit, to the finished product.
  10. In fairness to you and your contractor, try to establish a budget. Do a little homework. Gather rough costs for lineal feet of cabinets, appliances, design consultation and construction costs (a good resource are the home-improvement stores). Give yourself some latitude as this cannot be a finite budget at this early stage of the planning.
  11. With your design pro, discuss contractors that fit the bill to what you are trying to accomplish. If you are only tackling cosmetic improvements, a general contractor might not be needed. For example, new wall finish, countertops and appliances or new cabinet fronts, a new light fixture…these are individual sub-contractor projects. But as soon as you get into moving plumbing and electric, adding or removing walls, puncturing the envelope with windows or skylights – you had better hire a general contractor to take responsibility for the scheduling, coordination, licensing and permitting of the work.
  12. Once your scope of work is determined, you might need to get familiar with great carry-out in your neighborhood!!! That and a few great restaurants too, as you might be without your kitchen during a portion, if not all, of the process once the work begins!!!

Here are a few projects that we have documented with pretty effective “before and afters” to help you consider some of the above referenced tips.

These peachy pickled white-washed red-oak cabinets had classic lines and were in excellent shape after 30 years! The original owners were ready for an update.


Purely cosmetic (except for replacing the lighting) we saved the cabinets in their entirety, painted the boxes, doors and drawers. By shooting the fronts remotely, quality control was insured and caused less imposition at the residence.


Black accent pieces were already in play. The new black finish was a dramatic transformation. Using a special tinted varnish, proper prep and several coats results in a very strong new finish. All other finishes were replaced with a conscientious effort to coordinate with the existing flooring. The result “reads” as though it was all done at the same time. The floor tile looks good as new!


Similarly, we saved the cabinet boxes, but differently from the previous project, we added a few updated cabinet features and replaced the door and drawer fronts to a more classic raised panel detail.


Again the transformation was exciting, but by saving the perfectly good cabinets, we had far less disruption to the home-owners. Enhanced cabinet details for improved drawer glides, additional storage, new counter-tops, new lighting, and as is true with all of these projects “cabinet jewelry,” in the way of new door and drawer pulls and handles, adds the finishing touches.


This very dated kitchen from the early 70s, had a new owner – a single man – and he definitely didn’t want this provincial look!


In this case, a general contractor was in order. We opened walls, re-designed all the lighting, replaced all cabinets with new custom cabinets, appliances, flooring, counter-tops and back-splashes. The transformation is astonishing!


A Most Illuminating Lighting Course Proves – It Exists!

As is often the case, after attending an engaging and informative continuing education class, I am compelled to share at least a fraction of the energy that I experienced today. When a class is good, it is energizing. This was a most illuminating lighting course!

We know that as interior designers that light plays a significant role in creating a scene. Whether task lighting, ambient lighting, spot lighting or washes of color – light plays an important role. What’s so exciting and compelling is the technology that is so rapidly changing the possibilities!

The profound change is a result of the perfected application of Light Emitting Diodes – LED lighting. Lynne Wilkinson takes the complexity of physics and speaks in plain language with a humorous and entertaining delivery distilling that which is incredibly complex into digestible information.

Here’s a link to Philips for more information:

https://www.usa.philips.com/c-m-li/led-light-bulbs

So today I want to impart a tiny bit of the exciting content of this day. If a child asked you – “what is light?” How might you answer that?  Um…well…it’s uh…Electromagnetic radiation. Duh! After clearing that hurdle, we settled into distinguishing the technology between incandescent and fluorescent and a number of other lighting sources.  We discussed temperature Kelvin, luminescence, illumination and the atomic composition of protons, neutrons and electrons that are involved. So how is this interesting to YOU?

Well…inasmuch as we in the field have kept step with much  of this terminology throughout our careers, and the sci-fi interpretations of the possibilities – the future is HERE! If you just look at I-Phones being only 10 years old, yes, 2007 – we’ve come a long way baby!! Nearly anything you can imagine already exists! And if it doesn’t yet, the brains in the incubators are racing to discover and invent the next iteration of these amazing possibilities!! Look at these cool dots and dashes dramatically streaking across a living room ceiling!


You probably know that LEDs are energy efficient. Have you noticed how dramatically their price has come down in the last, say, three years? They used to be $50 and now they are under $10..  They burn for 50,000 hours…but as they diminish, the quality of their light changes – they will burn long after the accuracy of their illumination has changed. Do you care?

So many health issues are still being discovered with regard to the effectiveness of lighting. Circadian rhythms – how your body is biologically on a timer. How it needs rest and waking hours. What interferes with the natural melatonin in your system that can affect your health. Dark is for sleep. Blue light versus red light can interfere with your good sleep? Here’s a hint – don’t leave computer screens or cell phones on in your bedroom – get rid  of the clocks and other light-emitting devices when you are trying to sleep. AVOID the cool colors – blue especially.

To take this to a higher level of interaction, artificial lighting can be “tuned.” We know it can be dimmed and change color – but tuning is the technology of changing the temperature and related color to compliment the activity in the space. Your living room can be tuned to track the time of day to compliment warm early morning, bright cool mid day, dimming down to the warmth of an evening glow. Do you care? Maybe not today – but to better organize and track a busy day, this can be soothing to compliment your morning coffee…energize you into a more productive mode as the day progresses and calm you as the day closes. It might be handy if you lived in Scandinavia where the days are shorter and the desire to create a sense of daylight’s progression is real.

In an operating room – do you want your surgeon to see well into your body parts? By tuning the room in zones, you can place certain colors of light over the surgery to better illuminate and contrast the focal point or dim the light to read monitors better (as in many endoscopic procedures where they go in with a camera and don’t even see the action except on the monitors which are better read with a darkened surrounding quality of light or lack thereof), or brighten other areas where medical implements, keyboards, etc need brighter light to do the job. The understanding and ability to control these various light levels, colors and luminescence is becoming very apparent. Might ultimately be invaluable.

Back to interior design applications and concerns – the idea is to create effective, appropriate light and not see the source. I have always said this especially in the realm of landscape lighting – yes outside. I never use the “runway lights,” rather I chose to conceal the light source and have it spill, wash, spot and filter without giving away the source of the light.  It is more subtle, effective, natural, soft, and pleasing. So in a kitchen, don’t let the under-counter lights be spotty, reflected on any adjacent dark or shiny surface, use smaller aperture ceiling fixtures (cans), hockey pucks in cabinets create shadows…with all the new LED tapes, fixtures and diffusers these faux pas are very avoidable.

Lightology has an exciting site full of great images, ideas and information

http://www.lightology.com/index.php?module=how_to&sub=new-recessed-lighting

As recently as 18 months ago we were remodeling a bar and wanted to use LED tape the full-length beneath the long countertop  – but the cost was significant. Today, that cost is a fraction of what it was. So I might be re-visiting that bar detail!!!

So many lights can be field modified cut and shaped. With the perfection of Organic LEDs, seemingly limitless possibilities exist. Imagine your laptop being so pliable that you can roll it into a tight tube and pack it effortlessly without fear of cracking or breaking. Light-weight and completely flexible. They exist.

Imagine an entire wall in your home that is a touch screen that can be installed as easily as wallpaper. Yes, pliable and paper thin, glued onto the wall and operate as a computer – all your news and information at your fingertips at a scale that commands the room. Smart surfaces – they exist.

Learn more from Planar

http://www.planar.com/products/led-video-walls/led-calculator/#!/welcome

Learn more from Corning:

https://www.corning.com/au/en/about-us/news-events/features/willow-samples.html

Back to now – smart homes can do so much from an app on your phone and lighting is a huge part of that control. You already know that you can turn you lights on and off from your phone on a beach in Tahiti. But did you know that your phone can be as small as a lipstick tube or small flashlight and have a retractable screen of flexible OLED – easy to hold, pack, carry and with a simple tug, click or push of a button reveal a thin full screen? It exists.

Learn more about OLED:

https://www.oled-info.com/introduction

Architecture and interior design benefit greatly from this technology, but are probably the last to be jumping on the bandwagon. This technology is introduced in so many other aspects of our world before it gets to mere offices and residences. Fabric panel walls that have lights IN the fabric and can be controlled for color and movement, resin furniture glowing from inside that can be used outside in all-weather, stair treads that sparkle with glass embedded into them and coffee tables that have pressure sensitivity that when you touch them they respond. So many of these creative applications are already very cost-effective and remarkably accessible.

Here is more about glowing furniture from Marceladick:

A German company, Cerion, making exciting glass pieces embedded with LEDs

http://glassprocessing.eu/dg-glass-furniture-glass-processing-3d-laser.htm

Glowing ceiling layers that once were inconvenient to replace lamps (bulbs) often were left dark rather than scale the heights to maintain. Now the long lasting light sources produce their glow for many years.

Fashion is also enhanced with the advent of these light sources in the actual fabrics. Models sporting luminous layers, glowing translucence, sparkling luminescence adding elements to clothing imagined. Think about draperies!

Here is a fashion-forward blog to share:

These exciting applications will be sure to get you thinking about the many possibilities. Love light? Use light!!